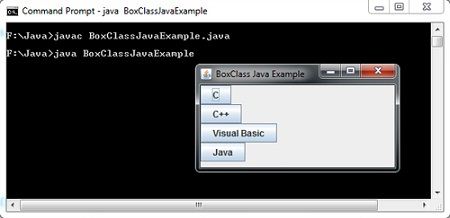
Although you can use the BoxLayou t directly, it is much more convenient to use javax.swing.BoxContainer class which has a built in BoxLayout layout manager. This class has some additional facilities that provide more flexibility in the arrangement of components than is provided by other containers such as JPanel object.
To create a Box container, call the Box (int axis) constructor where axis parameter is a constant value that can be either Boxlayout .X_AXIS for left to right layout or BoxLayout .Y_AXIS for top to bottom layout. For example.
Box b = new Box(BoxLayout.Y_AXIS)i
You can also create a horizontal or vertical box using the Box’s static methods createHorizontalBox () or createVerticalBox () . Both of these methods return a reference to a Box container with the orientation applied. For example, To create a vertical box, use the following statement,
Box b = Box createVertical()i
Once the box is created, you can add components as usual. For example : To add button component to the Box b, use b.add(BtnFirst);
import javax.swing.*;
 import java.awt.*;
 class BoxLayoutEx extends JFrame
 {
     JButton [] Buttons;
     BoxLayoutEx()
     {
        int  i;
        Box b = Box.createVerticalBox();
        JButton Btnfirst = new JButton("C");
        JButton BtnSecond = new JButton("C++");
        JButton BtnThird= new JButton("Visual Basic");
        JButton Btnfour= new JButton("Java");
        b.add(Btnfirst);b.add(BtnSecond);b.add(BtnThird);b.add(Btnfour);
        add(b);
     }
 }
   class BoxClassJavaExample
 {
     public static void main(String args[])
     {
       BoxLayoutEx frame = new BoxLayoutEx();
       frame.setTitle("BoxClass Java Example");
       frame.setBounds(200,250,250,150);
       frame.setDefaultCloseOperation(JFrame.EXIT_ON_CLOSE);
       frame.setVisible(true);
     }
 }

 Dinesh Thakur holds an B.C.A, MCDBA, MCSD certifications. Dinesh authors the hugely popular