• Skip to main content
  • Skip to primary sidebar
  • Skip to secondary sidebar
  • Skip to footer

Computer Notes

Library
    • Computer Fundamental
    • Computer Memory
    • DBMS Tutorial
    • Operating System
    • Computer Networking
    • C Programming
    • C++ Programming
    • Java Programming
    • C# Programming
    • SQL Tutorial
    • Management Tutorial
    • Computer Graphics
    • Compiler Design
    • Style Sheet
    • JavaScript Tutorial
    • Html Tutorial
    • Wordpress Tutorial
    • Python Tutorial
    • PHP Tutorial
    • JSP Tutorial
    • AngularJS Tutorial
    • Data Structures
    • E Commerce Tutorial
    • Visual Basic
    • Structs2 Tutorial
    • Digital Electronics
    • Internet Terms
    • Servlet Tutorial
    • Software Engineering
    • Interviews Questions
    • Basic Terms
    • Troubleshooting
Menu

Header Right

Home » How To » how-to

how-to

How to Solve Tablet Common Problems?

By Dinesh Thakur

Here, we’ll examine a few common problems and provide you with solutions to help you resolve the issues.

Sluggish Tablet

Despite the size differences, tablets are essentially small computers. And like PCs, they will occasionally suffer from issues caused by poor memory management, system errors, and file corruption. Sometimes the easiest way to resolve performance problems is to reboot the tablet. Note that this is different than simply pressing the Power button and putting the tablet into a sleep mode. With an Android-based tablet, you’ll typically need to hold the Power button until the Shutdown menu appears. Select Power Off, and once shut down, press the Power button to restart the tablet. iPad owners can hold the Sleep/Wake button until a red slider appears that you can slide to turn off the iPad.

Unresponsive Apps

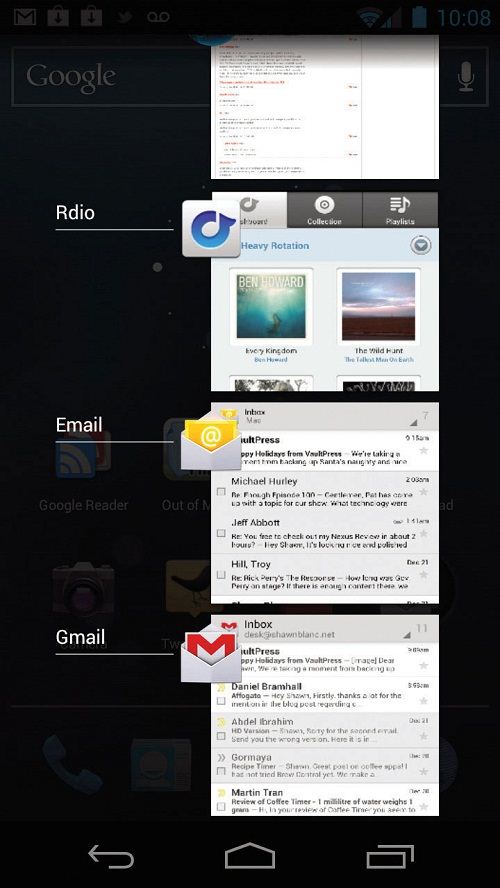
Tablet apps can lock up, just like the programs on your PC. To force a frozen application to quit on an iPad, hold down the Sleep/ Wake button until the red slider appears. Then, hold down the Home button for six to 10 seconds. Open apps should be forced to quit, and the iPad should bring you back to the Home screen. With an Android-based tablet that operates version 3.2 or below, you can tap the Menu button, select Settings, choose Applications, and tap Manage Applications. Under the Running tab, you’ll see a list of the open apps on your tablet. Select the one you wish to close and touch the Force Stop button. If your tablet runs Android 4.0 or higher, you’ll be able to close an app by bringing up the multitasking pane and swiping the app to the left or right.
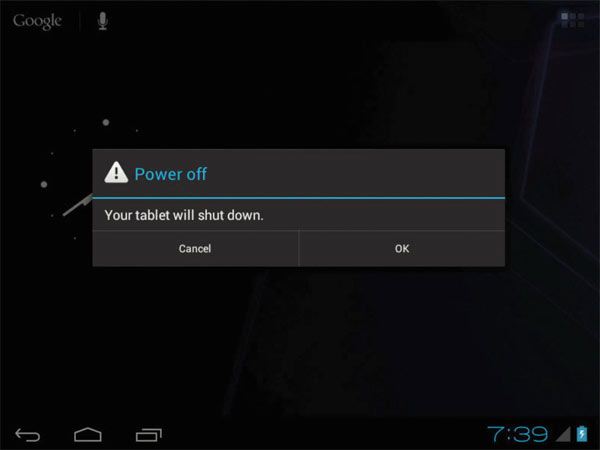
    Try rebooting your tablet when it seems slow.

Wi-Fi Dropouts

If Wi-Fi dropouts only occur in one room or one location in the room, you may need to use the tablet somewhere else. The quality of your Wi-Fi signal can be affected by a number of different things. First, you may be experiencing interference from a neighbor’s Wi-Fi signal, which typically uses the 2.4GHz frequency. Other devices that cause interference include cordless phones, baby monitors, and Bluetooth devices. An entire room may be included in a dropout area, depending on the walls. Problematic materials include brick, metal, solid stone, and mirrors. Fortunately, tablets are portable devices, so you simply need to find another place to use it where the signal is stronger.
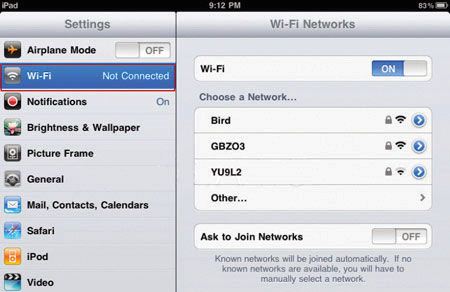
   The list of available Wi-Fi networks will indicate the quality of the signal strength

Less Battery Life Than Expected

Many of today’s tablets provide wireless connectivity for Wi-Fi, Bluetooth, and GPS. When the wireless connections are constantly left on, your tablet will more quickly use up its battery. When you’re not using a wireless technology, it’s a good idea to turn off the feature via the Settings menu of your tablet. You’ll be able to quickly turn it on again when you need it. Another common battery hog for tablets is the brightness level of your screen. Sure, it’s nice to be able to clearly see the screen in bright outdoor environments, but in normal lighting, the tablet probably won’t need to operate at the highest brightness level. You can access the tablet’s Settings to set your brightness level. Note that many new tablets feature automatic brightness controls (using a light sensor to analyze the room lighting), so you don’t have to adjust it manually.
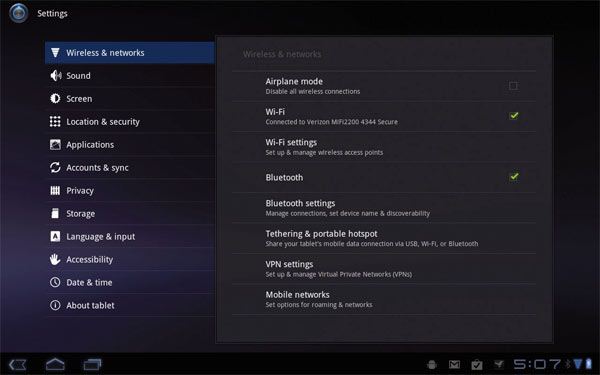
  To save battery life, turn off your Wi-Fi, Bluetooth, and GPS when not in use.

  With a tablet running Android 4.0, you’ll be able to close apps by swiping the app off the screen.

How to recover my Windows 7 existing system repair disc and backup image?

By Dinesh Thakur

To recover your computer, you’ll first need to configure the computer’s BIOS (basic input/ output system) to boot to the optical drive. Typically, changing the BIOS involves pressing the DELETE key or one of the function keys along the top of your keyboard. The splash screen that pops up when your computer first boots will indicate the key you should press to enter the BIOS. Once inside the BIOS, find the area where you can change the order that the BIOS searches when trying to load the OS. It may be labeled Boot Sequence or something similar. Move the CD-ROM drive or optical drive listing to the top of the list. Next, arrow over to the Save Changes And Exit (or similar) option and press ENTER on your keyboard. Next, load the System Repair Disc into the optical drive and restart the PC.


Windows will load the System Recovery Options window, from which you can select the Restore Your Computer Using A System Image That You Created option. Select this option and click Next. If you’ve created multiple system images, you’ll be able to select the one you want from the Select A System Image Backup screen. Click Next and you can choose to delete an existing partition or disk from the computer. This is a wise choice if you’re fixing a crashed operating system, because you don’t want the excess files taking up space. Make your choice and click Next to see an overview of your restoration. Click Finish if everything looks correct.

How to create a system backup of Windows 7

By Dinesh Thakur

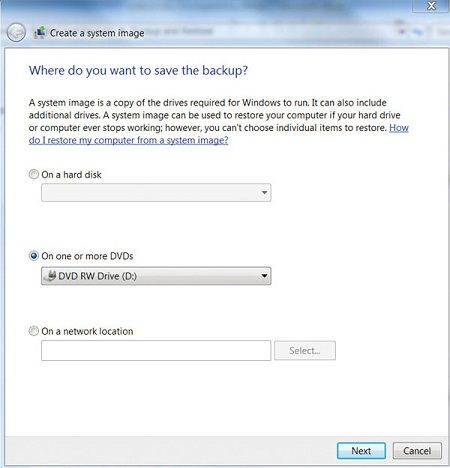
The feature is called Create A System Image, and it’s pretty easy to use, as long you do so before a problem occurs. Click the Start button, select Control Panel, choose System And Security, and click Backup And Restore. Click The Create A System Image link and Windows will bring up a window from which you can select the media on which to store the backup. Your options will include On A Hard Disk (if you have another hard drive or external drive connected to your computer), On One Or More DVDs (typically, you’ll need multiple DVDs to back up all the files on your computer), and On A Network Location (available if you have a local server or network storage device).

   Create a Backup

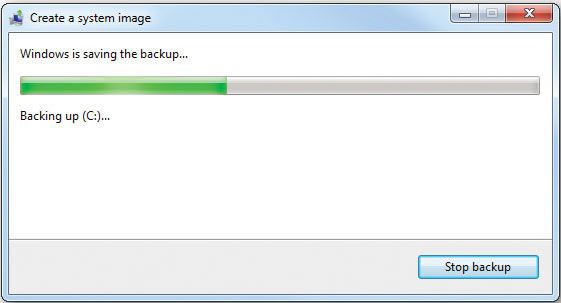
Once you’ve made a selection, you’ll see the Which Drives Do You Want To Include In The Backup dialog. Here, you can choose from among all the storage options connected to your computer, including external hard drives and USB flash drives. Click Next and the Confirm Your Backup Settings screen will show the amount of space required to save the entire backup. Click Next and a progress meter will display how quickly the backup is progressing. Once the process is finished, Windows 7 will ask you if you want create a system repair disc, which is a CD or DVD that will boot into the Windows Recovery area. We recommend that you do so if your computer didn’t come with a Windows installation disc.


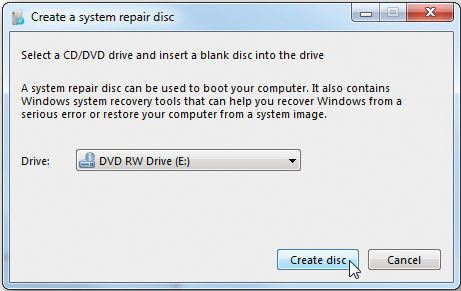
To create the disc, select Yes and insert a blank CD or DVD (you can use either) into the optical drive of your computer. Choose the drive letter for your optical drive, and select Create Disc. Windows will write the System Repair Disc onto the media you inserted in the optical drive. When the process finishes, the Autoplay window may pop up and ask you what you want to do with the new disc. Close the popup window, because there’s nothing you can do with the disc right now. We recommend that you take the disc out of the drive and label it (“System Repair Disc for Laptop” or “Repair Disc for Office Computer” might work well) so that you’ll be able to find the disc when you need it.


Primary Sidebar

Trubleshooting

Troubleshoot Tutorials

  • How to - Solve Tablet Problems
  • How to - Windows 7 Backup
  • How to - Windows 7 Recover
  • Troubleshoot - Computer
  • Troubleshoot - Memory
  • Troubleshoot - All-in-One PC
  • Troubleshoot - Networking
  • Troubleshoot - Software Update
  • Troubleshoot - Wi-fi Connection
  • Troubleshoot - Digital Cameras

Footer

Basic Course

  • Computer Fundamental
  • Computer Networking
  • Operating System
  • Database System
  • Computer Graphics
  • Management System
  • Software Engineering
  • Digital Electronics
  • Electronic Commerce
  • Compiler Design
  • Troubleshooting

Programming

  • Java Programming
  • Structured Query (SQL)
  • C Programming
  • C++ Programming
  • Visual Basic
  • Data Structures
  • Struts 2
  • Java Servlet
  • C# Programming
  • Basic Terms
  • Interviews

World Wide Web

  • Internet
  • Java Script
  • HTML Language
  • Cascading Style Sheet
  • Java Server Pages
  • Wordpress
  • PHP
  • Python Tutorial
  • AngularJS
  • Troubleshooting

 About Us |  Contact Us |  FAQ

Dinesh Thakur is a Technology Columinist and founder of Computer Notes.

Copyright © 2025. All Rights Reserved.

APPLY FOR ONLINE JOB IN BIGGEST CRYPTO COMPANIES
APPLY NOW