The foundation of most solutions that involve Windows Forms is the Windows Application project. Creating one is easy within the integrated development environment (IDE).
To Create a Windows Application project
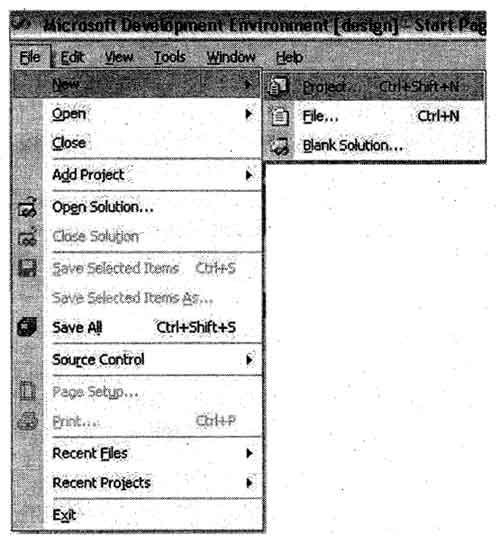
• On the File menu, point to New, and then select Project.
• In the left pane, choose visual C# project, and in the right pane, choose Windows Application.
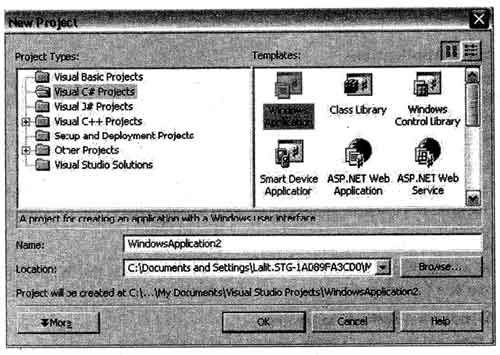
Note: In the Name box, name the project something unique to indicate the application’s purpose. In the Location box, enter the directory in which you want to save your project, or click the Browse button to· navigate to it.
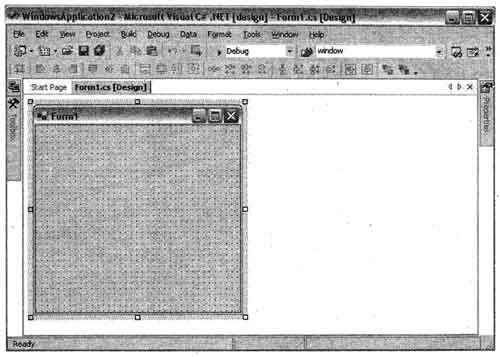
- The Windows Forms Designer opens, showing Form1of the project you created.
WINDOWS FORMS
Forms Designer is a class, and when you display an instance of the form at run time, this class is the template used to create the windows form. The framework also allows you to inherit from existing forms to add functionality or modify existing behavior. When you add a form to your project, you can choose whether it inherits from the Form· class provided by the framework, or from a form you have previously created.
Windows form uses some controls, because they inherit from the Control class.
Within a Windows Forms project, the form is the primary vehicle for user interaction. By combining different sets of controls and writing code, you can obtain information from the user and respond to it, work with existing stores of data, and query and write back to the file system and registry on the user’s local computer.
Although the form can be created entirely in the Code Editor, it is easier to use the
Windows Forms Designer to create and modify forms.
Adding Button Control
To add any control to the Form Design
- Open ToolBox from the View Menu. or you can press Ctrl + Alt + X as shortcut key.
-
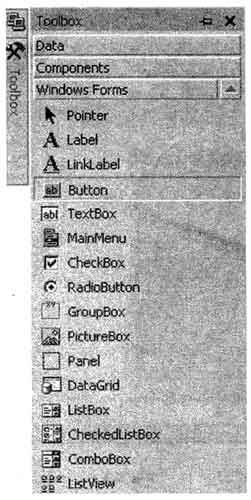
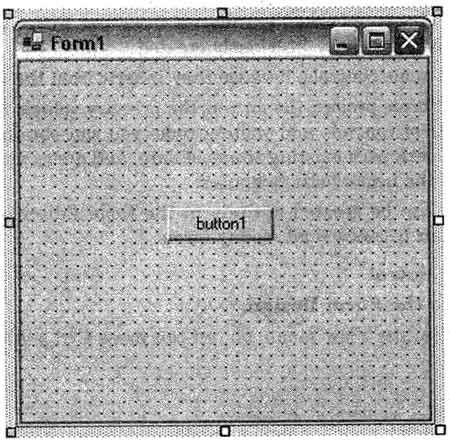
Click on the Button option and Drag a single button from ToolBox to the middle of the form then it will shows as following figure with “button1” name on the form.
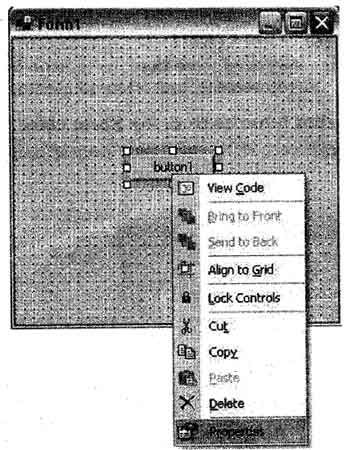
- To Change the name of Button open the properties after right click on the button control.
-
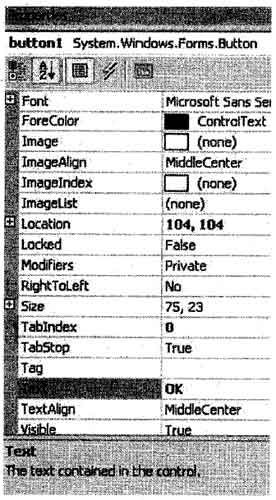
- Change the text property from button1 to “OK”
-
You can add more controls on the form which are available in Toolbox.
Adding windows Form to the project
Your windows application may need more than just a main form. The framework makes it easy to add dialog boxes, startup screens, and other supporting forms.
To add a windows Form that inherits from the Form class
- In the Solution Explorer, right-click your project and choose ADD, the choose Windows Form.
-
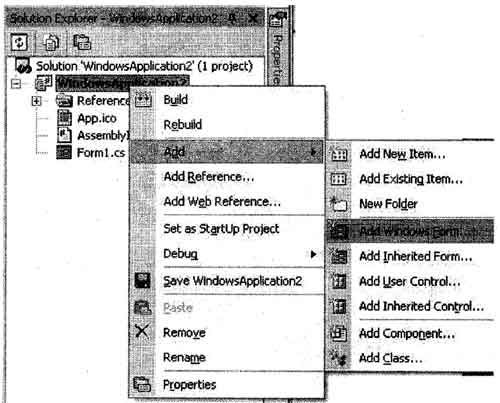
To add a windows From that inherits from a previously created form class
- In the Solution Explorer, right-click your project and choose Add, then choose Inherited Form.
-
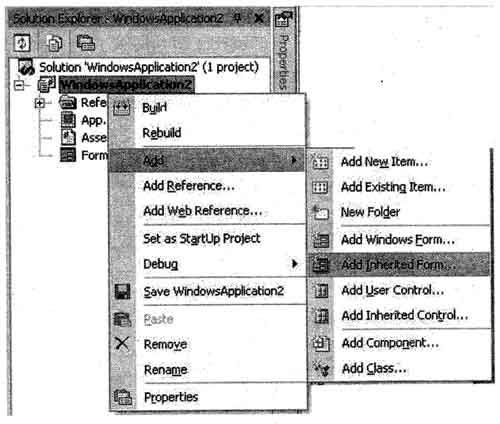
Note: You can also add a Windows Form from the Project menu.
Resizing Windows Form
There are a number of ways to specify the size of your Windows Form, including manually within the Windows Forms Designer, using the Properties window, and in code.
To resize a form in the Windows Forms Designer
1. In the Windows Forms Designer, click the form to select it.
2. Click and drag one of the right sizing handle which appear on the border of the form.
The sizing handles look like small white boxes, and the mouse pointer turns into a double-headed arrow when you point at a handle.
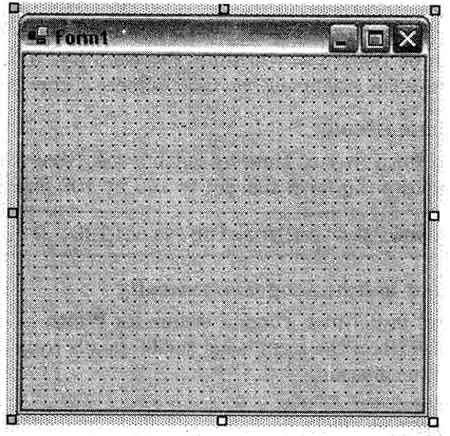
Note: Pressing the ARROW keys while holding down the SHIFT key allows you to resize the form more precisely.
To resize a form using the Properties window
• In the Properties window, click the Size property and enter values for the width and height, separated by a comma.
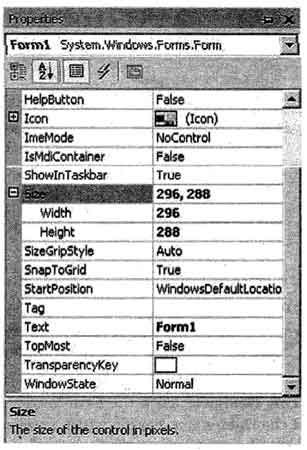
Note : Expand the Size property to enter the Width and Height values individually .
Additionally, forms can be resized at run time. For example, if a form displays a bitmap, you may want to resize the form whenever the user selects a new bitmap.
To resize a form programmatically
• Define the size of a form at run time by setting the Size property of the form. The. following example shows the form size set to 100 by 100 pixels:
Form1.Size = new system.Drawing.Size(100, 100);
To change form width and height programmatically
• Once the Size object is defined, change either its Width or Height property. In the example below, the width of the form is set to 300 pixels from the left edge of the form, while the height stays constant .
Form1. width = 300;
• Change Width or Height by setting the Size property. As the following code snows, however, this approach is more cumbersome than simply setting Width or Height properties.
Form1.size = new Size(300, Form1.Size.Height);
 Dinesh Thakur holds an B.C.A, MCDBA, MCSD certifications. Dinesh authors the hugely popular