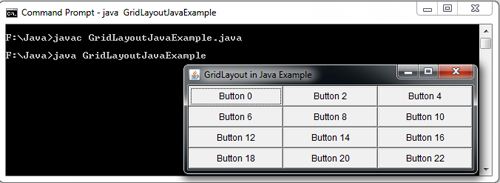
The GridLayout layout manager divides the container into a rectangular grid so that component can be placed in rows and column. The intersection of each row and column is known as a cell. The components are laid out in cells and each cell has the same size, components are added to a GridLayout starting at the top left cell of the grid and continuing to the right until the row is full. The process continues left to right on the next row of the grid and so on.
The java.awt.GridLayout class contain the following constructors and methods that can use to customize this manager:
Method | Description |
GridLayout () | Creates a GridLayout manager with a default row and a column. |
GridLayout (int, int) | Creates a GridLayout manager with the number of rows and columns specified. |
GridLayout (int, int, int, int) | Creates a GridLayout manager with the number of specified rows and columns and alignment, horizontal and vertical spacing data. |
getColumns () | Gets the number of columns in the layout. |
getHgap () | Gets the horizontal spacing. |
getRows () | Gets the number of rows of the layout. |
getVgap () | Gets the vertical spacing. |
SetColumns () | Specifies the number of columns in the layout. |
setHgap (int) | Specifies the horizontal spacing. |
SetRows () | Specifies the number of rows of the layout. |
setVgap (int) | Specifies the vertical spacing. |
import java.awt.*;
 class GridLayoutExample extends Frame
 {
     GridLayoutExample()
     {
          Button[] button =new Button[12];
          setLayout(new  GridLayout(4,3));
          for(int i=0; i<button.length;i++)
             {
                button[i]=new Button("Button "+(i+i));
                add(button[i]);
             }
      }
 }
   class GridLayoutJavaExample
   {
       public static void main(String args[])
       {
           GridLayoutExample frame = new GridLayoutExample();
           frame.setTitle("GridLayout in Java Example");
           frame.setSize(400,150);
           frame.setVisible(true);
       }
   }

 Dinesh Thakur holds an B.C.A, MCDBA, MCSD certifications. Dinesh authors the hugely popular