Image Media is a media library in which there are entire content in the form of pictures, video and other media files that you’ve uploaded previously, be it when making a post or pages.
In addition you can also upload content via the media. Here are the steps.
1. Sign on your WordPress dashboard, then select Media » Library you will find all the content you’ve uploaded. Each button will open a new window that will allow you to insert media.
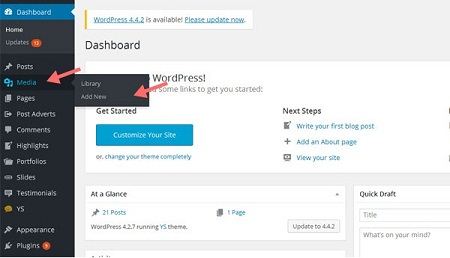
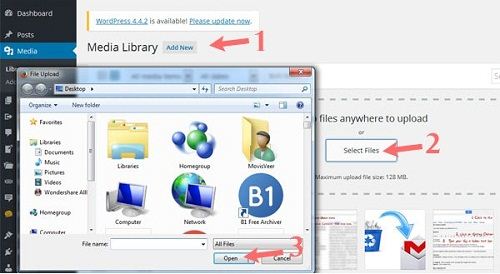
2. To add images or other new content, you simply select Add New »Select Files and select the image you want to upload. Later this image is ready for you put on a post or page without the need to upload it again.
Inserting an image you must have an prior image to add in your post. It may find on your computer or on an server. To insert a picture in your post, you’ll first point of the cursor mouse to where you want to integrate. Then you click the button to the right of Send. A new window opens.
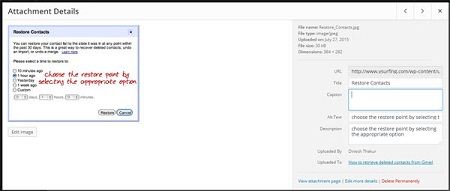
3. You can also change the captions by clicking on one of the images. After that, it will appear as shown below, where you can change the Title, Description, and more here.
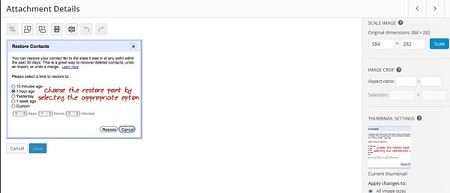
4. In addition, you can edit the image by selecting Edit Image in the picture above. There are several options available to edit images, such as Rotate, Flip, adjust the image size, crop images and others.
Essential tutorials before Use the Image Media
• How To Register Your Website Domain Name With GoDaddy
• How To Install WordPress On Hostgator CPanel
• How To Install WordPress Theme
• How to Install WordPress Plugin
 Dinesh Thakur holds an B.C.A, MCDBA, MCSD certifications. Dinesh authors the hugely popular