A DATA STRUCTURE which is accompanied by a set of ACCESS FUNCTIONS that must be employed to create objects of that type and access their contents, without the programmer being concerned with the internal layout of the data structure. The CLASSES employed in OBJECT-ORIENTED PROGRAMMING are abstract data types whose concealment is actually enforced by the language syntax, but abstract data types may be created in conventional languages such as C, PASCAL and MODULA-2 too, where the concealment is voluntary. [Read more…] about What is abstract data type (ADT)?
What is applet?
Applet: A small program for specific functions, which usually come with the operating system. Examples in Windows are Paint and Notepad. On a Macintosh, examples are Calculator and Scrapbook. The name comes from the term “applications” which is one variety of a software program. [Read more…] about What is applet?
Update Method in Java Applet Example
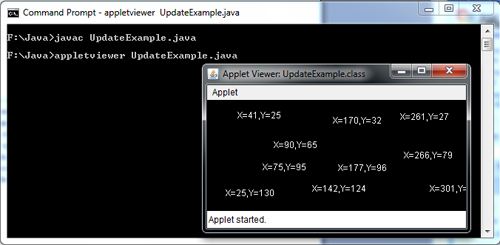
The repaint () method causes then AWT runtime system to execute the update () method of the Component class which clears the window with the background color of the applet and then calls the paint () method. But sometimes erasing the background is undesirable. For example: If user wants to display the x and y coordinates of each location where the mouse is clicked instead of only the currently clicked location then it is not possible using the default version of the update () method. Each time the user clicks in the applets’s window, the coordinates of the previously clicked location are erased and only the coordinates of the currently clicked location are displayed. To overcome this problem, it is necessary to override the update () method to invoke paint () directly, thus avoiding the erasure of the component’s background.
import java.awt.*;
 import java.applet.Applet;
 import java.awt.event.*;
 /*<applet code="UpdateExample.class" width="350" height="150"> </applet>*/
 public class UpdateExample extends Applet implements MouseListener
 {
         private int mouseX, mouseY;
         private boolean mouseclicked = false;
         public void init()
         {
           setBackground(Color.black);
           addMouseListener(this);
         }
         public void mouseClicked(MouseEvent e)
         {
           mouseX=e.getX();
           mouseY=e.getY();
           mouseclicked = true;
           repaint();
         }
         public void mouseEntered(MouseEvent e){};
         public void mousePressed(MouseEvent e){};
         public void mouseReleased(MouseEvent e){};
         public void mouseExited(MouseEvent e){};
         public void update(Graphics g)
         {
           paint(g);
         }
         public void paint( Graphics g)
         {
            String str;
            g.setColor(Color.white);
            if (mouseclicked)
            {
              str = "X="+ mouseX + "," + "Y=" + mouseY;
              g.drawString(str,mouseX,mouseY);
              mouseclicked = false;
            }
         }
 }
repaint() in Java Applet Example
The paint () method is called automatically by the environment (usually a web browser) that contains the applet whenever the applet window needs to be redrawn. This happens when the component is first displayed, but it can happen again if the user minimizes the window that displays the component and then restores it or if the user moves another window over it and then move that window out of the way. In addition to these implicit calls to the paint() method by the environment, one can also call the paint () method explicitly whenever the applet window needs to be redrawn, using the repaint () method.
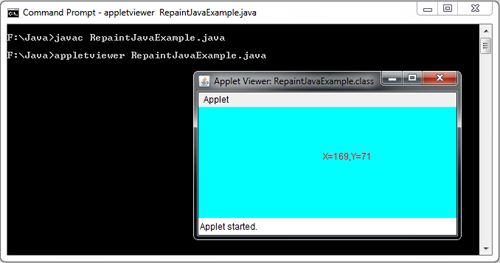
The repaint () method causes the AWT runtime system to execute the update () method of the Component class which clears the window with the background color of the applet and then calls the paint () method. For example: Suppose you want to display the current x and y coordinates of the location where the mouse button is clicked in the applet window. As the applet needs to update information displayed in its window (i.e. redraw the window), each time the mouse is being clicked so this is possible with the use of repaint () method. To sum up, the repaint() method is invoked to refresh the viewing area i.e. you call it when you have new things to display.
import java.awt.*;
 import java.applet.Applet;
 import java.awt.event.*;
 /*<applet code="RepaintJavaExample.class" width="350" height="150"> </applet>*/
 public class RepaintJavaExample extends Applet implements MouseListener
 {
         private int mouseX, mouseY;
         private boolean mouseclicked = false;
         public void init()
         {
           setBackground(Color.CYAN);
           addMouseListener(this);
         }
         public void mouseClicked(MouseEvent e)
         {
           mouseX = e.getX();
           mouseY=e.getY();
           mouseclicked = true;
           repaint();
         }
         public void mouseEntered(MouseEvent e){};
         public void mousePressed(MouseEvent e){};
         public void mouseReleased(MouseEvent e){};
         public void mouseExited(MouseEvent e){};
         public void paint( Graphics g )
         {
            String str;
            g.setColor(Color.RED);
            if (mouseclicked)
            {
              str = "X="+ mouseX + "," + "Y="+ mouseY ;
              g.drawString(str,mouseX,mouseY);
              mouseclicked = false;
            }
         }
 }
Applet Life Cycle in Java with Example
When an applet is executed within the web browser or in an applet window, it goes through the four stages of its life cycle: initialized, started, stopped and destroyed. These stages correspond to the applet methods init(), start(), stop() and destroy() respectively. All these methods defined in the Applet class which is called automatically by the browser or the applet viewer controlling the applet. All these methods have hollow bodies by default. To perform specific functions, these methods need to be overridden in the user’s applet so that the browser can call your code correctly.
We shall now briefly discuss about these methods:
• Public void init(): This method is used to perform any initialization that needed for the applet. It is called automatically when the applet is first loaded into the browser and is called only once during the life cycle of the applet.
In this method, we generally perform startup activities such as adding GUI components; loading resources such as images, audio, font; creating threads; and getting string parameter values from the APPLET tag in the HTML page.
• Public void start(): After the applet is loaded and initialized, the Java environment automatically calls the start() method. It also called when the user returns to the HTML page that contains the applet after browsing through other webpages. This method is used to start the processing for the applet. For example, Action performed here might include starting an animation or starting other threads of execution. Unlike the init() method, the start() method may be called more than once during the life cycle of an applet.
• Public void stop(): This method is called automatically by the browser when the user moves off the HTML page containing the applet. It is generally used to suspend the applet’s execution so that it does not take up system resources when the user is not viewing the HTML page or has quit the browser. For example Processor intensive activities such as animation, playing audio files or performing calculations in a thread can be stopped which not visible to the user until the user returns to the page.
• Public void destroy(): This method called after the stop() method when the user exits the web browser normally. This method is used to clean up resources allocated to the applet that is managed by the local operating system. Like the init() method, it is called only once in the lifetime of the applet.
It is not always necessary to override all of these methods to get a basic applet to work. You will most likely need to implement only the init() method at a minimum. The need to implement the remaining life cycle methods depends on what your applet is doing.

import java.applet.Applet;
 import java.awt.Graphics;
 import java.awt.*;
 /*<applet code="AppletLifeCycle.class" width="350" height="150"> </applet>*/
 public class AppletLifeCycle extends Applet
 {
      public void init()
      {
        setBackground(Color.CYAN);
        System.out.println("init() called");
      }
      public void start(){ System.out.println("Start() called"); }
      public void paint(Graphics g){ System.out.println("Paint(() called"); }
      public void stop() { System.out.println("Stop() Called"); }
      public void destroy()   { System.out.println("Destroy)() Called"); }
 }
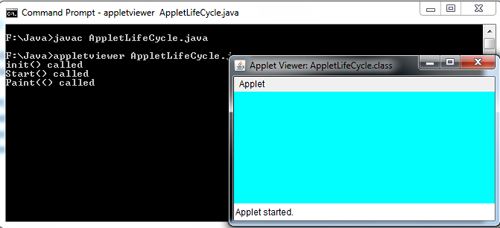
When the user opens Applet Life, an HTML page containing the applet life cycle. java in an app1etviewer, an instance for each of the applet classes is created using the no-argument constructor, and its init() method called. As a result, the message” init() called” is displayed in the command window. After execution of the code in the init() method, the program control returns to the applet viewer which then calls the applet’s start () method. As a result, the message “start() called” is displayed. Next, the appletviewer calls the applet’s paint() method as a result of which the message “paint() called” displayed.
Now when the user minimizes the applet window, the stop() method is called, and on restoring the window the start() method is called again. When the user exits the appletviewer, the destroy() method called that displays the message “destroy() called” in the command window.
Java Separate Listener Class Example
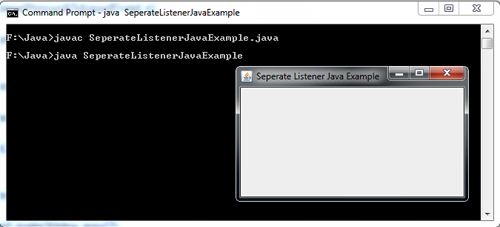
Another approach for handling events is to create separate Listener class for each listener type.
For example : Suppose you want to create a frame window such that when the user clicks in it, the coordinates of the clicked location relative to the left comer of the window are displayed in the console window. For this, you have to create a separate Listener class (say MyMouseListener) that extends the MouseAdapter class and define the mousePressed () method which is triggered and remaining do nothing methods are inherited from the MouseAdapter class.
The complete program is as follows,
import javax.swing.*;
 import java.awt.*;
 import java.awt.event.*;
 class MyMouseListener extends MouseAdapter
 {
        public void MousePressed(MouseEvent e)
        {
          System.out.println("Mouse Pressed at ("+e.getX() +","+ e.getY()+")");
        }
 }
    class SeperateListenerExample extends JFrame
    {
         SeperateListenerExample()
        {
              addMouseListener(new MyMouseListener());
         }
     }
   class SeperateListenerJavaExample
  {
       public static void main(String args[])
      {
           SeperateListenerExample frame = new SeperateListenerExample();
           frame.setTitle("Seperate Listener Java Example");
           frame.setBounds(200,150,180,150);
           frame.setDefaultCloseOperation(JFrame.EXIT_ON_CLOSE);
           frame.setResizable(false);
           frame.setVisible(true);
       }
   }
Anonymous Inner Classes in Java with Examples
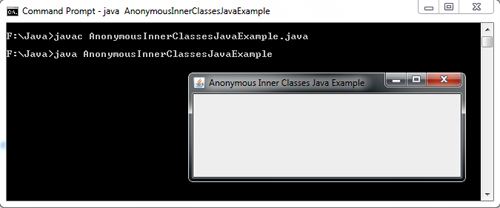
Anonymous inner classes can also be used to provide a similar facility as that provided by inner classes.
In this approach, the event listener is implemented as an anonymous inner class. The inner class declaration is incorporated into the syntax needed to register the component with the event listener. Although anonymous inner classes result in more compact programs but they do make the code more difficult to read. For example : Suppose we want to write an anonymous WindowAdapter class that terminates the JVM when the user closes the window.
addWindowListener(new WindowAdapter()
{
public void WindowClosing(WindowEvent e)
{
System.exit(0);
}
}) ;
In this code,
• A class is defined without a name that extends the WindowAdapter class .
• A windowClosing ()method is defined in this anonymous class that exits the program when the user closes the window. The remaining six do nothing methods are inherited from the WindowAdapter class .
• An object of WindowAdapter is created without a name and passes to the addWindowListener () method.
import javax.swing.*;
 import java.awt.*;
 import java.awt.event.*;
 class AnonymousInnerClasses extends JFrame
 {
       AnonymousInnerClasses()
       {
         addWindowListener(new WindowAdapter()
                          {
                            public void WindowClosing(WindowEvent e)
                             {
                               System.exit(0);
                             }
                          }) ;
        }
 }
  class AnonymousInnerClassesJavaExample
  {
       public static void main(String args[])
       {
         AnonymousInnerClasses frame = new AnonymousInnerClasses();
         frame.setTitle("Anonymous Inner Classes Java Example");
         frame.setBounds(200,150,180,150);
         frame.setVisible(true);
       }
   }
Named Inner Class Java Example
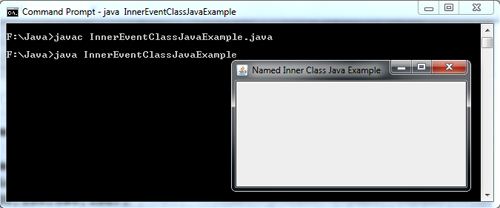
The most common use of inner classes is with event handling. An inner class can be used to implement a particular listener interface or to subclass a particular adapter. This has the benefit of separating out the control aspect of the interface from the display elements. It also means that the event handler inner class can inherit from a different class to the encompassing class.
For example: Suppose you have a class that extends the Frame class. Suppose now you want to use a WindowAdapter class to handle window events. Since Java does not support multiple inheritance so your class cannot extend both the Frame and WindowAdapter class. A solution to this problem is to define an inner class i.e. a class inside the Frame subclass that extends the WindowAdapter class.
import javax.swing.*;
 import java.awt.event.*;
 import java.awt.*;
 class NamedInnerClass  extends JFrame
 {
       NamedInnerClass()
       {
         addWindowListener(new MyAdapterClass());
       }
       class MyAdapterClass extends WindowAdapter
      {
         public void windowClosing(WindowEvent e)
         {
           System.exit(0);
         }
      }
 }
     class InnerEventClassJavaExample
   {
       public static void main(String args[])
       {
         NamedInnerClass frame = new NamedInnerClass();
         frame.setTitle("Named Inner Class Java Example");
         frame.setBounds(200,150,180,150);
         frame.setVisible(true);
       }
   }
Java Adapter Classes with Example
The listener class that implements the Listener interface must provide bodies for all of the methods of that interface. It is not a problem for all the semantic listener interfaces such as ActionEvent, ItemEvent, TextEvent, AdapterEvent as each of them declares only one method. However, for all the low-level listener interfaces where each interface contains multiple methods, implementing each method can be somewhat tedious, especially when we have to define methods in which we are not interested. For example: Suppose we are interested in setting up only one listener interface method windowClosing() of the WindowListener interface that causes the program to terminate. In that case, we would not only need to provide code for windowClosing() method but also need to write empty bodies for the other methods available in the WindowListener interface.
class WindowEventFrame extends Frame implements WindowListener {
..................
public void windowClosing(WindowEvent e){
System.exit(0);
}
publicvoid windowOpened(WindowEvent e){}
publicvoid windowClosed(WindowEvent e){}
publicvoid windowActivated(WindowEvent e){}
publicvoid windowDeactivated(WindowEvent e){}
publicvoid windowlconified(WindowEvent e){}
publicvoid windowDeiconified(WindowEvent e){}
..................
}
To avoid this unnecessary code, the java.awt.event package provides adapter classes for various event-listener types. The event listener interfaces that contain more than one method have a corresponding event adapter class that implements the interface and defines each method in the interface with an empty method body. For example, the adapter class for the WindowListener interface is WindowAdapter.
The following table lists some of the listener interfaces and their corresponding adapter classes.

Now instead of implementing an event listener interface, you can extend the corresponding event adapter class and define only those methods in which you are interested. For example, The following code segment shows that a class MyWindowAdapter extends WindowAdapter and implements the windowClosing() method.
class MyWindowAdapter extends WindowAdapter {
public void windowClosing(WindowEvent e){
System.exit(0);
}
}
This class can be registered using the following statement,
this.addWindowListener(new MyWindowAdapter());
However, if the class is a subclass of a Frame or Applet class, then you cannot define the class as a subclass of WindowAdapter. In such a case, you can use inner classes. So the preceding MyWindowAdapter class and addWindowListener statement replaced with the following statements,
this.addWindowListener( new WindowAdapter() {
public void windowClosing(WindowEvent e) {
System.exit(0);
}
}) ;
You can read this syntax as defining an anonymous inner class as a subclass ofWindowAdapter, create an instance of this inner class and use this instance as an argument to the addWindowListener () method.
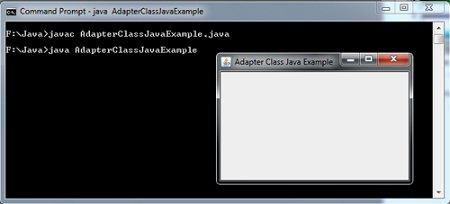
The following program demonstrates how the adapter class is created and used.
import javax.swing.*;
 import java.awt.event.*;
 import java.awt.*;
 class AdapterExample extends JFrame
 {
        AdapterExample()
        {
           this.addWindowListener( new WindowAdapter() {
           public void windowClosing(WindowEvent e)
                            {
                               System.exit(0);
                            }
                            });
        }
 }
     class AdapterClassJavaExample
 {
       public static void main(String [] args)
       {
         AdapterExample frame = new AdapterExample();
         frame.setTitle("Adapter Class Java Example");
         frame.setBounds(100,200,200,200);
         frame.setVisible(true);
       }
 }
FocusListener in Java Swing Example
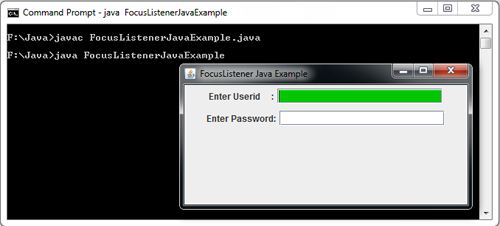
Focus events occur when a component gains or loses keyboard focus. Objects representing focus events are created from FocusEvent Class. The corresponding listener interface for FocusEvent Class is FocusListener interface. Each listener for FocusEvent should implement the FocusListener interface.
import javax.swing.*;
 import java.awt.event.*;
 import java.awt.*;
 class FocusListenerExample extends JFrame implements FocusListener
 {
       JTextField txtUserid ;
       JPasswordField txtpassword;
      FocusListenerExample()
      {
         JPanel panel1 = new JPanel();
         panel1.add(new JLabel("Enter Userid     :"));
         txtUserid = new JTextField(20);
         panel1.add(txtUserid);
         add(panel1,"North");

         JPanel panel2 = new JPanel();
         panel2.add(new JLabel("Enter Password:"));
         txtpassword = new JPasswordField(20);
         panel2.add(txtpassword);
         add(panel2);
         txtUserid.addFocusListener(this);
         txtpassword.addFocusListener(this);
      }
    public void focusGained(FocusEvent e)
      {
        Component c= (Component)e.getSource();
        Color green = new Color(0,200,0);
        c.setBackground(green);
      }
     public void focusLost(FocusEvent e)
      {
        Component c= (Component)e.getSource();
        Color white = new Color(255,255,255);
        c.setBackground(white);
      }
 }
   class FocusListenerJavaExample
  {
     public static void main(String[] args)
     {
       FocusListenerExample frame = new FocusListenerExample();
       frame.setTitle("FocusListener Java Example");
       frame.setDefaultCloseOperation(JFrame.EXIT_ON_CLOSE);
       frame.setBounds(100,200,400,200);
       frame.setVisible(true);
     }
 }
WindowListener in Java Example
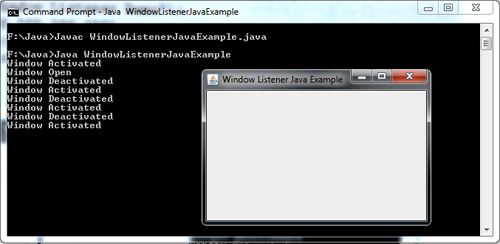
Window event occurs when window related activities such as closing, activating or deactivating a window are performed. Objects representing window events are created from WindowEvent class. The most common method of this class is
Window getWindow()
It returns the Window object that generated the event.
There are three listener interfaces corresponding to the WindowEvent class. These include WindowListener interface, WindowFocusListener interface and WindowStateListener interface. Each listener for WindowEvent should implement the appropriate interface.
The methods of this interface are:
Method | Description |
windowOpened (WindowEvent e) | Invoked when the window opens. |
windowClosing (WindowEvent e) | Invoked when trying to close the window. |
windowClosed (WindowEvent e) | Invoked when the window has been permanently closed. |
windowIconified (WindowEvent e) | Invoked when the window is minimized. |
windowDeiconified (WindowEvent e) | Invoked when the window goes from being minimized to be normal. |
windowActivated (WindowEvent e) | Invoked when the window becomes the active window. |
windowDeactivated (WindowEvent e) | Invoked when the Window is no longer the active window. |
windowClosing () is called when you click on system closing the window box. WindowClosed () is called after closing the window: This method is only useful if the closure of the window does not cause the end of application.
import javax.swing.*;
 import java.awt.event.*;
 import java.awt.*;
 class WindowListenerExample extends JFrame implements WindowListener
 {
        WindowListenerExample()
        {
           addWindowListener(this);
        }
        public void windowClosing(WindowEvent e)
        {
           System.out.println("Window Closing");
           dispose();
           System.exit(0);
        }
        public void windowOpened(WindowEvent e)
           { System.out.println("Window Open"); }
        public void windowClosed(WindowEvent e)
           { System.out.println("Window Closed");}
        public void windowActivated(WindowEvent e)
           { System.out.println("Window Activated"); }
        public void windowDeactivated(WindowEvent e)
           { System.out.println("Window Deactivated"); }
        public void windowIconified(WindowEvent e)
           { System.out.println("window Iconified"); }
        public void windowDeiconified(WindowEvent e)
           { System.out.println("Window Deiconified"); }
      }
      class WindowListenerJavaExample
     {
        public static void main(String[] args)
        {
          WindowListenerExample frame = new WindowListenerExample();
          frame.setTitle("Window Listener Java Example");
          frame.setBounds(100,200,200,200);
          frame.setVisible(true);
        }
    }
KeyListener in Java Swing Example
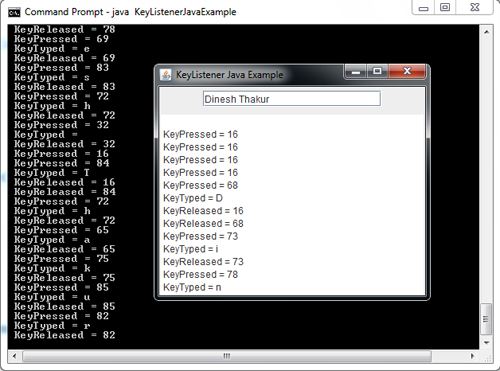
Key events occur when a key is pressed, released or typed on a component. Objects representing key events are created from KeyEvent class. The corresponding listener interface for KeyEvent class is KeyListener. Each listener for KeyEvent should implement the KeyListener interface. The KeyListener interface defines three methods.
public void keyTyped(KeyEvent e)
public void keyPressed(KeyEvent t e)
public void keyReleased(KeyEvent e)
Demonstrate the event handling mechanism using KeyListener interface
import javax.swing.*;
 import java.awt.event.*;
 import java.awt.*;
 class KeyListenerExample extends JFrame implements KeyListener
 {
        JTextField data;
        JTextArea  txtData;
        String s="";
        KeyListenerExample()
        {
          JPanel panell = new JPanel(new FlowLayout());
          JPanel panel2 = new JPanel(new FlowLayout());
          data = new JTextField(20);
          txtData = new JTextArea(20,30);
          data.addKeyListener(this);
          panell.add(data);
          panel2.add(txtData);
          add(panell,BorderLayout.NORTH);
          add(panel2,BorderLayout.CENTER);
        }
       public void keyTyped(KeyEvent e)
       {
         s  += "\n KeyTyped = " + String.valueOf(e.getKeyChar());
         System.out.println(s);
         txtData.setText(s);
       }
      public void keyPressed(KeyEvent e)
      {
        s += "\n KeyPressed = " +String.valueOf(e.getKeyCode());
        System.out.println(s);
        txtData.setText(s);
      }
      public void keyReleased(KeyEvent e)
      {
        s += "\n KeyReleased = " +String.valueOf(e.getKeyCode());
        System.out.println(s);
        txtData.setText(s);
      }
    }
    class KeyListenerJavaExample
    {
       public static void main(String[] args)
       {
          KeyListenerExample frame = new KeyListenerExample();
          frame.setTitle("KeyListener Java Example");
          frame.setBounds(100,200,350,300);
          frame.setDefaultCloseOperation(JFrame.EXIT_ON_CLOSE);
          frame.setVisible(true);
      }
    }
MouseListener in Java Swing Example
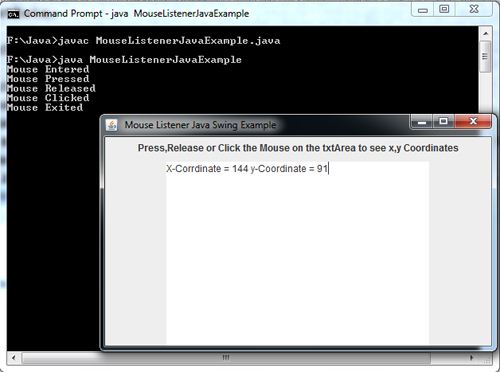
Mouse event occurs when a mouse related activity is performed on a component such as clicking, dragging, pressing, moving or releasing a mouse etc. Objects representing mouse events are created from MouseEvent class.
There are two listener interfaces corresponding to the MouseEvent Class. These include MouseListener and MouseMotionListener interface. Each listener for MouseEvent should implement the appropriate interface.
Mouse Event
Method | Description |
void mouseClicked (MouseEvent e) | Invoked when the mouse button has been clicked (pressed and released) on a component |
void mouseEntered (MouseEvent e) | Invoked when the mouse pointer enters a component |
void mouseExited (MouseEvent e) | Invoked when the mouse pointer exits a component |
void mousePressed (MouseEvent e) | Invoked when a mouse button has been pressed on a component |
void mouseReleased (MouseEvent e) | Invoked when a mouse button has been released on a component |
void mouseDragged (MouseEvent e) | Invoked when a mouse button is pressed on a component and then dragged |
void mouseMoved (MouseEvent e) | Invoked when the mouse pointer has been moved onto a component but no buttons have been pressed |
import javax.swing.*;
 import java.awt.event.*;
 import java.awt.*;
 class MouseListenerExample extends JFrame implements MouseListener
 {
        JLabel lblData;
        JTextArea txtData;
        MouseListenerExample()
        {
          JPanel panel1 = new JPanel(new FlowLayout());
          JPanel panel2 = new JPanel(new FlowLayout());
          lblData = new JLabel("Press,Release or Click the Mouse on the txtArea to see x,y Coordinates");
          txtData = new JTextArea(20,30);
          txtData.addMouseListener(this);
          panel1.add(lblData);
          panel2.add(txtData);
          add(panel1,BorderLayout.NORTH);
          add(panel2,BorderLayout.CENTER);
        }
        public void mousePressed(MouseEvent e)
        {
          String s= "x-Corrdinate = " + e.getX() + "y-Coordinate = " + e.getY();
          System.out.println("Mouse Pressed");
          txtData.setText(s);
        }

        public void mouseReleased(MouseEvent e)
        {
          String s = "x-Coordinate = " + e.getX() + "y-Coordinate = " + e.getY();
          System.out.println("Mouse Released");
          txtData.setText(s);
        }
        public void mouseClicked(MouseEvent e)
        {
          String s= "X-Corrdinate = " + e.getX() + " y-Coordinate = " + e.getY();
          System.out.println("Mouse Clicked");
          txtData.setText(s);
        }
          public void mouseEntered(MouseEvent e)
            {
               System.out.println("Mouse Entered");
            }
          public void mouseExited(MouseEvent e)
           {
               System.out.println("Mouse Exited");
           }
 }
        class MouseListenerJavaExample
       {
          public static void main(String[] args)
          {
             MouseListenerExample frame = new MouseListenerExample();
             frame.setTitle(" Mouse Listener Java Swing Example");
             frame.setBounds(100,200,500,300);
             frame.setDefaultCloseOperation(JFrame.EXIT_ON_CLOSE);
             frame.setVisible(true);
          }
       }
ItemListener in Java Swing Examples
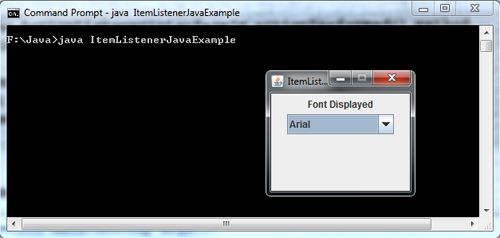
Item events occur when a user selects a choice item, a checkbox menu item or a list item. Objects representing item events are created from the ItemEvent class.
The corresponding listener interface for ItemEvent class is ItemListener. Each listener for ItemEvent should implement the ItemListener interface. This listener defines the following method to handle ItemEvent generated by a user interface component.
void itemStateChanged(ItemEvent e)
It is called when the selected item changes.
import javax.swing.*;
 import java.awt.*;
 import java.awt.event.*;
 class ItemListenerExample extends JFrame implements ItemListener
 {
     JLabel lblData;
     JComboBox cbofont;
     ItemListenerExample()
     {
         setLayout(new FlowLayout());
         lblData = new JLabel("Font Displayed");
         String[] fontData ={"Arial","Courier New", "Arial Black", "Times New Roman"};
         cbofont = new JComboBox(fontData);
         cbofont.addItemListener(this);
         add(lblData);
         add(cbofont);
     }
      public void itemStateChanged(ItemEvent e)
     {
          String fontName=(String)cbofont.getSelectedItem();
          Font font = new Font(fontName,Font.PLAIN,12);
          lblData.setFont(font);
     }
 }
 class ItemListenerJavaExample
 {
    public static void main(String args[])
    {
       ItemListenerExample frame = new ItemListenerExample();
       frame.setTitle("ItemListener Java Example");
       frame.setBounds(200,150,180,150);
       frame.setDefaultCloseOperation(JFrame.EXIT_ON_CLOSE);
       frame.setResizable(false);
       frame.setVisible(true);
   }
 }
ActionListener in Java Swing Examples
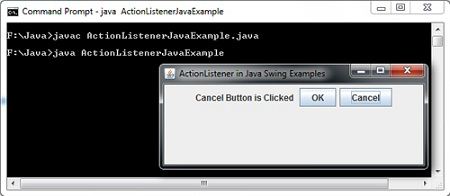
The action event occurs when you perform an action on a component such as clicking a button, double clicking a list item, selecting a menu item etc. Objects representing action events are created from ActionEvent class.
The corresponding listener interface for ActionEvent class is ActionListener. Each listener for ActionEvent should implement the ActionListener interface. This interface defines the following method to handle ActionEvent generated by a user interface component.
void actionPerformed(ActionEvent e)
It is called when ActionEvent is fired by any registered component.
import javax.swing.*;
 import java.awt.*;
 import java.awt.event.*;
 class ActionListenerExample extends JFrame implements ActionListener
 {
     JLabel lblData;
     JButton btnOk,btnCancel;
     ActionListenerExample()
     {
       setLayout(new FlowLayout());
       lblData = new JLabel("Click any button to display data");
       btnOk=new JButton("OK");
       btnCancel = new JButton("Cancel");
       //Register the current(this);
       btnOk.addActionListener(this);
       btnCancel.addActionListener(this);
       add(lblData);
       add(btnOk);
       add(btnCancel);
     }

    public void actionPerformed(ActionEvent e)
    {
     if(e.getSource() == btnOk)
        lblData.setText("OK Button is Clicked ");
     else
        lblData.setText("Cancel Button is Clicked ");
    }
 }
  class ActionListenerJavaExample
  {
     public static void main(String args[])
     {
          ActionListenerExample frame = new ActionListenerExample();
         frame.setTitle("ActionListener in Java Swing Examples");
         frame.setBounds(200,150,180,150);
         frame.setDefaultCloseOperation(JFrame.EXIT_ON_CLOSE);
         frame.setVisible(true);
    }
  }
Event Handling in Java Swing Examples
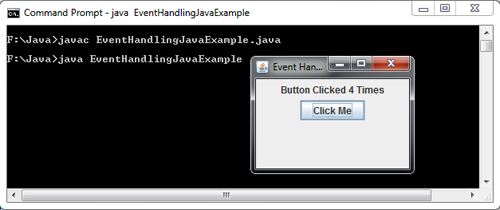
• Event: An event is a signal to the program that something has happened. It can be triggered by typing in a text field, selecting an item from the menu etc. The action is initiated outside the scope of the program and it is handled by a piece of code inside the program. Events may also be triggered when timer expires, hardware or software failure occurs, operation completes, counter is increased or decreased by a value etc.
• Event handler: The code that performs a task in response to an event. is called event handler.
• Event handling: It is process of responding to events that can occur at any time during execution of a program.
• Event Source: It is an object that generates the event(s). Usually the event source is a button or the other component that the user can click but any Swing component can be an event source. The job of the event source is to accept registrations, get events from the user and call the listener’s event handling method.
• Event Listener: It is an object that watch for (i.e. listen for) events and handles them when they occur. It is basically a consumer that receives events from the source. To sum up, the job of an event listener is to implement the interface, register with the source and provide the eventhandling.
• Listener interface: It is an interface which contains methods that the listener must implement and the source of the event invokes when the event occurs.
import javax.swing.*;
 import java.awt.*;
 import java.awt.event.*;
 class EventExample extends JFrame implements ActionListener
 {
     private int count =0;
     JLabel lblData;
     EventExample()
     {
       setLayout(new FlowLayout());
       lblData = new JLabel("Button Clicked 0 Times");
       JButton btnClick=new JButton("Click Me");
       btnClick.addActionListener(this);
       add(lblData);
       add(btnClick);
     }
     public void actionPerformed(ActionEvent e)
     {
       count++;
       lblData.setText("Button Clicked " + count +" Times");
     }
 }
   class EventHandlingJavaExample
  {
     public static void main(String args[])
     {
        EventExample frame = new EventExample();
        frame.setTitle("Event Handling Java Example");
        frame.setBounds(200,150,180,150);
        frame.setDefaultCloseOperation(JFrame.EXIT_ON_CLOSE);
        frame.setVisible(true);
     }
  }
Java Swing Border in Panel Example
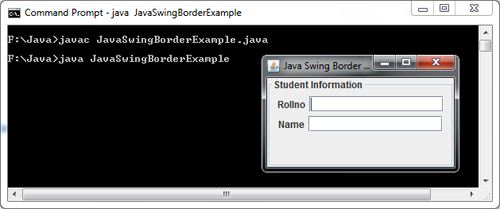
Every swing component that is a subclass of JComponent can have a border. A border is a decorative element that virtually group components by drawing a line around them. By default, a component does not have a border.
import javax.swing.*;
 import javax.swing.border.*;
 class JPanelExample extends JFrame
 {
      JPanelExample()
      {
        JPanel p1 = new JPanel();
        JLabel lblRoll = new JLabel("Rollno");
        JLabel lblName = new JLabel("Name");
        JTextField txtRoll = new JTextField(15);
        JTextField txtName = new JTextField(15);
        Border b = BorderFactory.createTitledBorder("Student Information");
        p1.setBorder(b);
        p1.add(lblRoll);
        p1.add(txtRoll);
        p1.add(lblName);
        p1.add(txtName);
        add(p1);
      }
 }
    class JavaSwingBorderExample
   {
      public static void main(String args[])
      {
        JPanelExample frame = new JPanelExample();
        frame.setTitle("Java Swing Border Example");
        frame.setBounds(200,250,250,150);
        frame.setDefaultCloseOperation(JFrame.EXIT_ON_CLOSE);
        frame.setVisible(true);
      }
   }
SpringLayout in Java Swing Example
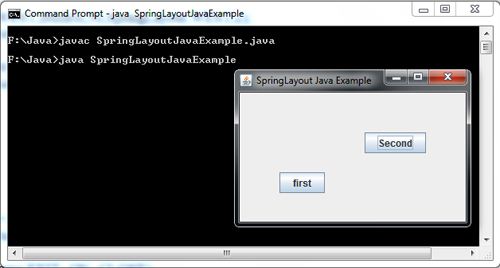
The SpringLayout layout manager is for a GUI’s components to maintain their position relative to container edges or the edges of the other components after the GUI is resized. The SpringLayout layout manager lays out its container components according to a set of constraints specified by the user. Each constraint represented by a Spring object, controls the vertical or horizontal distance between two component edges. The edges can belong to the container itself or to any child of the container.
In order to create SpringLayout layout manager, use the constructor
SpringLayout()
Just like CardLayout, you need to keep the reference of the SpringLayout layout manager in order to use the various methods available with the SpringLayout class. For example: The following statements sets the layout manager, for the content pane of a JFrame object to be SpringLayout.
SpringLayout layout = new SpringLayout();
setLayout(layout);
Every component of a SpringLayout controlled container as well as the container itself has exactly one set of constraints associated with it. These constraints are represented by SpringLayout. Constraints object. By default, SpringLayout creates constraints that make their associated component have the minimum, preferred and maximum sizes according to the values returned from the Component’s getMinimumSize (), getPreferredSize () and getMaximumSize () respectively. But the components (x,y) positions are not constrained. So each component will put its top left corner at (0,0) point of the container. This overlapping arrangement of components will look messy. In order to properly position the components, you must put constraints explicitly on each component.
You usually don’t need to add the component with the constraints. Instead, you can add the component and then typically attach the constraints separately. To add constraints for a component, we first create a SpringLayout. Constraints object. The SpringLayout.Constraints is not a simple class but actually a collection of Spring objects, each of which represents a different constraint on the component. You need to add each spring constraint separately to SpringLayout.Constraints. You do this by setting specific constraints on an edge of the component.
The top, bottom, left and right edges of a component are referred to by their compass point north, south, west and east. When you need to refer to a particular edge in you code for setting a constraint, you need to use one of the constants NORTH, SOUTH, WEST and EAST defined in SpringLayout class
import javax.swing.*;
 import java.awt.*;
 class SpringLayoutFrameExample extends JFrame
 {
      SpringLayoutFrameExample()
      {
          JButton Btnfirst = new JButton("first");
          JButton BtnSecond = new JButton("Second");
          Container c = getContentPane();
          SpringLayout layout = new SpringLayout();
          c.setLayout(layout);
          layout.putConstraint(SpringLayout.WEST,Btnfirst,50,SpringLayout.WEST,c);
          layout.putConstraint(SpringLayout.NORTH,Btnfirst,100,SpringLayout.NORTH,c);
          c.add(Btnfirst);
          layout.putConstraint(SpringLayout.WEST,BtnSecond,50,SpringLayout.EAST,Btnfirst);
          layout.putConstraint(SpringLayout.NORTH,BtnSecond,50,SpringLayout.NORTH,c);
          c.add(BtnSecond);
      }
 }
    class SpringLayoutJavaExample
   {
       public static void main(String args[])
      {
          SpringLayoutFrameExample frame = new SpringLayoutFrameExample();
          frame.setTitle("SpringLayout Java Example");
          frame.setBounds(200,250,300,200);
          frame.setDefaultCloseOperation(JFrame.EXIT_ON_CLOSE);
          frame.setVisible(true);
      }
   }
GLUE in Java Swing Example
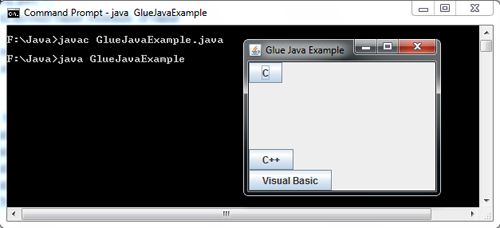
Glue is an invisible component which is similar to a strut but it pushes the components as far away from each other as possible within the bounds of the box itself. You create an invisible component that represents Glue by calling the createGl ue () method for a Box object For example: The statements
b. add (new JButton (“C”)) ;
b.add(Box.createGlue());
b.add(new JButton(“C++”));
b.add(new JButton(“Visual Basic”));
b.add(new JButton(“Java”));
move the second third and fourth buttons as far away from the first button as possible, based on the height of the box.
import javax.swing.*;
 import java.awt.*;
 class BoxLayoutFrame extends JFrame
 {
      JButton [] Buttons;
      BoxLayoutFrame()
      {
        int i;
        Box b = Box.createVerticalBox();
        b.add(new JButton("C"));
        b.add(Box.createGlue());
        b.add(new JButton("C++"));
        b.add(new JButton("Visual Basic"));
        add(b);
      }
 }
    class GlueJavaExample
    {
      public static void main(String args[])
      {
           BoxLayoutFrame frame = new BoxLayoutFrame();
           frame.setTitle("Glue Java Example");
           frame.setBounds(200,250,250,250);
           frame.setDefaultCloseOperation(JFrame.EXIT_ON_CLOSE);
           frame.setVisible(true);
      }
    }
Rigid Area Filler in Java Swing Example
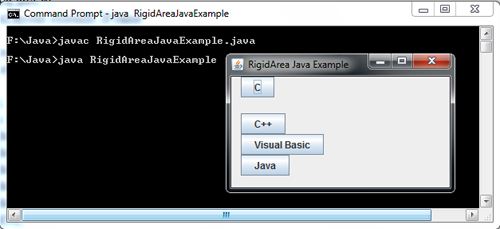
A rigid area filler is similar to pair of struts. It is an invisible component with a specific width and height. It can be created using the static method
createRigidArea(dimension)
.in the Box class. Here the dimension argument specifies the size of rigid area. For example, the statement.
b.add(Box.createRigidArea(new Dimension(10,20));
adds a rigid area 10 pixels wide and 20 pixels in height into a Box.
import javax.swing.*;
 import java.awt.*;
 class BoxLayout extends JFrame
 {
      JButton [] Buttons;
      BoxLayout()
     {
         int i;
         Box b = Box.createVerticalBox();
         b.add(new JButton("C"));
         b.add(Box.createRigidArea(new Dimension(10,20)));
         b.add(new JButton("C++"));
         b.add(new JButton("Visual Basic"));
         b.add(new JButton("Java"));
         add(b);
      }
 }
     class RigidAreaJavaExample
     {
        public static void main(String args[])
        {
            BoxLayout frame = new BoxLayout();
            frame.setTitle("RigidArea Java Example");
            frame.setBounds(200,250,250,250);
            frame.setDefaultCloseOperation(JFrame.EXIT_ON_CLOSE);
            frame.setVisible(true);
        }
     }
Struts in Java Swing Example
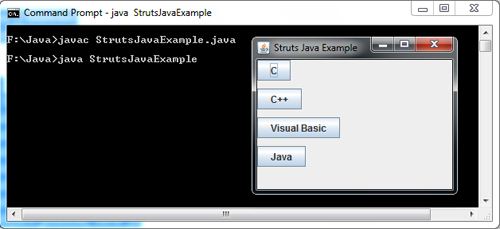
A strut is a fixed width invisible component that forces a certain amount of space between components. You can create a strut by calling the createHorizontalStrut () or createVerticalStrut () method depending upon what type of strut you want to create. The static method
createHorizontalStrut(int width)
creates a horizontal strut component that places the specified amount of space between the components on either side. The static method
createVerticalStrut(int Height)
creates a vertical strut component that places the specified amount of space between the components above and below it. For example : The following statements adds a vertical strut of 10 pixels between four buttons in a vertical box.
b.add(new JButton(“C”));
b.add(Box.createVerticalStrut(10));
b.add(new JButton(“C++”));
b.add(Box.createVerticalStrut(10));
b.add(new JButton(“Visual Basic”));
b.add(Box createVerticalStrut(10));
b. add (new JButton (“Java”));
import javax.swing.*;
 import java.awt.*;
 class BoxLayoutFrame extends JFrame
 {
      JButton [] Buttons;
      BoxLayoutFrame()
      {
        int i;
        Box b = Box.createVerticalBox();
        b.add(new JButton("C"));
        b.add(Box.createVerticalStrut(10));
        b.add(new JButton("C++"));
        b.add(Box.createVerticalStrut(10));
        b.add(new JButton("Visual Basic"));
        b.add(Box.createVerticalStrut(10));
        b.add(new JButton("Java"));
        add(b);
      }
 }
    class StrutsJavaExample
    {
         public static void main(String args[])
        {
             BoxLayoutFrame frame = new BoxLayoutFrame();
             frame.setTitle("Struts Java Example");
             frame.setBounds(200,250,200,200);
             frame.setDefaultCloseOperation(JFrame.EXIT_ON_CLOSE);
             frame.setVisible(true);
        }
    }
BoxLayout Example Program
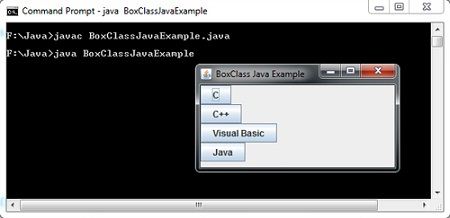
Although you can use the BoxLayou t directly, it is much more convenient to use javax.swing.BoxContainer class which has a built in BoxLayout layout manager. This class has some additional facilities that provide more flexibility in the arrangement of components than is provided by other containers such as JPanel object.
To create a Box container, call the Box (int axis) constructor where axis parameter is a constant value that can be either Boxlayout .X_AXIS for left to right layout or BoxLayout .Y_AXIS for top to bottom layout. For example.
Box b = new Box(BoxLayout.Y_AXIS)i
You can also create a horizontal or vertical box using the Box’s static methods createHorizontalBox () or createVerticalBox () . Both of these methods return a reference to a Box container with the orientation applied. For example, To create a vertical box, use the following statement,
Box b = Box createVertical()i
Once the box is created, you can add components as usual. For example : To add button component to the Box b, use b.add(BtnFirst);
import javax.swing.*;
 import java.awt.*;
 class BoxLayoutEx extends JFrame
 {
     JButton [] Buttons;
     BoxLayoutEx()
     {
        int  i;
        Box b = Box.createVerticalBox();
        JButton Btnfirst = new JButton("C");
        JButton BtnSecond = new JButton("C++");
        JButton BtnThird= new JButton("Visual Basic");
        JButton Btnfour= new JButton("Java");
        b.add(Btnfirst);b.add(BtnSecond);b.add(BtnThird);b.add(Btnfour);
        add(b);
     }
 }
   class BoxClassJavaExample
 {
     public static void main(String args[])
     {
       BoxLayoutEx frame = new BoxLayoutEx();
       frame.setTitle("BoxClass Java Example");
       frame.setBounds(200,250,250,150);
       frame.setDefaultCloseOperation(JFrame.EXIT_ON_CLOSE);
       frame.setVisible(true);
     }
 }
BoxLayout in Java Swing Example
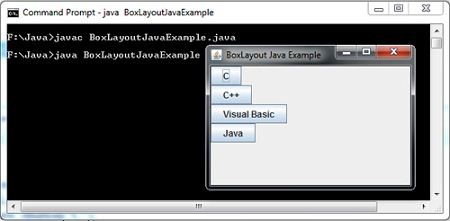
The BoxLayout layout manager is similar to FlowLayout in that, the components are placed in the order in which they are added and each component gets to have its own size. But unlike FlowLayout, the BoxLayout layout manager arranges components in either a single row or a single column. In other words, the components you add to BoxLayout are added vertically from top to bottom or horizontally from left to right. In BoxLayout, components will not continue on the next line or columns when there is insufficient room. The components that are out of range will not be shown. This layout manager is useful for creating toolbars or vertical button bars.
The constructor used for creating BoxLayout layout manager is
BoxLayout(java.awt.Container target, int axis}
It creates a layout manager that will layout components either left to right or top to bottom as specified in the axis parameter. The parameter target is a reference to the container to which layout manager applies and the parameter axis is a constant value that can be either BoxLayout.X_AXIS for left to right layout or Boxlayout.Y_AXIS for top to bottom layout.
Constructors and methods in the BoxLayout class.
Constructors and Methods | Description |
BoxLayout(Container cont, int axis) | Constructs a box layout manager that lays the specified containers in the specified axis. |
Dimension maximumLayoutSize(Container cont) | Returns the maximum dimension the specified container can use to layout components. |
Dimension minimumLayoutSize(Container cont) | Returns the minimum dimensions needed to layout the specified container’s component. |
Dimension preferredLayoutSize(Container cont) | Returns the preferred dimensions for this layout when the components of the specified container are given . |
Program demonstrates the JBoxLayout class:
import javax.swing.*;
 import java.awt.*;
 class BoxLayoutExample extends JFrame
 {
     JButton [] Buttons;
     BoxLayoutExample()
     {
        int i;
        Container c = getContentPane();
        setLayout(new BoxLayout(c,BoxLayout.Y_AXIS));
        JButton Btnfirst = new JButton("C");
        JButton BtnSecond = new JButton("C++");
        JButton BtnThird= new JButton("Visual Basic");
        JButton Btnfour = new JButton("Java");
        add(Btnfirst);add(BtnSecond);add(BtnThird);add(Btnfour);
     }
 }
   class BoxLayoutJavaExample
   {
       public static void main(String args[])
      {
          BoxLayoutExample frame = new BoxLayoutExample();
          frame.setTitle("BoxLayout Java Example");
          frame.setBounds(200,250,200,200);
          frame.setDefaultCloseOperation(JFrame.EXIT_ON_CLOSE);
          frame.setVisible(true);
      }
   }
JPanel in Java Swing Example
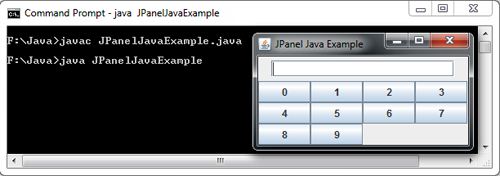
A panel in swing is similar to Panel in AWT, is a lightweight container that is designed to group a set of components, including other panels. It is visually represented as window that does not contain a title bar, menu bar or border. It is simplest of all the containers. Its default layout manager is FlowLayout.
Panels are represented by objects created from JPanel class by calling the constructor.
public JPanel ()
After the panel has been created, other components can be added to JPanel object by calling its add (component) method inherited from the Container class. The following code fragment demonstrates creating a panel and adding two buttons to it.
JPanel p = new JPanel();
p. add (new JButton (“OK”)) ;
p. add (new JButton (“Cancel”) ) ;
Using panels, you can design complex GUls.
import javax.swing.*;
import java.awt.event.*;
import java.awt.*;
class JPanelExample extends JFrame
{
    JPanel panel1,panel2 ;
    JTextField txtData;
    JButton[] btnData = new JButton[12];
    JPanelExample()
    {
        panel1=new JPanel();
        txtData = new JTextField(20);
        panel1.add(txtData);
        add(panel1,"North");
        panel2=new JPanel(new GridLayout(3,4));
        for(int i=0;i<=9;i++)
        {
            btnData[i]=new JButton(""+i);
            panel2.add(btnData[i]);
        }
            add(panel2,"Center");
     }
}
 class JPanelJavaExample
 {
      public static void main(String[]  args)
     {
          JPanelExample frame = new JPanelExample();
          frame.setTitle("JPanel Java Example");
          frame.setBounds(100,200,220,200);
          frame.setDefaultCloseOperation(JFrame.EXIT_ON_CLOSE);
          frame.pack();
          frame.setVisible(true);
   }
 }
JScrollPane in Java Swing Example
A scrolling pane is a container that can be used to hold any component that can be scrolled. By default, the list and textarea component do not scroll automatically when number of items in the list or text area component go beyond the displayed area. So to make these components scroll, you must insert them into the scrollpane. After you create a scrollpane containing a component (list or textarea), the scrolling pane should be added to the container in place of that component. A scrolling pane can be created by instantiating the JScrollPane class.
import javax.swing.*;
 import java.awt.*;
 class JScrollPaneExample extends JFrame
 {
      JScrollPaneExample()
     {
      setLayout(new FlowLayout());
      String[] language = {"Cobol","Fortran","Pascal","C","C++","java","C#"};
      JLabel lblLanguage = new JLabel("Choose the Language");
      JList LstMonth = new JList(language);
      LstMonth.setVisibleRowCount (4);
      JScrollPane s = new JScrollPane(LstMonth,JScrollPane.VERTICAL_SCROLLBAR_ALWAYS,JScrollPane.HORIZONTAL_SCROLLBAR_NEVER);
      add(lblLanguage);
      add(s);
     }
 }
   class JScrollPaneJavaExample
  {
       public static void main(String[] args)
      {
           JScrollPaneExample frame = new JScrollPaneExample();
           frame.setTitle("JScrollPane Java Example");
           frame.setBounds(200,250,180,150);
           frame.setDefaultCloseOperation(JFrame.EXIT_ON_CLOSE);
           frame.setVisible(true);
     }
  }

JList in Java Swing Example
A list components allows user to select a single or multiple items from a given list of items by clicking on each. By default, a user can select multiple items, however it is also possible to create a list from which user can choose only a single item.
When the number of items in the list exceeds the available space then the list does not scroll automatically and only the top group of items will be available. In order to make a list scroll, you must insert it into a scrollpane.
The JList class provides the visual representation for selecting items in a set. An object of JList can be initiated with an array or a list of values. The JList object will create one item for each element in the array vector or list. The data in the JList object can be initiated by calling the constructor with the array vector as the parameter or by using the setListData() method. The JList class allows the user to create either a single-selection list (that is, a list in which only one item or element can be selected) or a multiple-selection list (which is a list in which more than one element can be selected.)
A list can be created by instantiating a JList class. Relevant methods:
Method | Description |
publicJList() | Createsan emptyJList; |
publicJList(Object [] listItems) | created withtheitemscontained in thearrayof objects; |
publicJList(VectorlistItems) | created withtheVectorelements; |
getSelectedIndexpublic int() | returns theindex of the firstselectItem(-1if none); |
public int[] getSelectedIndices() | returns an array ofindicesthat are selected; |
getSelectedValuepublic Object() | givesthereference to the object; |
public Object[] getSelectedValues() | returns anarraywith the selectedObject. |
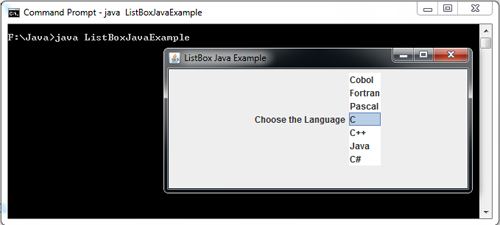
Program explains the usage of the class Jlist. A scroll pane can also be attached to a Jlist item if the number of elements is more than the size of list.
import javax.swing.*;
import java.awt.*;
class ListBoxExample extends JFrame
{
    ListBoxExample()
    {
        setLayout(new FlowLayout());
        String[] language = {"Cobol","Fortran","Pascal","C","C++","Java","C#"};
        JLabel lblLanguage = new JLabel("Choose the Language");
        JList LstMonth = new JList(language);
        add(lblLanguage);   add(LstMonth);

    }
}
  class ListBoxJavaExample
  {
       public static void main(String args[])
      {
            ListBoxExample frame = new ListBoxExample();
            frame.setTitle("ListBox Java Example");
            frame.setBounds(200,250,150,200);
            frame.setDefaultCloseOperation(JFrame.EXIT_ON_CLOSE);
            frame.setVisible(true);
   }
 }
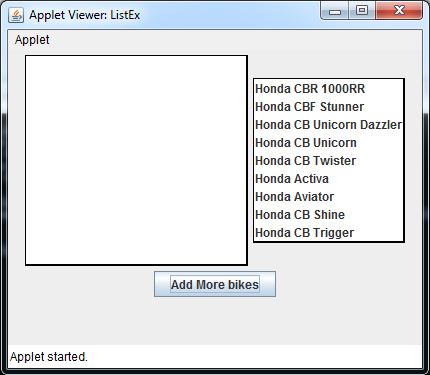
One of the another Example for JList is:
// <applet code=ListEx width=250 height=375> </applet>
 import javax.swing.*;
 import javax.swing.event.*;
 import java.awt.*;
 import java.awt.event.*;
 import javax.swing.border.*;
 public class ListEx extends JApplet
 {
     String[] bikes = { "Honda Activa", "Honda Aviator", "Honda CB Shine", "Honda CB Trigger", "Honda CB Twister", "Honda CB Unicorn","Honda CB Unicorn Dazzler",
 "Honda CBF Stunner","Honda CBR 1000RR","Honda CBR150R","Honda CB1000R","Honda CBR250R","Honda Dio" };
     DefaultListModel ListModel=new DefaultListModel();
     JList list = new JList(ListModel);
     JTextArea textarea = new JTextArea(bikes.length,20);
     JButton button = new JButton("Add More bikes");
     ActionListener Action = new ActionListener()
    {
        public void actionPerformed(ActionEvent e)
       {
                 if(count < bikes.length)
                  {
                          ListModel.add(0, bikes[count++]);
                  } else
                      {
                             button.setEnabled(false);
                      }
        }
    };
         ListSelectionListener ListSelection = new ListSelectionListener()
         {
             public void valueChanged(ListSelectionEvent e)
            {
                textarea.setText("");
                Object[] items=list.getSelectedValues();
                for(int i = 0; i < items.length; i++)
                     textarea.append(items[i] + "\n");
             }
         };
             int count = 0;
             public void init()
            {
                    Container cont = getContentPane();
                    textarea.setEditable(false);
                    cont.setLayout(new FlowLayout());
                    Border brd = BorderFactory.createMatteBorder( 1, 1, 2, 2, Color.black);
                    list.setBorder(brd);
                    textarea.setBorder(brd);
                    for(int i = 0; i < 4; i++)
                          ListModel.addElement(bikes[count++]);
                          cont.add(textarea);
                          cont.add(list);
                          cont.add(button);
                          list.addListSelectionListener(ListSelection);
                          button.addActionListener(Action);
             }

 }
JComboBox in Java Swing Example
As a group of radio buttons, a drop-down list is a form of forcing the user to select only one element of a group of possibilities. However, it is a more compact way to do this, and is easier to change the elements of the list without surprising the user.
The JComboBox component, similar to Choice component in AWT, is a combination of textfield and drop down list of items. User can make selection by clicking at an item from the list or by typing into the box. It can be created by instantiating the JCombobox class.
The Java JComboBox box is not like Windows, which lets you select from a list or type your own selection. With a box JComboBox is choose one and only one element of the list.
JComboBox methods
Method | Purpose |
void addItem(object) | Adds an item to the list |
void removeItem(object) | Removes an item from the list |
void removeAllItems() | Removes all items from the list |
object getItemAt(int) | Returns the list item at the index position specified by the integer argument |
int getItemCount() | Returns the number of items in the list |
int getMaximumRowCount() | Returns the maximum number of items the combo box can display without a scroll bar |
int getSelectedIndex() | Returns the position of the currently selected item |
object getSelectedItem() | Returns the currently selected item |
object[] getSelectedobjects() | Returns an array containing selected objects |
void setEditable(boolean) | Sets the field to be editable or not editable |
void setMaximumRowCount(int) | Sets the number of rows in the combo box that can display at one time |
void setSelectedIndex(int) | Selects the index at the position indicated by the argument |
void setSelectedItem(object) | Sets the selected item in the combo box display area to be the object argument |
In the following example, the JComboBox box starts with a number of inputs and then new entries are added when a button is pressed.
import javax.swing.*;
 import java.awt.*;
 class ComboBoxExample extends JFrame
 {
     ComboBoxExample()
     {
       setLayout(new FlowLayout());
       String[] month = {"Jan","feb","mar","Apr","May","Jun","Jul","Aug","sep","oct","Nov","Dec"};
       JLabel lblDay = new JLabel("Day");
       JLabel lblMonth = new JLabel("Month");
       JLabel lblYear = new JLabel("Year");
       JComboBox cboDay = new JComboBox();
       JComboBox cboMonth = new JComboBox(month);
       JComboBox cboyear = new JComboBox();
           for(int i=1;i<=31;i++)
                cboDay.addItem(i);
                for(int i=2009;i>1970;i--)
                     add(lblDay);   add(cboDay);
                     add(lblMonth); add(cboMonth);
                     add(lblYear);  add(cboyear);
    }
 }
  class JComboBoxJavaExample
  {
      public static void main(String args[])
      {
            ComboBoxExample frame = new ComboBoxExample();
            frame.setTitle("ComboBox Java Example");
            frame.setBounds(200,250,350,50);
            frame.setDefaultCloseOperation(JFrame.EXIT_ON_CLOSE);
            frame.setVisible(true);
    }
  }

JRadioButton Example in Java Swing
The radiobutton component is a two state button which can either be selected or not selected, similar to a checkbox component. However, unlike checkboxes, the radiobuttons are associated with a group and only one radiobutton in a group can be selected. When the radiobutton in the group is selected, any other previously selected radiobutton in the group is deselected. The JRadioButton class is a subclass of JToggleButton which is further a subclass of AbstractButton.
For a set of radio buttons are grouped so that only one can be selected, you must use an object of the class ButtonGroup. So, to group radio buttons, simply have to invoke the following method in the Button class Group:
The following table shows some of the JRadioButton class methods:
Method | Description |
JRadioButton() | Creates a radio button with no text and no selected . |
JRadioButton(Icon) | Create an unselected unlabeled icon with the provided parameter |
JRadioButton(Icon, boolean) | Create an unlabeled icon with the button provided and the state parameter |
JRadioButton(String) | Create an unselected with the wording provided parameter button |
JRadioButton(String, boolean) | Creates a radio button with text and status specified |
JRadioButton(String, Icon) | Create an unselected with label and icon button provided parameter |
JRadioButton(String, Icon, boolean) | Create a button with the label, icon and provided state parameter |
setSelected(boolean)
public boolean isSelected () | sets whether the radio button is on or selected (true or false)
determines if the button is selected or not. |
ButtonGroup() | Creates a group for radio buttons |
Namegroup.add(JRadioButton)
public void add (AbstractButton b) | Adds a radio button to a group
add button to button group so that only one button in the group may be selected at any given time. |
import javax.swing.*;
import java.awt.*;
class RadioButtonExample extends JFrame
{
    RadioButtonExample()
    {
         setLayout(new FlowLayout());
         JLabel lbSex = new JLabel("SEX");
         JRadioButton rdbtMale = new JRadioButton("Male");
         JRadioButton rdbtfemale = new JRadioButton("Female", true);
         ButtonGroup sex = new ButtonGroup();
         sex.add(rdbtMale);
         sex.add(rdbtfemale);
         add(lbSex);
         add(rdbtMale);
         add(rdbtfemale);
     }
}
  class JRadioButtonJavaExample
  {
      public static void main(String args[])
     {
         RadioButtonExample frame = new RadioButtonExample();
         frame.setTitle ("JRadioButton Java Example");
         frame.setBounds(200,250,250,100);
         frame.setDefaultCloseOperation(JFrame.EXIT_ON_CLOSE);
         frame.setVisible(true);
    }
  }

JCheckBox in Java Swing Example
A checkbox component in Swing is similar to checkbox component in AWT. A check box is a control that consists of a combination of a small box and a label. The label provides the description of the box with which it is associated. It is a two-state control having states true (checked) and false (unchecked). The state of a checkbox can be changed by clicking on it. A checkbox is an object of JCheckBox class.
The following table shows some methods of this class:
Method | Description |
JCheckBox() | Creates a checkbox without text and not selected |
JCheckBox(Str,bool) | Creates a checkbox with the specified text and status |
isSelected() | Returns whether the checkbox is selected (true) or not (false) |
setSelected(boolean b) | selects if b is true, and marks it as selected if it is false; |
String getText() | it returns the text associated with the JCheckBox. This operation replaces getLabel it has become deprecated; |
setEnabled(boolean b) | enable or disable the component so that it can be usable or not by the user. |
import javax.swing.*;
 import java.awt.*;
 class CheckBoxExample extends JFrame
 {
    CheckBoxExample()
    {
      setLayout(new FlowLayout());
      JLabel lblHobbies = new JLabel("HOBBIES");
      JCheckBox chkSports = new JCheckBox("Sports");
      JCheckBox chkMusic = new JCheckBox("Music",true);
      JCheckBox chkReading = new JCheckBox("Reading");
      add(lblHobbies);
      add(chkSports);
      add(chkMusic);
      add(chkReading);
    }
 }
   class CheckBoxJavaExample
  {
       public static void main(String args[])
      {
              CheckBoxExample frame = new CheckBoxExample();
              frame.setTitle("JCheckBox Java Example");
              frame.setBounds(200,250,350,100);
              frame.setDefaultCloseOperation(JFrame.EXIT_ON_CLOSE);
              frame.setResizable(false);
              frame.setVisible(true);
       }
  }

JTextField in Java Swing Example
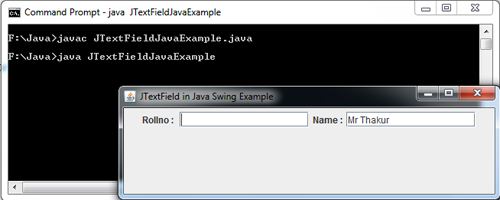
A Textfield is a component used for displaying, inputting and editing a single line of plain text. We can create text field by creating an instance of JTextField class. The JTextComponent is a superclass of JTextField that provides common set of methods used by JTextfield.
The following table shows some methods of this class:
Method | Description |
JTextField() | Constructs anew textfield |
JTextField(int) | Constructsa textfield withthe number of columns(size) entered |
JTextField(String) | Constructsa textfield with the specified text |
setText(String) | Sets the textof the textfield to the given |
getText() | Returns the text of the textfield
|
setEnabled(boolean) | Sets whetherthe textfield is enabled(true) or disabled(false) |
import javax.swing.*;
 import java.awt.*;
 class JTextFieldExample extends JFrame
 {
    JTextFieldExample()
    {
        setLayout(new FlowLayout());
        JLabel lblRollno = new JLabel("Rollno : ");
        JTextField txtRollno = new JTextField(15);
        JLabel lblName = new JLabel("Name :");
        JTextField txtName = new JTextField("Mr Thakur",15);
        add(lblRollno); add(txtRollno);
        add(lblName); add(txtName);
    }
 }
  class JTextFieldJavaExample
  {
        public static void main(String args[])
       {
            JTextFieldExample frame = new JTextFieldExample();
             frame.setTitle("JTextField in Java Swing Example");
             frame.setBounds(200,250,150,150);
             frame.setDefaultCloseOperation(JFrame.EXIT_ON_CLOSE);

             frame.setVisible(true);
   }
 }
