• Skip to main content
  • Skip to primary sidebar
  • Skip to secondary sidebar
  • Skip to footer

Computer Notes

Library
    • Computer Fundamental
    • Computer Memory
    • DBMS Tutorial
    • Operating System
    • Computer Networking
    • C Programming
    • C++ Programming
    • Java Programming
    • C# Programming
    • SQL Tutorial
    • Management Tutorial
    • Computer Graphics
    • Compiler Design
    • Style Sheet
    • JavaScript Tutorial
    • Html Tutorial
    • Wordpress Tutorial
    • Python Tutorial
    • PHP Tutorial
    • JSP Tutorial
    • AngularJS Tutorial
    • Data Structures
    • E Commerce Tutorial
    • Visual Basic
    • Structs2 Tutorial
    • Digital Electronics
    • Internet Terms
    • Servlet Tutorial
    • Software Engineering
    • Interviews Questions
    • Basic Terms
    • Troubleshooting
Menu

Header Right

Home » Java » Java

JButton in Java Swing Example

By Dinesh Thakur

The Buttons component in Swing is similar to the Button component in AWT except that it can contain text, image or both. It can be created by instantiating the JButton class. The JButton class is a subclass of AbstractButton class.

To the text on the face of an object is called JButton button label. Having more than one JButton object with the same tag makes the JButton objects are ambiguous for the user (each button label must be unique).

A JButton can display Icon objects, this provides an additional level of visual interactivity. You can also have a replacement object, which is an Icon object that appears when the mouse is positioned over the button, the button icon changes as the mouse is away from and toward the area of the button on the screen.

The following table shows some methods of JButton class:


Method

Description

JButton()                          

Constructs a button with no text

JButton(String)               

Constructs a button with the text entered

JButton(String, Icon)     

Constructs abutton with thetext andinformedimage

getText()                            

Gets the button text

setText(String)                

Sets the button text

setEnabled(boolean)      

Sets whether the button is enabled (true) or disabled (false)

import javax.swing.* ; 
import java.awt.*;
class JButtonExample extends JFrame
{
   JButtonExample()
   {
         setLayout(new FlowLayout());
         JButton btnOk = new JButton("OK");
         ImageIcon icon = new ImageIcon("check.png");
         JButton btnIcon = new JButton(icon);
         JButton btnTxtIcon = new JButton("OK",icon);
         add(btnOk);
         add(btnIcon);
         add(btnTxtIcon);
   }
}
 class JButtonJavaExample
 {
      public static void main(String args [])
      {
           JButtonExample frame = new JButtonExample();
           frame.setTitle("JButton in Java Swing Example");
           frame.setBounds(200,250,250,100);
           frame.setDefaultCloseOperation(JFrame.EXIT_ON_CLOSE);
           frame.setVisible(true);
      }
 }
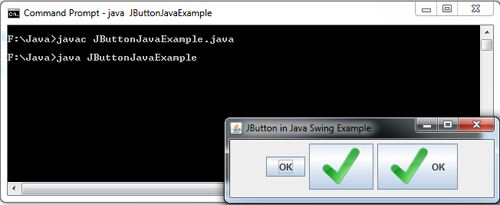
JButton in Java Swing Example

JPasswordField in Java Swing Example

By Dinesh Thakur

The PasswordField is a special kind of textfield. It is a single line textfield used for accepting passwords without displaying the characters typed in. Each typed character is represented by an echo character typically an astriek (*). To create a PasswordField component, instantiate the JpasswordField class.

import javax.swing.*; 
import java.awt.* ;
class JPasswordFieldExample extends JFrame
{
     JPasswordFieldExample()
    {
        setLayout(new FlowLayout());
        JLabel lblUserid = new JLabel("Userid");
        JTextField txtUserid = new JTextField("Mr Thakur",15);
        JLabel lblpassword = new JLabel("password");
        JPasswordField txtpassword = new JPasswordField(15);
        add(lblUserid); add(txtUserid);
        add(lblpassword); add(txtpassword);
    }
}
 class JPasswordFieldJavaExample
 {
       public static void main(String args[])
      { 
           JPasswordFieldExample frame = new JPasswordFieldExample();
           frame.setTitle("JPasswordField in Java Swing Example");
           frame.setBounds(200,250,250,150);
           frame.setDefaultCloseOperation(JFrame.EXIT_ON_CLOSE);
           frame.setVisible(true);
     }
}
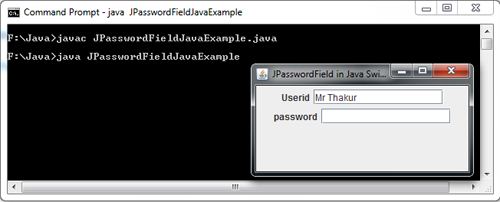
JPasswordField in Java Swing Example

JTextArea in Java Swing Example

By Dinesh Thakur

The TextArea component in swing is similar to the TextArea component in AWT as it allows to display and edit multiple lines of plaintext. But unlike TextArea component in AWT, if all the text cannot be displayed in the available space in the component, scrollbars are not automatically added. In order to add scrollbars, you must insert it into a ScrollPane.

Commonly used methods of this latter component are:


Methods

Description

public JTextArea ():

creates a new text area with 0 rows and columns;

public JTextArea (int rows, int columns)

created with the number of rows and columns;

public JTextArea (String text, int rows, int columns):

same as above but with an initial text;

getRows public int ():

returns the number of rows;

getColumns public int ():

Returns the number of columns;

public void append (String text):

concatenates the text at the end of the existing text in the JTextArea;

public void insert (String text, int position

Inserts text at the specified position


This component is often used within a JScrollPane container. Thus when the number of lines is that the component is larger than the space allocated for distribution manager scroll bars appear.

import javax.swing.*; 
import java.awt.*;
class JTextAreaExample extends JFrame
{
    JTextAreaExample()
    {
         setLayout(new FlowLayout());
         JLabel label = new JLabel("Comments : ");
         JTextArea txtArea = new JTextArea("TextArea with 3 rows and 15 column",3,15);
         txtArea.setLineWrap(true);
         txtArea.setWrapStyleWord(true);
         add(label);
         add(txtArea);
    }
}
 class JTextAreaJavaExample
{
       public static void main(String args[])
      {
           JTextAreaExample frame = new JTextAreaExample();
           frame.setTitle("JTextArea in Java Swing Example");
           frame.setBounds(200,250,350,150);
           frame.setDefaultCloseOperation(JFrame.EXIT_ON_CLOSE);
           frame.setVisible(true);
      }
}
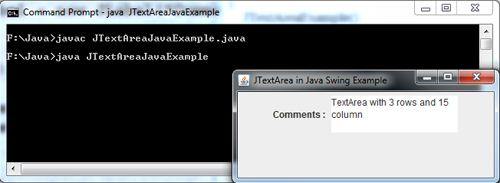
JTextArea in Java Swing Example

JLabel in Java Swing Example

By Dinesh Thakur

JLabel component in swing is similar to label in AWT except that it may contain uneditable text, an image or both. We can create label by creating an instance of JLabel class.


JLabel (label) does not react to user events so you can not get the keyboard focus. It often used in combination with other components which do not have the ability to demonstrate its purpose, for example, in combination with a JTextField serve us to tell the user what we expect to enter into it.

The following table shows some methods of this class:


Method  

Description

JLabel()                 

Constructs a label with no text

JLabel(String)     

Constructs a label with the text entered

JLabel(Icon)       

Constructs a label containing the specified image

setText(String)    

Sets the text to be shown

The JLabel class defines several methods to change the appearance of the component:

Method

Description

setText()

To initializeorchange the text displayed

setOpaque()

Indicates whether the component is transparent (false parameter) or opaque (true)

setBackground()

Specifies the background color of the component (setOpaque must be true)

setFont()

Specifiesthe text font

setForeGround()

Specifiesthe text color

setHorizontalAlignment()

Allows you to change the horizontal alignment of text and icon

setVerticalAlignment()

Allows you to change the vertical alignment of text and icon

setHorizontalTextAlignment()

Allows you to change the horizontal alignment of text only

setVerticalTextAlignment()

Allows you to change the vertical alignment of text only

setIcon()

Allows you to assign an icon

setDisabledIcon()

Sets the icon for the JLabel when disabled

[Read more…] about JLabel in Java Swing Example

JFrame Class in Java Example

By Dinesh Thakur

Another way of creating an application window is by defining a new class that extends the JFrame class. The new class will inherit fields and methods from the JFrame class. This technique is a preferred style for creating GUI applications.

In this Example, we have created a class named JFrameClassExample that extends the JFrame class. The constructor of the JFrameClassExample class contains the statement that constructs the user interface.

The statements.

FlowLayout layout = new FlowLayout();

setLayout(layout);

sets the layout manager for the container object ( i.e. JFrame).

The statements used for creating and setting layout can be combined as follows,

setLayout(new FlowLayout);

The statement,

JFrameClassExample frame = new JFrameClassExample ();

in the main () method instantiates an object of JFrameClassExampleclass which invokes the default constructor. This constructor sets the layout of the frame to FlowLayout and adds two buttons using the add () method with labels OK and Cancel into it.

The statement,

frame.setTitle(“JFrame Class in Java Example”);

sets the specified argument as the title of the frame. The other statements in the main () method work as usual.

import javax.swing.*; 
import java.awt.*;
class JFrameClassExample extends JFrame
{
    JFrameClassExample()
    {
         FlowLayout layout = new FlowLayout();
         setLayout(layout);
         JButton ok = new JButton("OK");
         JButton cancel = new JButton("Cancel");
         add(ok);
         add(cancel);
     }
}
 class JFrameClassJavaExample
 {
     public static void main(String args[])
    {
        JFrameClassExample frame = new JFrameClassExample();
        frame.setTitle("JFrame Class in Java Example");
        frame.setBounds(200,250,350,150);
        frame.setDefaultCloseOperation(JFrame.EXIT_ON_CLOSE);
        frame.setVisible(true);
    }
}
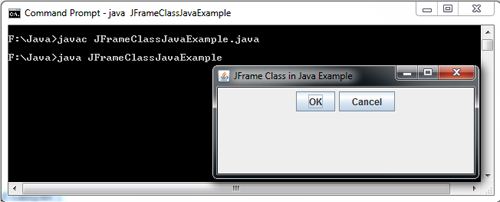
JFrame Class in Java Example

Add Components to JFrame Java Example

By Dinesh Thakur

In order to add a component to a container, first create an instance of the desired component and then call the add () method of the Container class to add it to a window. The add() method has many forms and one of these is,

Component add (Component c)

This method adds an instance of Component (i.e. c) to the container. The component added is automatically visible whenever its parent window is displayed.

import javax.swing.*; 
class AddComponentJFrame
{
      public static void main(String args[])
     {
           JFrame frame = new JFrame("Add Components to JFrame Java Example");
           JButton button = new JButton("OK");
           frame.add(button);
           frame.setBounds(200,100,300,250);
           frame.setDefaultCloseOperation(JFrame.EXIT_ON_CLOSE);
           frame.setVisible(true);
    }
  }
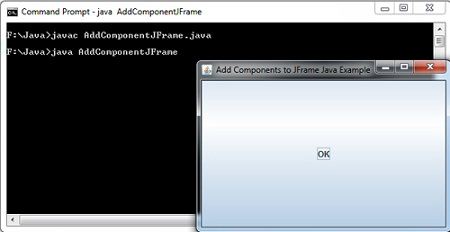
Add Components to JFrame Java Example

JFrame in Java Example

By Dinesh Thakur

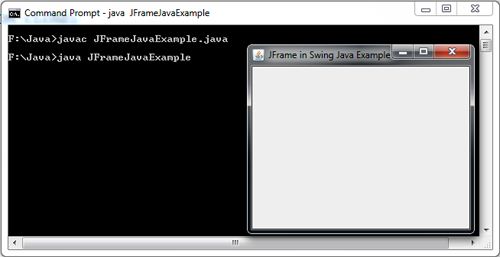
Every program with a Swing GUI must contain atleast one top level swing container and JFrame is the most commonly used top level container for creating GUI applications.

So in order to create frame, you will have to create an instance of class JFrame or a subclass of JFrame. When working with JFrame objects, the following steps are basically followed to get a JFrame window to appear on the screen.

1. Create an object of type JFrame.

2. Give the JFrame object a size or/and location using setSize () or setBounds () methods.

3. Make the JFrame object appear on the screen by calling setVisible () method.


JFrame Method


Method

Purpose

void setTitle(String)

Sets a JFrame’s title using the String argument

void setSize(int ,int)

Sets a JFrame’s size in pixels with the width and height as arguments

void setSize(Dimension)

Sets a JFrame’s size using a Dimension class object, the Dimension(int ,int) constructor creates an object that represents both a width and a height

String (getTitle)

Returns a JFrame’s title

void setResizable(boolean)

Sets the JFrame to be resizable by passing true to the method, or sets the JFrame not to be resizable by passing false to the method

boolean isResizable()

Returns true or false to indicate whether the JFrame is resizable

void setVisible(boolean)

Sets a JFrame to be visible using the boolean argument true and invisible using the boolean aruement false

void setBounds(int,int, int,int)

Overrides the default behaviour for the JFrame to be positioned in the upper-left corner of the computer screen’s desktop. The first two arguments are the horizontal and vertical positions of the JFrame’s upper-left corner on  the desktop. The final two arguments set the width and height

import javax.swing.*; 
class JFrameJavaExample
{
    public static void main(String args[])
   {
       JFrame frame = new JFrame("JFrame in Swing Java Example");
       frame.setSize(300,250);
       frame.setDefaultCloseOperation(JFrame.EXIT_ON_CLOSE);
       frame.setVisible(true); // display the frame
   }
}

JFrame in Java Example

Font Metrics in Java Example

By Dinesh Thakur

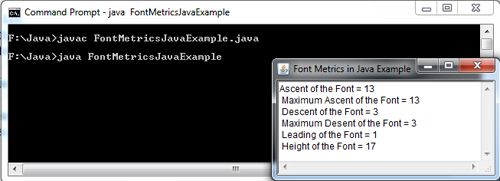
Sometimes you may want to know the precise information about the font such as height, ascent, decent and leading etc. For example, if you want to display string in the center of the panel.

This information is made available using the FontMetrics class. To use the FontMetrics class in Java, you need to understand the following terms that are used in FontMetrics class whichare the same as used by typesetters.

• Baseline: It refers to the line on which the bottom of the most characters occurs.

• Ascent: It is the distance from the baseline to the top of an ascender which is the upper part of a letter like b or k or an uppercase letter.

• Descent: It is the distance from the baseline to a descender which is the lower part of letters such as y or p.

• Leading: It is spacing between the descent of one line of text and the ascent of the next line of text.

• Height: It is the sum (in pixels) of the ascent, descent and leading values.

import java.awt.*; 
class FontMetricsExample extends Frame
{
     TextArea txtData;
     String str="" ;
     FontMetricsExample()
    {
           Font myfont = new Font("Serif",Font.BOLD,12);
           FontMetrics metrics = getFontMetrics(myfont);
           str=str+ "Ascent of the Font = " + metrics.getAscent();
           str = str + "\n Maximum Ascent of the Font = " + metrics.getMaxAscent();
           str = str + "\n Descent of the Font = " + metrics.getDescent();
           str = str + "\n Maximum Desent of the Font = " + metrics.getMaxDescent();
           str = str + "\n Leading of the Font = " + metrics.getLeading();
           str = str + "\n Height of the Font = " + metrics.getHeight();
           txtData=new TextArea(10,15);
           txtData.setText(str);
           add(txtData);
     }
}
 class FontMetricsJavaExample
 {
        public static void main(String [] args)
       {
             FontMetricsExample frame = new FontMetricsExample();
             frame.setTitle("Font Metrics in Java Example");
             frame.setSize(300,1500);
             frame.setVisible(true);
       }
 }
Font Metrics in Java Example

Font in Java Example

By Dinesh Thakur

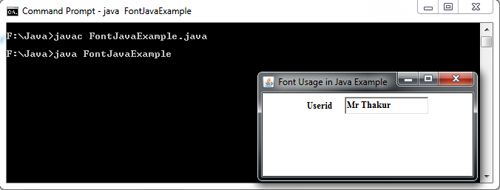
In order to set a different font, Java provides the Font class contained in java. awt package. You can create the Font object using the following constructor.

public Font(String name, int style, int size);

Here, the parameter namecorresponds to the logical font name. The logical font is one of the five font families supported by Java runtime environment. These include Serif, SansSerif,Monospaced,Dialog and DialogInput. The parameter style represents the Font shape which can take the values Font.Plain(0), Font.Bold(l), Font.Italic(2) and Font.Bold +Font. Italic (3). The parameter size specify the font size which can be any positive integer. The font size is measured in points. A point in 1/72 of an inch.


Font Useful Interface


Method

Returns

Notes

Font(String name, int style, int size)


Style is either Font.PLAIN, Font.BOLD, or Font.ITALIC

equals(Object ,obj)

Boolean

Use this to check for a font identical to  this one

getFamily()

String

Platform-specific font family name

getFont(String name)

Static Font

Looks up a font from a system property or null

getFont(String name, Font font)

Static Font

Same as above, but return the passed font if the property is not found

getName()

String

Returns the name of this font

getSize()

Int

The point size

getStyle()

Int

Style is either Font.PLAIN, Font.BOLD, or Font.ITALIC

isBold()

Boolean

A convenience method to avoid if (getStyle()== Font.PLAIN

isItalic()

Boolean

A convenience method

isPlain()

Boolean

A convenience method


import java.awt.*; 
class FontExample extends Frame
{
   FontExample()
   {
        setLayout(new FlowLayout());
        Font f = new Font("Serif",Font.BOLD,12);
        Label lblUserid = new Label("Userid");
        lblUserid.setFont(f);
        TextField txtUserid = new TextField("Mr Thakur",15);
        txtUserid.setFont(f);
        Button btnOK = new Button("OK");
        add(lblUserid); add(txtUserid);
    }
}
 class FontJavaExample
 {
       public static void main(String args[])
      {
           FontExample frame = new FontExample();
           frame.setTitle("Font Usage in Java Example");
           frame.setSize(250,150);
           frame.setVisible(true);
      }
}
FontJavaExample

Color in Java Example

By Dinesh Thakur

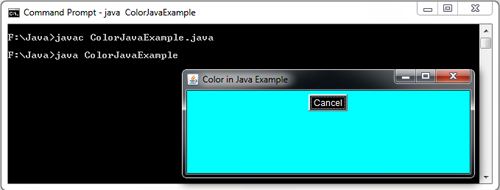
However, if you want to change the color of the text or GUI components, Java provides the Color class contained in java.awt.package. Every color is made up of red, green and blue components, each represented by an unsigned byte value that describes its intensity. You can specify the intensity of each color to be a value ranging from 0 to 255 where 0 represents the darkest shade and 255 represents the lightest shade. This is known as RGB model.

In order to create a Color object use the following constructors.

• public Color (int r, int g, int b) : The three parameters r, g, b correspond to the intensities of red, green and blue components of the Color respectively. The values that these parameters can hold range from 0 to 255. If you specify a value beyond this range then an IllegalArgumentException exception will be raised. For example: The statement.

Color c = newColor (255,200,0);

creates a Color object that represent the color orange. The first RGB component (i.e. 255) represents the amount of red, the second (i.e. 200) represents the amount of green and the third(i.e. 0) represents the amount of blue. Together these components form the orange color.

• public Color(float r, float g, float b): The three parameters r,g,b correspond to the intensities of red, green and blue components that can be represented by floating-point values in the range 0.0.to 1.0.


Color Interface


Method

Returns

Notes

Color(float r, float g, float b)


Each constructor has the same range of colors but receives them in various formats

Color(int rgb)


Color(int r, int g, int b)


brighter()

Color

The returned color is brighter by some color model specific amount

darker()

Color

The returned color is

darker  brighter by some color model specific amount

equals(Object obj)

Boolean

Is the passed object a color that has the same RGB component? 

getBlue()

Int

Gets the blue component of this color object

getColor(String name)

Static Color

Looks up the “name” in the system properties and converts the property into a color

getColor(String name, Color c)

Static Color

Looks up the “name” in the system properties and converts the property into a color; if the property doesn’t exist, returns the passed color

getColor(String name, int rgb)

Static Color

Looks up the “name” in the system properties and converts the property into a color; if the property doesn’t exist, returns a color that matches the passed int (in RGB format)

getGreen()

Int

Gets the green component of this color object

getHSBColor(float h, float s, float b)

Static Color

Returns a color that represents the passed hue, saturation, and brightness

getRed()

Int

Gets the red component of this color object

getRGB()

Int

Returns a 32-bit color where all components are in the range 0-255, red is in bits 16-23, green in 8-15, and blue is in 0-7

HSBtoRGB(float h, float s, float b)

Int

Same as HSBcolor(), except returns the color as an int in RGB format 

RGBtoHSB(int r, int g, int b, float hsbvals[])

Static float[]

Converts the passed integer color components to HSB form; if hsbvals is null, creates a new array of floats for the result; if a float array is passed for hsbvals, updates the passed array with the hue, saturation, and brightness


import java.awt.*; 
class ColorExample extends Frame
{
   ColorExample()
   {
          Color frameColor = new Color(0,255,255);
          setLayout(new FlowLayout());
          setBackground(frameColor);
          Button btnCancel = new Button("Cancel");
          btnCancel.setBackground(Color.BLACK);
          btnCancel.setForeground(Color.WHITE);
          add(btnCancel);
  
    }
}
 class ColorJavaExample
{
          public static void main(String args[])
       {
              ColorExample frame = new ColorExample();
              frame.setTitle("Color in Java Example");
              frame.setSize(400,150);
              frame.setVisible(true);
        }
}
Color in Java Example

PopupMenu in Java Example

By Dinesh Thakur

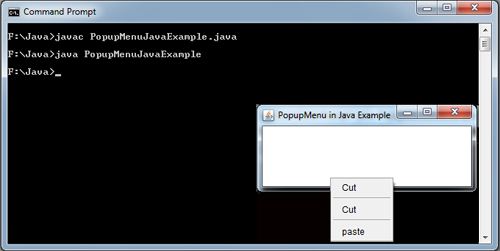
A popupmenu is a small window that pops up and displays a list of choices such as Cut, Copy, Paste, Select All etc. This menu is invisible until the user makes a platform specific mouse action such as pressing the right mouse button over a popup enabled component. The popup menu then appears under the cursor.

In order to create a pop up menu, java .awt .PopupMenu class is used. It is a subclass of Menu and is used very much like a Menu. It provides the following two constructors

• PopupMenu () – Creates an empty popup menu.

• PopupMenu (String title) – Creates an empty pop up menu with the as the title of the popup menu.

As expected, the AWT provides fairly complete support for creating applications using the menu bar (menu bar), drop down menus (pull-down menus) and  independent menu (pop-up menus) through set of classes briefly described following:

class

Description

MenuComponent

Abstract class that defines the behavior and structure Basic elements of the components menu.

MenuItem

class that defines a simple menu entry.

MenuBar

class that defines a menu bar for an application.

Menu

Class that defines a menu dropdown.

MenuShortCut

class that defines a shortcut to a menu item.

CheckboxMenuItem

class that defines a menu entry type option.

PopupMenu

class that defines an independent menu.

import java.awt.*; 
class PopupMenuExample extends Frame
{
     PopupMenu popupMenu;
     public PopupMenuExample()
    {
           setLayout(new FlowLayout());
           popupMenu = new PopupMenu();
           popupMenu.add(new MenuItem("Cut"));
           popupMenu.addSeparator();
           popupMenu.add(new MenuItem("Cut"));
           popupMenu.addSeparator();
           popupMenu.add(new MenuItem("paste"));
           add(popupMenu);   
           setTitle("PopupMenu in Java Example");
           setSize(300,120);
           setVisible(true);
           popupMenu.show(this,100,100);
    }
}
 class PopupMenuJavaExample
 {
        public static void main(String[] args)
       {
            PopupMenuExample frame = new PopupMenuExample();
       }
 }

PopupMenu in Java Example

Menu in Java Example

By Dinesh Thakur

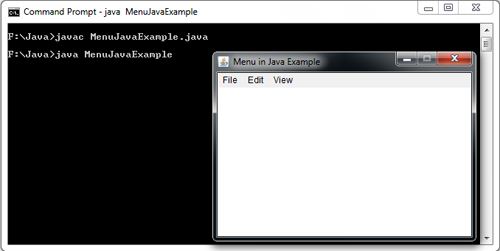
Creating a menu bar is straight forward. You have to simply create an instance of Java.awt.MenuBar which is a container for menus. It has only one constructor which is the default constructor as follows,

public MenuBar ()

Once you create the menu bar, you can add it to a frame with the setMenuBar () method of Frame class. One should remember that each application has only one menu.

The following statements create a menu bar and add it to the top of the frame.

Menubar menuBar = new MenuBar();

setMenubar(menuBar);

These statements are part of the class that extends Frame.

Initially the menubar is empty and you need to add menus before using it. Each menu is represented by an instance of class Menu. In order to create a Menu instance, you have to use the following constructor.

public Menu(String str)

where str represents the label for the menu. For example: In order to create a File menu, use the following statement

Menu menuFile = new Menu(“File”);

Similarly to create Edit and View menu, use the statements

Menu menuEdit = new Menu(“Edit”);

Menu menuView = new Menu (“View”);

Once the Menu objects are created, we need to add them to the menu bar. For this, you have to use

the add () method of the MenuBar class whose syntax is as follows,

Menu add (Menu menu)

where menu is Menu instance that is added to the menu bar. This method returns a reference to the menu. By default, consecutively added menus are positioned in the menu bar from left to right. This makes the first menu added the leftmost menu and the last menu added the rightmost menu. If you want to add a menu at a specific location, then use the following version of add ()method inherited from the Container class.

Component add (Component menu, int index)

where menu is added to the menu bar at the specified index. Indexing begins at 0, with 0 being the leftmost menu. For example: In order to add menu instance menuFile to the menuBar use the following statement,

menuBar.add(menuFile);

Similarly, add other Menu instances menuEdit,menuView using the following statements,

menuBar.add(menuEdit);

menuBar.add(menuView);

import java.awt.*; 
class MenuExample extends Frame
{
       MenuExample()
      {
           MenuBar menuBar = new MenuBar();
           setMenuBar(menuBar);
           Menu menuFile = new Menu("File");
           Menu menuEdit = new Menu("Edit");
           Menu menuView = new Menu("View");
           menuBar.add(menuFile);
           menuBar.add(menuEdit);
           menuBar.add(menuView);
           MenuItem itemOpen = new MenuItem("Open");
           MenuItem itemSave = new MenuItem("Save");
           MenuItem itemExit = new MenuItem("Exit");
           menuFile.add(itemOpen);
           menuFile.add(itemSave);
           menuFile.add(itemExit);
           MenuItem itemcopy = new MenuItem("Copy");
           menuEdit.add(itemcopy);
     }
}
  class MenuJavaExample
  {
          public static void main(String args[])
         {
              MenuExample frame = new MenuExample();
              frame.setTitle("Menu in Java Example");
              frame.setSize(350,250);
              frame.setResizable(false);
              frame.setVisible(true);
         }
  }
Menu in Java Example

GridBagLayout in Java Example

By Dinesh Thakur

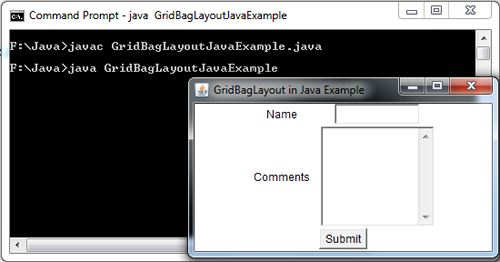
The java.awt.GridBagLayout layout manager is the most powerful and flexible of all the predefined layout managers but more complicated to use. Unlike GridLayout where the component are arranged in a rectangular grid and each component in the container is forced to be the same size, in GridBagLayout, components are also arranged in rectangular grid but can have different sizes and can occupy multiple rows or columns.

In order to create GridBagLayout, we first instantiate the GridBagLayout class by using its only no-arg constructor

public GridLayout();

and defining it as the current layout manager. The following statements accomplish this task;

GridBagLayout layout = new GridBagLayout();

setLayout(layout);

A GridBagLayout layout manager requires a lot of information to know where to put a component in a container. A helper class called GridBagConstraints provides all this information. It specifies constraints on how to position a component, how to distribute the component and how to resize and align them. Each component in a GridBagLayout has its own set of constraints, so you have to associate an object of type GridBagConstraints with each component before adding component to the container.

Instance variables to manipulate the GridBagLayout object Constraints are:


Variable

Role

gridx and gridy

These contain the coordinates of the origin of the grid. They allow a at a specific position of a component positioning. By default, they have GrigBagConstraint.RELATIVE value which indicates that a component can be stored to the right of previous

gridwidth, gridheight

Define how many cells will occupy component (height and width). by The default is 1. The indication is relative to the other components of the line or the column. The GridBagConstraints.REMAINDER value specifies that the next component inserted will be the last of the line or the current column. the value GridBagConstraints.RELATIVE up the component after the last component of a row or column.

fill

Defines the fate of a component smaller than the grid cell.
GridBagConstraints.NONE retains the original size: Default
GridBagConstraints.HORIZONTAL expanded horizontally
GridBagConstraints.VERTICAL GridBagConstraints.BOTH expanded vertically expanded to the dimensions of the cell

ipadx, ipady

Used to define the horizontal and vertical expansion of components. not works if expansion is required by fill. The default value is (0,0).

anchor

When a component is smaller than the cell in which it is inserted, it can be positioned using this variable to define the side from which the control should be aligned within the cell. Possible variables NORTH, NORTHWEST, NORTHEAST, SOUTH, SOUTHWEST, SOUTHEAST, WEST and EAST

weightx, weighty

Used to define the distribution of space in case of change of dimension


import java.awt.*; 
class GridBagLayoutExample extends Frame
{
     GridBagLayoutExample()
     {  
         Label lblName = new Label("Name");
         TextField txtName =new TextField(10);
         Label lblcomments = new Label("Comments");
         TextArea TAreaComments=new TextArea(6,15);
         Button btnSubmit = new Button("Submit");
         setLayout(new GridBagLayout());
         GridBagConstraints gc =new GridBagConstraints();
         add(lblName,gc,0,0,1,1,0,0);
         add(txtName,gc,1,0,1,1,0,20);
         add(lblcomments,gc,0,1,1,1,0,0);
         add(TAreaComments,gc,1,1,1,1,0,60);
         add(btnSubmit,gc,0,2,2,1,0,20);
     }
    void add(Component comp,GridBagConstraints gc,int x,int y,int w,int h,int wx,int wy)
     {   
         gc.gridx = x;
         gc.gridy = y;
         gc.gridwidth = w;
         gc.gridheight= h;
         gc.weightx = wx;
         gc.weighty = wy;
         add(comp,gc);
     }
}
   class GridBagLayoutJavaExample
  {
        public static void main(String args[])
       {
             GridBagLayoutExample frame = new GridBagLayoutExample();
             frame.setTitle("GridBagLayout in Java Example");
             frame.setSize(300,200);
             frame.setVisible(true);
       }
  }
GridBagLayout in Java Example

CardLayout in Java Example

By Dinesh Thakur

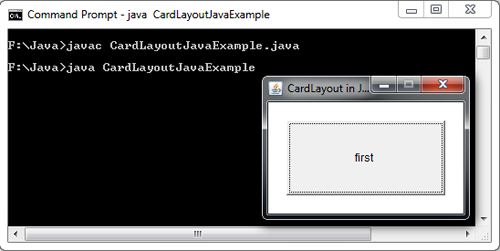
The java.awt.CardLayout layout manager is significantly different from the other layout managers. Unlike other layout managers, that display all the components within the container at once, a CardLayout layout manager displays only one component at a time (The component could be a component or another container).

Each component in a container with this layout fills the entire container. The name cardlayout evolves from a stack of cards where one card is piled upon another and only one of them is shown. In this layout, the first component that you add to the container will be at the top of stack and therefore visible and the last one will be at the bottom.


Java.awt.CardLayout the class selected the following constructors and methods: 

Method

Description

CardLayout ()

Creates a new layout manager without spacing between regions.

CardLayout (int, int)

Creates a new layout manager with the spacing horizontal and vertical specified.

first (Container)

Displays the first component added to the layout container specified

getHgap ()

Gets the horizontal spacing.

getVgap ()

Gets the vertical spacing.

last (Container)

Returns the last component added to the layout container specified

next (Container)

Returns the next component added to the layout container specified

previous (Container)

Displays the previous component added to the layout container specified

setHgap (int)

Specifies the horizontal spacing.

setVgap (int)

Specifies the vertical spacing.


import java.awt.*;   
import java.awt.event.*;
class CardLayoutExample extends Frame implements ActionListener
{
     CardLayout card = new CardLayout(20,20);
     CardLayoutExample()
     {
         setLayout(card);
         Button Btnfirst = new Button("first ");
         Button BtnSecond = new Button ("Second");
         Button BtnThird = new Button("Third");
         add(Btnfirst,"Card1");
         add(BtnSecond,"Card2");
         add(BtnThird,"Card3");
         Btnfirst.addActionListener(this);
         BtnSecond.addActionListener (this);
         BtnThird.addActionListener(this);
     }
     public void actionPerformed(ActionEvent e)
     {
       card.next(this);
     }
}
   class CardLayoutJavaExample
   {
        public static void main(String args[])
       {
            CardLayoutExample frame = new CardLayoutExample();
            frame.setTitle("CardLayout in Java Example");
            frame.setSize(220,150);
            frame.setResizable(false);
            frame.setVisible(true);
       }
   }
CardLayout in Java Example

GridLayout in Java Example

By Dinesh Thakur

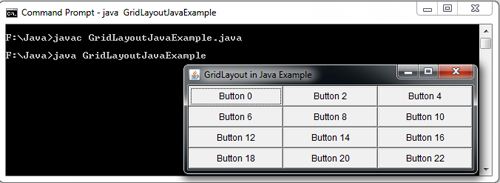
The GridLayout layout manager divides the container into a rectangular grid so that component can be placed in rows and column. The intersection of each row and column is known as a cell. The components are laid out in cells and each cell has the same size, components are added to a GridLayout starting at the top left cell of the grid and continuing to the right until the row is full. The process continues left to right on the next row of the grid and so on.

The java.awt.GridLayout class contain the following constructors and methods that can use to customize this manager:

Method

Description

GridLayout ()

Creates a GridLayout manager with a default row and a column.

GridLayout (int, int)

Creates a GridLayout manager with the number of rows and columns specified.

GridLayout (int, int, int, int)

Creates a GridLayout manager with the number of specified rows and columns and alignment, horizontal and vertical spacing data.

getColumns ()

Gets the number of columns in the layout.

getHgap ()

Gets the horizontal spacing.

getRows ()

Gets the number of rows of the layout.

getVgap ()

Gets the vertical spacing.

SetColumns ()

Specifies the number of columns in the layout.

setHgap (int)

Specifies the horizontal spacing.

SetRows ()

Specifies the number of rows of the layout.

setVgap (int)

Specifies the vertical spacing.


import java.awt.*; 
class GridLayoutExample extends Frame
{
    GridLayoutExample()
    {
         Button[] button =new Button[12];
         setLayout(new  GridLayout(4,3));
         for(int i=0; i<button.length;i++)
            {
               button[i]=new Button("Button "+(i+i));
               add(button[i]);
            }
     }
}
  class GridLayoutJavaExample
  {
      public static void main(String args[])
      {
          GridLayoutExample frame = new GridLayoutExample();
          frame.setTitle("GridLayout in Java Example");
          frame.setSize(400,150);
          frame.setVisible(true);
      }
  }
GridLayout in Java Example

BorderLayout in Java Example

By Dinesh Thakur

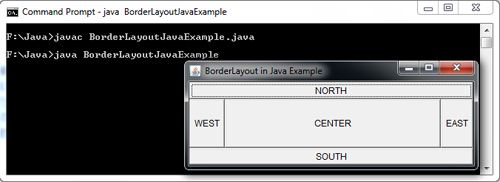
The BorderLayout layout manager divides the container into five regions that are named geographically: Top (north), lower (south), left (west), right (east) and central (center). North corresponds to the top of the container. You can add only one component per region to a container controlled by a BorderLayout layout manager. However, this limitation can be overcome by adding a container with multiple components (such as Panel). Components laid out by this layout manager normally do not get to have their preferred size.

The components added to the NORTH or SOUTH regions will get its width equal to the width of the container while maintaining their preferred height. The components added to the EAST or WEST regions will get its height equal to the height of the container minus any components in NORTH or SOUTH while maintaining their preferred width. The component that are added to the CENTER will fill up the rest of the space in horizontal and vertical dimensions. BorderLayout is the default layout manager for a JApplet, JFrame, JDialog and JWindow.

The java.awt.BorderLayout class contain the following constructors and methods that can use to customize this manager:


Method

Description

BorderLayout ()

Creates a new layout manager without spacing between regions.

BorderLayout (int, int)

Creates a new layout manager with the spacing horizontal and vertical specified.

getHgap ()

Gets the horizontal spacing.

getVgap ()

Gets the vertical spacing.

setHgap (int)

Specifies the horizontal spacing.

setVgap (int)

Specifies the vertical spacing.


import java.awt.*; 
class BorderLayoutExample extends Frame
{
    BorderLayoutExample()
    {
         setLayout(new BorderLayout());
         add(new Button("NORTH"),BorderLayout.NORTH);
         add(new Button("SOUTH"),BorderLayout.SOUTH);
         add(new Button("EAST"),BorderLayout.EAST);
         add(new Button("WEST"),BorderLayout.WEST);
         add(new Button("CENTER"),BorderLayout.CENTER);
     }
}
   class BorderLayoutJavaExample
   {
       public static void main(String args[])
      {
          BorderLayoutExample frame = new BorderLayoutExample();
          frame.setTitle("BorderLayout in Java Example");
          frame.setSize(400,150);
          frame.setVisible(true);
      }
  }
BorderLayout in Java Example

FlowLayout in Java Example

By Dinesh Thakur

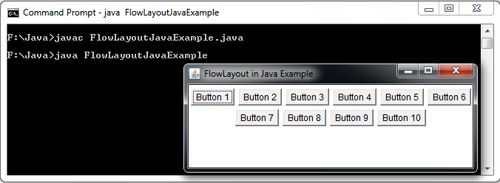
The FlowLayout is one the most popular and simplest layout manager. It places components in a container from left to right in the order in which they were added to the container. When one row is filled, layout advances to the next row. It is analogous to lines of text in a paragraph. Components managed by a FlowLayout are always set to their preferred size (both width and height) regardless of the size of the parent container. Whenever the container is resized then the components in the container are also adjusted from the top-left comer. The FlowLayout is the default layout manager for a Panel, Applet and JPanel.

The java.awt.FlowLayout class contain the following constructors and methods:

Method

Description

FlowLayout ()

Creates a default FlowLayout manager: centered alignment, horizontal spacing and 5 vertical units.

FlowLayout (int)

Creates a FlowLayout manager with alignment and given horizontal and vertical spacing of 5 units.

FlowLayout (int, int, int)

Creates a FlowLayout manager with alignment, horizontal and vertical spacing data.

getAlignment ()

Gets the alignment of this layout.

getHgap ()

Gets the horizontal spacing.

getVgap ()

Gets the vertical spacing.

setAlignment (int)

Specifies the alignment of this layout.

setHgap (int)

Specifies the horizontal spacing.

setVgap (int)

Specifies the vertical spacing.


Also has the constant–FlowLayout.LEFT, and FlowLayout.CENTER FlowLayout.RIGHT who can be used to specify or determine the alignment of this layout manager.

import java.awt.*; 
class FlowLayoutExample extends Frame
{
     FlowLayoutExample()
     {
         Button[] button =new Button[10];
         setLayout(new FlowLayout());
         for(int i=0;i<button.length;i++)
             {
                  button[i]=new Button("Button "+(i+1));
                  add(button[i]);
             }
       }
}
  class FlowLayoutJavaExample
  {
       public static void main(String args[])
      {
             FlowLayoutExample frame = new FlowLayoutExample();
             frame.setTitle("FlowLayout in Java Example");
             frame.setSize(400,150);
             frame.setVisible(true);
       }
  }
FlowLayout in Java Example

setLayout in Java Example

By Dinesh Thakur

How does Java come to know where to place the component into the container. One possible way is to tell it manually. By manually, we mean that you have to specify the size and position of each component yourself.

import java.awt.*; 
class setLayoutExample extends Frame
{
      setLayoutExample()
      {
            setLayout(null);
            Label lblRollno = new Label("Rollno : ");
            lblRollno.setSize(50,120);
            TextField txtRollno = new TextField(15);
            txtRollno.setSize(50,120);
            add(lblRollno); add(txtRollno);   
       }
}
   class setLayoutJavaExample
  {
        public static void main(String args[])
       {
           setLayoutExample frame = new setLayoutExample();
           frame.setTitle("Manually setLayout in Java Example");
           frame.setSize(250,150);
           frame.setVisible(true);
      }
  }
Panels in Java Example

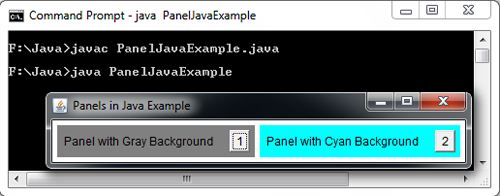
By Dinesh Thakur

The java.awt.Panel or Panel is a container that is designed to group a set of components, including other panels. It is visually represented as window that does not contain a title bar, menu bar or border. Panels are represented by objects created from Panel class by calling the constructor. The java.awt.Panel class has two constructors:


Method

Description

Panel ()

Constructs a panel with the default alignment (FlowLayout).

Panel (LayoutManager)

Constructs a panel with the specified alignment.

java.awt.Panel class shares the following methods with their ancestor class java.awt.Container.


Method

Description

add (Component)

Adds the specified component to the container.

add (Component, int)

Adds the specified component to the container in position indicated.

doLayout ()

Cause the rearrangement of the components of the container according to its layout.

getComponent (int)

Obtain a reference to the indicated component.

getComponentsCount ()

Returns the number of components in the container.

getComponentAt (int, int)

Obtain a reference to the existing component given position.

GetLayout ()

Gets the layout manager for the container.

paint (Graphics)

Renders the container.

remove (int)

Removes the given component.

removeAll ()

Removes all the components of the container.

setLayout (LayoutManager)

Specifies the layout manager for the container.

updates (Graphics)

Updates the rendering of the container.


After the panel has been created, other components can be added to Panel object by calling its add (Component c) method inherited from the Container class. The following code fragment demonstrates creating a panel and adding two buttons to it.

Panel p = new Panel();

p. add (new Button (“OK”);

p.add(new Button(“Cancel”);

Using panels, you can design complex GUls.

import java.awt.*; 
class PanelExample extends Frame
{
       Panel panel1,panel2,panel3 ;
       Label  lblpanel1,lblpanel2,lblpanel3;
       PanelExample()
       {
            setLayout(new FlowLayout());
            panel1 = new Panel();
            lblpanel1 = new Label("Panel with Gray Background");
            panel1.add(lblpanel1);
            Button bt1 = new Button("1");
            panel1.add(bt1);
            panel1.setBackground(Color.gray);
            add(panel1);
            panel2=new Panel();
            lblpanel2 = new Label("Panel with Cyan Background");
            panel2.add(lblpanel2);
            Button bt2 = new Button("2");
            panel2.add(bt2);
            panel2.setBackground(Color.cyan);
            add(panel2);
       }
}
    class PanelJavaExample
    {
         public static void main(String[] args)
        {
             PanelExample frame = new PanelExample();
             frame.setTitle("Panels in Java Example");
             frame.setSize(250,200);
             frame.pack();
             frame.setVisible(true);
        }
   }
Panels in Java Example

Scrollbar in Java Example

By Dinesh Thakur

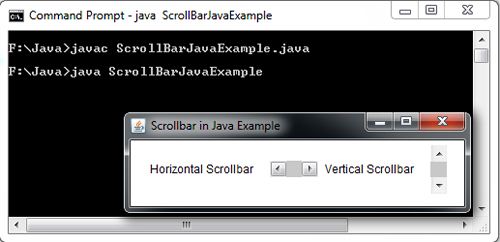
A scrollbar is a component that allows a user to select any numeric value by dragging a slider within a range defined by a minimum and maximum. A scrollbar may be oriented horizontally or vertically. A scrollbar consists of several individual parts: arrows (the buttons at each end of the scrollbar), a slider box or thumb (scrollable box you slide) and a track (part of the scrollbar you slide the thumb in).

Whenever the user clicks the arrows on either end, the current value of the scrollbar is modified by a unit depending upon direction of the arrows. The slider box indicates the current value of the scrollbar. The user can also click anywhere on the track to move the slider box to jump in that direction by some value larger than 1. It can be formed with the following constructors:

Scrollbar();
Scrollbar(int style);
Scrollbar(int style. int initialvalue, int thumbsize,int min. int max);
The second constructor creates a scroll bar with specified orientation, that is, horizontal or vertical. The third form specifies the initial value and the maximal value along with the thumb size. After initiating the Scroll with the default constructor, the values can be set using the following method:
void setValues(int initial. int thumbsize. int max);
The methods getValue() and setValue() are used to get and set the value of the scroll bar at a particular instant. The unit increment and block increment can be set using the methods:
void setUnitlncrement(int new)
void setBlocklncrement(int new)
The minimum value and the maximum value of the scrollbar can be obtained using getMinimum( ) and getMaximum( ) methods. There are two types of the scrollbarsvertical and horizontal. When creating scrollbars, the constants Scrollbar.VERTICAL and Scrollbar.HORIZONTAL are used. When a block in the scrollbar is adjusted, AdjustmentEvent is generated and hence the AdjustmentListener interface has to be used to handle the scrollbar. Program illustrates the use of scroll bars .

Scrollbar Interface

Method

Returns

Notes

Scrollbar(),


Orientation is either horizontal or vertical; value is starting value; visible is the page size; minimum and maximum are the reporting range for the ends of the bar

Scrollbar(int orientation),


Scrollbar(int orientation, int value, int visible, int minimum, int maximum),


getLineIncrement()

Int

How much is each “click” worth?

getMaximum()

Int

What is the largest value the scrollbar will report?

getMiniimum()

Int

What is the smallest value the scrollbar will report?

getOrientation()

Int

Either horizontal or vertical

getPageIncrement()

Int

How much is a page movement worth? 

getValue()

Int

What is the current value of the bar?

getVisible()

Int

How big is the handle(in line increments)

setLineIncrement(int value)

Void

Each click of the up/left, right/down buttons moves the current value this far

setPageIncrement(int value)

Void

Each click of the page up/left, right/down moves the current value this far

setValue(int value)

Void

Set the handle at this value

setValues(int value, int visible, int minimum, int maximum)

Void

Reset the scrollbar to reflect the bounds passed in


import java.awt.*; 
class ScrollBarExample extends Frame
{
     ScrollBarExample()
     {
           setLayout(new FlowLayout());
           //Horizontal Scrollbar with min value 0,max value 100,initial value 50 and visible amount 10
           Label lblHor =new Label("Horizontal Scrollbar");
           Scrollbar sl = new Scrollbar(Scrollbar.HORIZONTAL,50,10,0,100);
           //Vertical Scrollbar with min value 0,max value 255,initial value 10 and visible amount 5
           Label lblver =new Label("Vertical Scrollbar");
           Scrollbar s2 = new Scrollbar(Scrollbar.VERTICAL,10,5,0,10);
           add(lblHor); add(sl);
           add(lblver); add(s2);
     }
}
     class ScrollBarJavaExample
     {
           public static void main(String args[])
          {
               ScrollBarExample frame = new ScrollBarExample();
               frame.setTitle("Scrollbar in Java Example");
               frame.setSize(520,200);
               frame.setVisible(true);
          }
     }
Scrollbar

List in Java Example

By Dinesh Thakur

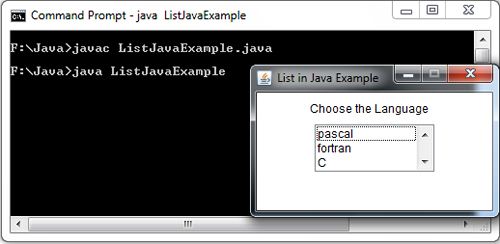
The java.awt.List component , known as a listbox or list box,  is similar to the Choice component, except it shows multiple items at a time and user is allowed to select either one or multiple items at a time. When the numbers of items in the list exceed the available space, the scrollbar will be displayed automatically. A list can be created by instantiating a List class.

The types of constructor supported by List control are the following:

List list=new List();
List list=new List(int numberofrows);
Ust list=new List(int numberof rows, boolean multi selection);

The first constructor is tbe default list. The second specifies the number of rows to be visible in the list and the third constructor specifies whether the multiple selections can be made. The methods that are used to add and select an item to the List are the same as those of Choice. Since it supports multiple selections, there are several methods that interact in this control. The two commonly used methods are:
String[] getSelectedltems();
Int[ ] getSelectedlndexes();
There is a method by name getitemCount() to get the number of items in the given list.

 The List Box allows display a list of items with the following characteristics :
( i ) the items can not be edited directly by the user ,
( ii ) A vertical scroll bar automatically appears when the box list contains more items than it can display;
( iii ) can be configured to allow selection of a single item or multiple items, and
( iv ) when you click on an item not selected this shall be selected and vice versa .

This component produces basically two types of events :

java.awt.event.ItemEvent when selecting an item occurs and java.awt.event.ActionEvent when the user double-click a displayed item the list . These events require treatment by different listeners respectively as interfaces : java.awt.event.ItemListener and java.awt.event.ActionListener .
It is recommended not to use up the ActionListener event when the list is operating in multiple-selection mode as this may hinder user interaction .

List Interface

Method

Returns

Notes

List()


Pass true if you want to allow multiple selected items

List(int rows, boolean multipleSelections)

Void


addItem(String item)

Void

Add at end

addItem(String item, int index)

Void

Add in slot index

allowMultipleSelections()

Boolean

Does this list currently allow multiple selections?

clear()

Void

Empty the list

countItems()

Int

How many items total?

delItem(int position)

Void

Remove a particular item

delItems(int start, int end)

Void

Remove a group of items

deselect(int index)

Void

Unselect item in slot index

getItem(int index)

String

Return a string containing the text of item index

getRows()

Int

How many rows are visible?

getSelectedIndex()

Int

Index of first selected item

getSelectedIndexes()

Int[]

Array of indexes for each selected item

getSelectedItem()

String

String of first selected item

getSelectedItems()

String[]

Array of strings for text of each selected item

getVisibleIndex()

Int

The last thing made visible (as opposed to scrolled off screen)

isSelectedIndex(int index)

Boolean

Is this element selected?

makeVisible(int index)

Void

Make this item visible, not necessarily at any particular position on screen

minimumSize()

Dimension

For layout purpose

minimumSize(int rows)

Dimension                           

For layout purpose

preferredSize()

Dimension

For layout purpose

preferredSize(int rows)

Dimension

For layout purpose

replaceItem(String newValue, int index)

Void

Instead of delete and insert

select(int index)

Void

Make this item selected

setMultipleSelections(boolean v)

Void

Enable or disable multiple selections, affects operation of select()


import java.awt.*; 
class ListExample extends Frame
{
     ListExample()
     {
         setLayout(new FlowLayout());
         Label lblLanguage = new Label("Choose the Language");
         List lstLanguage = new List(3,true);
         lstLanguage.add("pascal");
         lstLanguage.add("fortran");
         lstLanguage.add("C");
         lstLanguage.add("C++");
         lstLanguage.add("java");
         add(lblLanguage);   add(lstLanguage);
     
      }
}
   class ListJavaExample
   {
         public static void main(String args[])
      {
            ListExample frame = new ListExample();
            frame.setTitle("List in Java Example");
            frame.setSize(250,150);
            frame.setResizable(false);
            frame.setVisible(true);
      }
  }

List in Java Example

Choice in Java Example

By Dinesh Thakur

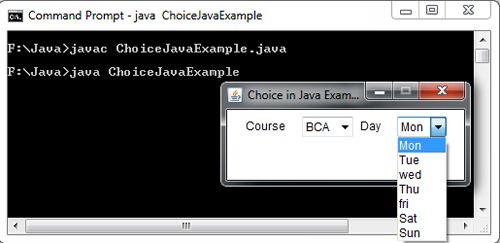
The Choice component is a combination of textfield and drop down list of items. User can make selection by clicking at an item from the list or by typing into the box. Note that you cannot select multiple items from the list. This component is the best component to use than the check box groups or list because it consumes less space than these components. It can be created by instantiating the Choice class. Choice has only one default constructor, namely the following.

Choice choice = new Choice()

To add items to the choice created in the above statement, the following methods can be used.

choice.addltem(String str);
choice.add(String str);

To get the selected item, the method getSelectedltem is used and the index of the selected item can be obtained using the method getSelectedlndex. Items can also be selected using select(int index) and select(String name) when either the index or the name of the item is known.

Choice Interface

Method

Returns

Notes

Choice()


Creates an empty choice box; use addItem() to populate

addItem(String item)

Void


countItems()

Int

Useful for interrogating the Choice contents

getItem(int index)

String

From 0 to countItems() -1

getSelectedIndex()

Int

Tells which item is selected by number

getSelectedItem()

String

Returns the selected item’s text

select(int pos)

Void

Make a particular cell the default

select(String str)

Void

Highlight the first cell with text equal  to str


import java.awt.*; 
class ChoiceExample extends Frame
{
     ChoiceExample()
     {
          setLayout(new FlowLayout());
          Label lblCourse = new Label("Course");
          Label lblweekDay = new Label("Day");
          Choice course = new Choice();
          course.add("BCA");
          course.add("MCA");
          course.add("MBA");
          String[] day={"Mon","Tue","wed","Thu","fri","Sat","Sun"};
          Choice weekDay =new Choice();
          for(int i=0;i<day.length; i++)
              {
                    weekDay.add(day[i]);
              }                                  
                   add(lblCourse);    add(course);      
                   add(lblweekDay);  add(weekDay);
      }
}
  class ChoiceJavaExample
  {
       public static void main(String args[])
      {
               ChoiceExample frame = new ChoiceExample();
               frame.setTitle("Choice in Java Example");
               frame.setSize(250,100);
               frame.setResizable(false);
               frame.setVisible(true);
      }
 }
Choice

CheckboxGroup Java Example

By Dinesh Thakur

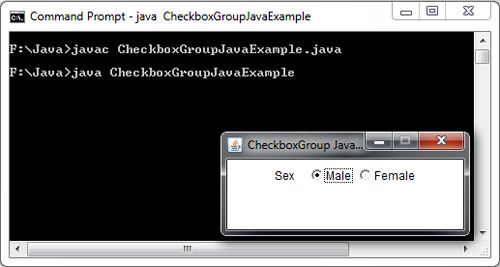
A check box group is a set of checkboxes in which one and only one checkbox can be checked at anyone time. Any other previously selected checkbox in the group is unchecked. These checkboxes are sometimes called radio buttons.

To create a check box group, follow the following steps,

1. Creating a CheckboxGroup object using the following constructor.

CheckboxGroup()

For example, the following statement creates a checkbox group named sex.

CheckboxGroup sex = new CheckboxGroup();

2. Create a Checkbox object: Pass a reference to the CheckboxGroup object to the Checkbox constructor. The Checkbox class provides the following two constructors to include a checkbox in acheckbox group.

Checkbox(String str,boolean state,CheckboxGroup cbgroup)

Checkbox(String str,CheckboxGroup cbGroup,boolean state)

Here, str specifies the label of the associated checkbox, state specifies the initial state of the associated check box, cbgroup is the checkbox group for the associated checkbox or null if the checkbox is not the part of a group.

For example, the following statements add two checkboxes labelled Male and Female to the checkbox group sex.

Checkbox(“Male”,true,sex);

Checkbox(“Female”,false,sex);


In Table we have the main methods of java.awt.CheckboxGroup class.


Method

Description

CheckboxGroup ()

Creates a group of checkboxes.

getSelectedCheckbox ()

Gets the Checkbox component group currently selected.

setSelectedCheckbox (Checkbox)

Determines which Checkbox component selected group.


import java.awt.*; 
class CheckboxExample extends Frame
{
     CheckboxExample()
     {
          setLayout(new FlowLayout());
          Label lblSex = new Label("Sex");
          CheckboxGroup sex = new CheckboxGroup();
          Checkbox ChkMale = new Checkbox("Male",true,sex);
          Checkbox Chkfemale = new Checkbox("Female",false,sex);
          add(lblSex);
          add(ChkMale);
          add(Chkfemale);
     }
}
  class CheckboxGroupJavaExample
 {
      public static void main(String args[])
     {
          CheckboxExample frame = new CheckboxExample();
          frame.setTitle("CheckboxGroup Java Example");
          frame.setSize(250,100);
          frame.setResizable(false);
          frame.setVisible(true);
     }
 }
CheckboxGroup

Checkbox in Java Example

By Dinesh Thakur

The check box, as it is also known java.awt.Checkbox component is a component used to plot an option which can be connected (on ​​= true) or off (off = false). It is usually used to display a set of options which can be selected independently by the user, or allow multiple selections. These controls also have a label associated with them which describes the option of the checkbox. This control supports many constructors.

Checkbox chbox=new Checkbox();
Checkbox chbox=new Checkbox(String str);
Checkbox chbox=new Checkbox(String str, boolean true);

Given above are three types of constructor for the checkbox. The first form creates the default checkbox. The label for the check box can be set using the setLabel() method. The second constructor creates a checkbox with the specified label. The last one creates a checkbox that can be set as checked or unchecked.
The state of a checkbox may change at any instant of time. Therefore a method called
setState(boolean on) is used to change the state of the checkbox. The method getState() is used to get the state of the checkbox. This method retums a boolean value. Since item state changes, it generates the event called Item Event, which is handled by the Item Listener interface.

 A checkbox component is a labelled or unlabelled square box that contains a checkmark when it is selected and nothing otherwise. Checkboxes are mostly used when you need to choose whether you want an option or not. By convention, any number of checkboxes in a group can be selected. It can be created by instantiating the Checkbox class.

Checkbox object is essentially a bi-state switch that remains in the user-selected (or programmatically set) state. The Checkbox is strictly an on/off component and generally depends on other UI objects (typically labels) to indicate what the two states really mean.

Checkbox Useful Interface


Method

Returns

Notes

Checkbox()


A Checkbox with no label is somewhat unusual, but possible; the third variant automatically adds the checkbox to a preexisting Checkbox group

Checkbox(String label)


Checkbox(String label, CheckboxGroup group, boolean state)


getCheckboxGroup()

CheckboxGroup

Return the containing CheckboxGroup object, if any

getLabel()

String

What is the Checkbox label text?

getState()

Boolean

What is the current state of the box?

setCheckboxGroup(CheckboxGroup)

Void

Move this box to a containing Checkbox group and pass null to remove it from all groups

setLabel(String label)

Void

Paint a new text string in the same Checkbox; this implies a layout manager relayout

setState(boolean state)

Void

Set the current state of the box


import java.awt.*; 
class CheckBoxExample extends Frame
{
     CheckBoxExample()
    {
        setLayout(new FlowLayout()); 
        Label lblHobbies = new Label("HOBBIES");
        Checkbox chkSports = new Checkbox("Sports");
        Checkbox chkMusic = new Checkbox("Music ",true);
        Checkbox chkReading = new Checkbox("Reading");
        add(lblHobbies);
        add(chkSports);
        add(chkMusic);
        add(chkReading);
    }
}
   class CheckboxJavaExample
  {
         public static void main(String args[])
        {
                CheckBoxExample frame = new CheckBoxExample();
                frame.setTitle("Checkbox in Java Example");
                frame.setSize(350,100);
                frame.setResizable(false);
                frame.setVisible(true);
         }
  }
Checkbox

Buttons in Java Example

By Dinesh Thakur

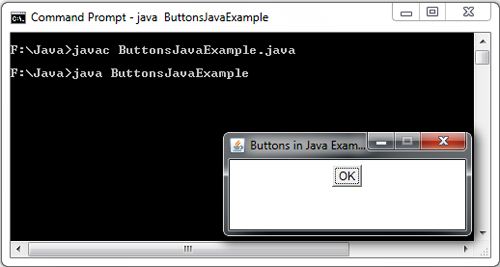
Buttons are perhaps the most familiar of all the component types. It is a regular push button that can contain text. It can be created by instantiating the Button class. The text on the face of the button is called button label. The buttons, components encapsulated in java.awt.Button class are as panels labeled with a text that, when activated, can trigger the execution of a routine or sequence of commands. Whenever a push button is clicked, it generates an event and executes the code of the specified listener. A button can be created using the following syntax:

Button button=new Button( );
Button button=newButton(String button name);

Button objects provide the most basic (and most commonly used bi-state controls in the AWT. They are generally labeled with SUBMIT, YES, ACCEPT, NO, or other simple one- or two word messages. Very seldom are AWT Buttons sub classed in a normal application.

A Button is added to a Container object (usually a Panel or a descendant of Panel) and is then said to be contained or owned by the Panel. The event handler for the Panel is normally considered to be responsible for any actions upon the Button.


Button Useful Interface


Metohod

Returns

Notes

Button


Button(String label)


An empty Button is somewhat unusual, but possible

getLabel()

String

What’s on the Button right now?

setLabel(String label)

Void

Paint a new text string in same Button; this implies a layout manager relayout


import java.awt.*; 
class ButtonExample extends Frame
{
     ButtonExample()
     {
         setLayout(new FlowLayout());     
         Button btnOK = new Button("OK");
         add(btnOK);
     }
}
    class ButtonsJavaExample
   {
       public static void main(String args[])
      {   
           ButtonExample frame = new ButtonExample();
           frame.setTitle("Buttons in Java Example");
           frame.setSize(250,100);
           frame.setResizable(false);
           frame.setVisible(true);
     } 
   }
Buttons in Java Example

TextArea in Java Example

By Dinesh Thakur

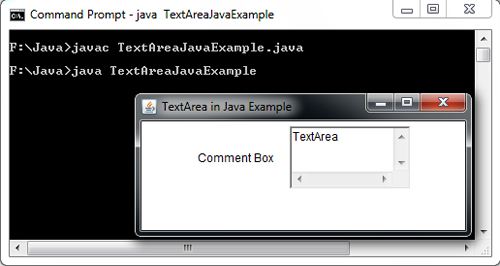
The TextArea component is similar to the TextField component except that it allows to display and edit multiple lines of plaintext. The TextArea component has certain number of rows and columns that determines its size. If all the text cannot be displayed in the available space in the component, even then scrollbars are not automatically added. In order to add scrollbars, you must insert it into a Scrollpane.

import java.awt.*; 
class TextAreaExample extends Frame
{
     TextAreaExample()
     {
          setLayout(new FlowLayout());
          Label label = new Label("Comment Box");
          TextArea txtArea = new TextArea("TextArea",3,15); //TextArea with 3 rows and 15 columms
          add(label);
          add(txtArea);
      }
}
   class TextAreaJavaExample
   {
         public static void main(String args[])
        {
               TextAreaExample frame = new TextAreaExample();
               frame.setTitle("TextArea in Java Example");
               frame.setSize(350,150);
               frame.setVisible(true);
        }
   }

TextArea in Java Example

Text Fields in Java Example

By Dinesh Thakur

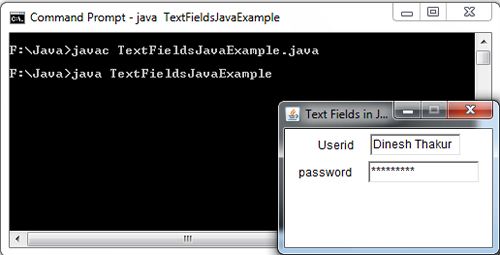
A Textfield is a component used for displaying, inputting and editing a single line of plain text. We can create textfield by creating an instance of Textfield class. The TextComponent is a superclass of TextField that provides common set of methods used by Textfield.

Text Classes User Interface


Method

Returns

Notes

getSelectedText()

String

 The string returned is only the selected text

getSelectionEnd()

Int

The index to the last character selected

getSelectionStart()

Int

The index to the first character selected

getText()

String

The entire contents of the text object

isEditable()

Boolean

if true, the user can type in the text object

select(int selStart, int selEnd)

Void

Use this to “pre-mark” text(as in search)

selectAll()

Void

Mark the whole text object contents(as in a file dialog window)

setEditable(boolean t)

Void

if true, the user can type in the object

setText(String t)

Void

Replace the entire contents of the text object

TextField()


Columns are approximate, some windowing systems don’t seem “perfect”

TextField(int cols)


TextField(String text)


TextField(String text, int cols )


echoCharIsSet()

Boolean

False if we’re echoing the keystrokes properly, true if we’re echoing a single character(like password echo)

getColumns()

Int

How wide is the textfield?

getEchoChar()

Char

What is the password echo character?

minimumSize()

Dimension

Tell us(in pixels) what the minimum space required is

minimumSize(int cols)

Dimension

Tell us(in pixels) what the minimum space required is

preferredSize()

Dimension


preferredSize(int Cols)

Dimension


setEchoCharacter(char c)

Void

Set the character to echo on keystrokes(password echo)


import java.awt.*; 
class Textfieldframe extends Frame
{
      Textfieldframe()
     {
            setLayout(new FlowLayout());
            Label lblUserid = new Label("Userid");
            TextField TxtUserid = new TextField(10);
            Label lblpassword = new Label("password");
            TextField Txtpassword = new TextField("Mr Thakur",13);
            Txtpassword.setEchoChar('*');
            add(lblUserid); add(TxtUserid);
            add(lblpassword); add(Txtpassword);
     }
}
   class TextFieldsJavaExample
   {
         public static void main(String args[])
        {
              Textfieldframe frame = new Textfieldframe();
              frame.setTitle("Text Fields in Java Example");
              frame.setSize(220,150);
              frame.setResizable(false);
              frame.setVisible(true);
        }
   }
Text Fields in Java Example

Label in Java Awt Example

By Dinesh Thakur

Labels are the simplest of all the AWT components. A label is a component that may contain uneditable text. They are generally limited to single-line messages (Labels, short notes, etc.). They are usually used to identify components. For example: In large GUI, it can be difficult to identify the purpose of every component unless the GUI designer provides labels (i.e. text information stating the purpose of each component).

Unlike any other component, labels do not support any interaction with the user and do not fire any events. So, there is no listener class for the labels .We can create label by creating an instance of Label class.The syntax for creating labels is as shown below:

Label label=new Label();
Label label=new Label(String str);
Label label=new Label(String str, int alignment);

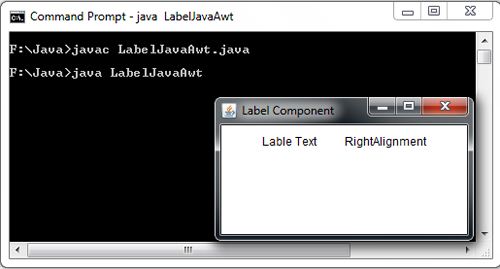
The first form creates a blank label. The other two constructors create labels with the specified string; the third constructor specifies how text is aligned within the label. So, the second argument int.alignment will take the values LabeI.RIGHT, Label.LEFT and LabeI.CENTER, which are constants defined in the Label class. The string used in the label can be obtained using the method get Text(). To set a text for a label the method label.setText(“First Label”); is used.

The Label has no surrounding border that might indicate that it’s an editable text object. It also has virtually no use in user interaction. For example, you wouldn’t normally attempt to detect mouse clicks or other events over the Label.


AWT Label Interface


Method

Returns

Notes

Label() Label(String label)


An empty label is somewhat unusual, but possible alignment is either Label.CENTER,Label. LEFT, or Label.RIGHT

Label(String label, int alignment)


getAlignment()

Int

Returns LEFT, CENTER, or RIGHT

getText

String

What’s on the Label right now?

setAlignment (int alignment)

Void

Change the alignment of the existing text

setText(String label)

Void

Paint a new text string in the same Label; this implies a layout manager relayout


import java.awt.*; 
class Labelframe extends Frame
{
      Labelframe()
      {
         setLayout(new FlowLayout());
         Label lblText = new Label("Lable Text");
         Label lblTextAlign = new Label("RightAlignment",Label.RIGHT);
         add(lblText);
         add(lblTextAlign);
      }
}
    class LabelJavaAwt
    {    
         public static void main(String args[])
        {
            Labelframe frame = new Labelframe();
            frame.setTitle("Label Component");
            frame.setSize(150,150);
            frame.setVisible(true);
        }
    } 

Label in Java Awt Example

Extending Frame Class in Java Example

By Dinesh Thakur

In this java Example, we have created a class named MyFrame that extends the Frame class. The constructor of the MyFrame class contains the statements that constructs the user interface.

The statements

FlowLayout layout = new Flowlayout();

setLayout(layout);

sets the layout manager for the container object (i.e. Frame).The layout manager arranges the GUI components in the window i.e. it determines the position and size of all the components in the container. The first statement creates an object of the class Flowlayout. In this layout manager, the components are arranged in the container (i.e. frame) from left to right, then on the next line when there is no more space. The setLayout () method defined in java.awt.Container class used in the second statement sets the new layout manager for the frame. The statements used for creating and setting layout can be combined as follows,

setLayout(new FlowLayout);

The statement,

MyFrame frame = new MyFrame();

in the main () method instantiates an object of MyFrame class which invokes the default constructor. This constructor sets the Flowlayout of the frame and adds two buttons using the add () method with labels OK and Cancel into it.

The statement,

frame.setTitle(“Extending Frame Class in Java Example”};

sets the specified argument as the title of the frame. The other statements in the main () method work as usual.

import java.awt.*; 
class Myframe extends Frame
{
     Myframe()
     {
        FlowLayout layout = new FlowLayout();
        setLayout(layout);
        Button ok = new Button("OK");
        Button cancel = new Button("Cancel");
        add(ok);   
        add(cancel);
     }
}
class ExtendingFrameClass
{
     public static void main(String args[])
     {
         Myframe frame = new Myframe();
         frame.setTitle("Extending Frame Class in Java Example");
         frame.setSize(350,150);
         frame.setVisible(true);
     }
}

Extending Frame Class in Java Example

Add Components to a Container in Java Example

By Dinesh Thakur

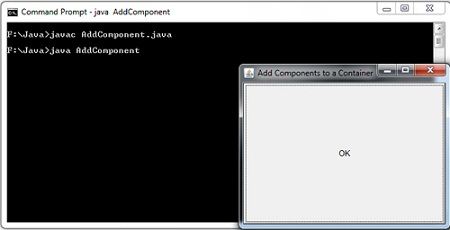
In order to add a component to a container, first create an instance of the desired component and then call the add () method of the Container class to add it to a window. The add () method has many forms and one of these is.

Component add (Component c)

This method adds an instance of component (i.e. c) to the container. The component added is automatically visible whenever its parent window is displayed.

import java.awt.*; 
class AddComponent
{
    public static void main(String args[])
    {
       Frame frame = new Frame("Add Components to a Container");
       Button button = new Button("OK");
       frame.add(button);
       frame.setSize(300,250);
       frame.setVisible(true); 
     }
}

Add Components to a Container in Java Example

« Previous Page
Next Page »

Primary Sidebar

Java Tutorials

Java Tutorials

  • Java - Home
  • Java - IDE
  • Java - Features
  • Java - History
  • Java - this Keyword
  • Java - Tokens
  • Java - Jump Statements
  • Java - Control Statements
  • Java - Literals
  • Java - Data Types
  • Java - Type Casting
  • Java - Constant
  • Java - Differences
  • Java - Keyword
  • Java - Static Keyword
  • Java - Variable Scope
  • Java - Identifiers
  • Java - Nested For Loop
  • Java - Vector
  • Java - Type Conversion Vs Casting
  • Java - Access Protection
  • Java - Implicit Type Conversion
  • Java - Type Casting
  • Java - Call by Value Vs Reference
  • Java - Collections
  • Java - Garbage Collection
  • Java - Scanner Class
  • Java - this Keyword
  • Java - Final Keyword
  • Java - Access Modifiers
  • Java - Design Patterns in Java

OOPS Concepts

  • Java - OOPS Concepts
  • Java - Characteristics of OOP
  • Java - OOPS Benefits
  • Java - Procedural Vs OOP's
  • Java - Polymorphism
  • Java - Encapsulation
  • Java - Multithreading
  • Java - Serialization

Java Operator & Types

  • Java - Operator
  • Java - Logical Operators
  • Java - Conditional Operator
  • Java - Assignment Operator
  • Java - Shift Operators
  • Java - Bitwise Complement Operator

Java Constructor & Types

  • Java - Constructor
  • Java - Copy Constructor
  • Java - String Constructors
  • Java - Parameterized Constructor

Java Array

  • Java - Array
  • Java - Accessing Array Elements
  • Java - ArrayList
  • Java - Passing Arrays to Methods
  • Java - Wrapper Class
  • Java - Singleton Class
  • Java - Access Specifiers
  • Java - Substring

Java Inheritance & Interfaces

  • Java - Inheritance
  • Java - Multilevel Inheritance
  • Java - Single Inheritance
  • Java - Abstract Class
  • Java - Abstraction
  • Java - Interfaces
  • Java - Extending Interfaces
  • Java - Method Overriding
  • Java - Method Overloading
  • Java - Super Keyword
  • Java - Multiple Inheritance

Exception Handling Tutorials

  • Java - Exception Handling
  • Java - Exception-Handling Advantages
  • Java - Final, Finally and Finalize

Data Structures

  • Java - Data Structures
  • Java - Bubble Sort

Advance Java

  • Java - Applet Life Cycle
  • Java - Applet Explaination
  • Java - Thread Model
  • Java - RMI Architecture
  • Java - Applet
  • Java - Swing Features
  • Java - Choice and list Control
  • Java - JFrame with Multiple JPanels
  • Java - Java Adapter Classes
  • Java - AWT Vs Swing
  • Java - Checkbox
  • Java - Byte Stream Classes
  • Java - Character Stream Classes
  • Java - Change Color of Applet
  • Java - Passing Parameters
  • Java - Html Applet Tag
  • Java - JComboBox
  • Java - CardLayout
  • Java - Keyboard Events
  • Java - Applet Run From CLI
  • Java - Applet Update Method
  • Java - Applet Display Methods
  • Java - Event Handling
  • Java - Scrollbar
  • Java - JFrame ContentPane Layout
  • Java - Class Rectangle
  • Java - Event Handling Model

Java programs

  • Java - Armstrong Number
  • Java - Program Structure
  • Java - Java Programs Types
  • Java - Font Class
  • Java - repaint()
  • Java - Thread Priority
  • Java - 1D Array
  • Java - 3x3 Matrix
  • Java - drawline()
  • Java - Prime Number Program
  • Java - Copy Data
  • Java - Calculate Area of Rectangle
  • Java - Strong Number Program
  • Java - Swap Elements of an Array
  • Java - Parameterized Constructor
  • Java - ActionListener
  • Java - Print Number
  • Java - Find Average Program
  • Java - Simple and Compound Interest
  • Java - Area of Rectangle
  • Java - Default Constructor Program
  • Java - Single Inheritance Program
  • Java - Array of Objects
  • Java - Passing 2D Array
  • Java - Compute the Bill
  • Java - BufferedReader Example
  • Java - Sum of First N Number
  • Java - Check Number
  • Java - Sum of Two 3x3 Matrices
  • Java - Calculate Circumference
  • Java - Perfect Number Program
  • Java - Factorial Program
  • Java - Reverse a String

Other Links

  • Java - PDF Version

Footer

Basic Course

  • Computer Fundamental
  • Computer Networking
  • Operating System
  • Database System
  • Computer Graphics
  • Management System
  • Software Engineering
  • Digital Electronics
  • Electronic Commerce
  • Compiler Design
  • Troubleshooting

Programming

  • Java Programming
  • Structured Query (SQL)
  • C Programming
  • C++ Programming
  • Visual Basic
  • Data Structures
  • Struts 2
  • Java Servlet
  • C# Programming
  • Basic Terms
  • Interviews

World Wide Web

  • Internet
  • Java Script
  • HTML Language
  • Cascading Style Sheet
  • Java Server Pages
  • Wordpress
  • PHP
  • Python Tutorial
  • AngularJS
  • Troubleshooting

 About Us |  Contact Us |  FAQ

Dinesh Thakur is a Technology Columinist and founder of Computer Notes.

Copyright © 2025. All Rights Reserved.

APPLY FOR ONLINE JOB IN BIGGEST CRYPTO COMPANIES
APPLY NOW