Moving from a hard drive to an SSD is a fairly straightforward procedure that you can perform in less than an hour. Here, we’ll cover the steps you’ll need to take in order to install an SSD in a desktop PC.
We’ll be covering the following topics in this tutorial:
Physical Installation
Start by turning your PC off and removing the left side panel. Then, locate the hard drive cage and look for a way to secure the SSD into the system. Most new desktop cases feature plastic slide-out trays that can hold either a 2.5-inch (traditional SSD size) or 3.5-inch (traditional hard drive size) drive, but if your PC is more than a year old, it’s unlikely it was built to natively hold the 2.5-inch SSD form factor.

Fortunately, there are a couple of ways you can mount an SSD into an open 3.5-inch hard drive bay. You can invest in a 3.5-inch to 2.5-inch adapter bracket that provides holes to securely mount your SSD, or, because SSDs have no moving parts, you can secure the drive in place with a few strips of hook-and-loop fastener tape, both on the 3.5-inch bay and the bottom of the SSD itself.
Attach
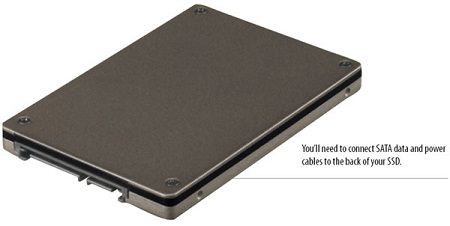
Once you’ve placed the SSD inside your case, you’ll need to connect a SATA (Serial Advanced Technology Attachment) data cable and a SATA power cable to the SSD. Your power supply should have a few unused L-shaped SATA power cables that you can run to the power connector on the back of the SSD.

When connecting the SATA data cable, you’ll want to attach it to the fastest SATA port on your motherboard. Most new PCs provide you with both 6Gbps (also known as SATA 3) and 3Gbps (also known as SATA 2) SATA ports. SSDs work faster when connected via a 6Gbps SATA port, because they are capable of operating at the faster SATA speeds. Examine the manual for your desktop or motherboard to learn about the location and speed of available SATA ports. If your desktop does offer a 6Gbps SATA port, you’ll also want to ensure that you run a 6Gbps SATA cable (often the cable features a SATA 3 label) from the motherboard to the hard drive. Similar to the SATA power cable, you’ll run the data cable to the data port on the motherboard.
Software Installation
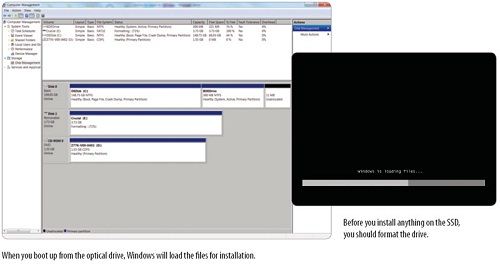
With the SSD mounted and connected, you can go ahead and install a fresh copy of Windows onto the drive. Before you install the operating system, however, you may need to format the drive. To do so in Windows, click the Start button, right-click Computer, and select Manage. Click Disk Management, right-click your SSD, and choose Format. The process will take a few minutes.

Now, you can set up the PC to boot from your computer’s optical drive so that you can install Windows onto the SSD. Note that you’ll need a Windows installation disc to perform the installation. To change the PC’s boot order, you must enter the BIOS (Basic Input/Output System) by starting the PC and pressing a specific key—typically the DELETE key—at boot-up. Once inside the BIOS, you can use the arrow keys to find the boot options that allow you to set the optical drive as the first boot device. Save your changes and restart your computer.
Final Steps
As your PC reboots, you should see a prompt that reads “Press any key to boot from CD or DVD.” Press a key and Windows loads its installation utility—assuming that you’ve inserted the Windows installation disc into the optical drive. Follow the on-screen instructions and select the options for installing Windows on your SSD.
 Dinesh Thakur holds an B.C.A, MCDBA, MCSD certifications. Dinesh authors the hugely popular