In Excel 2010, you can customize the ribbon. To do this, open the Excel Options window in the Customize the Ribbon section.
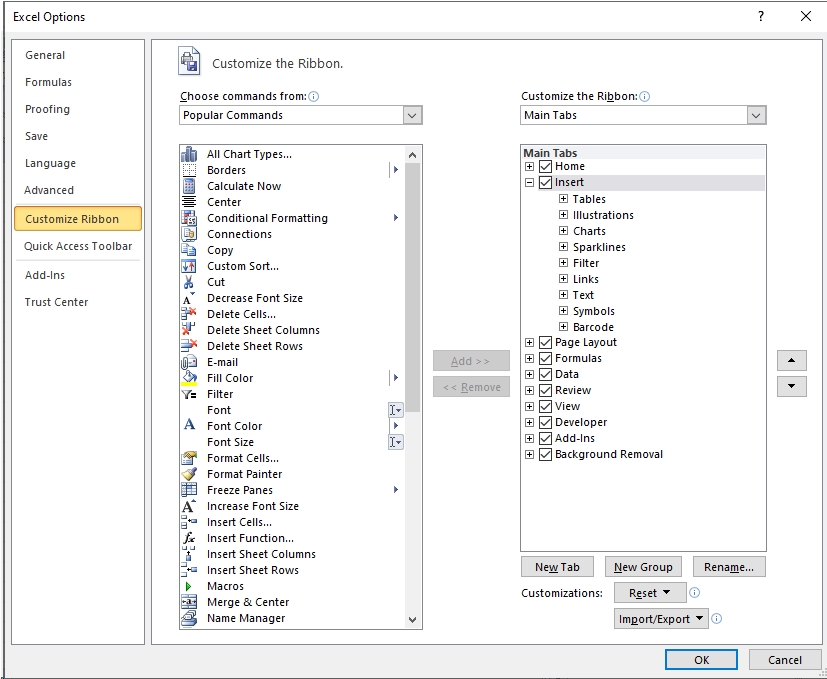
The procedure for customizing the ribbon is similar to how you customize the quick access panel, although there are many more customization options in this case. There are a few basic steps you can take to customize the ribbon:
- create a custom tab on the ribbon;
- create a custom group;
- make changes to standard tabs.
All these operations are performed quite simply, with the help of two fields in the central area of the window and a row of buttons. The main idea is that in the left box, Select commands from the Excel Options window, the commands and groups of commands added to different places on the ribbon are selected. Adding to the ribbon is done by selecting the item to be added and clicking the Add button. The location where the item is added on the ribbon is selected in the right-hand box, Customize the ribbon. In the upper part of each of the two fields, there is a drop-down list, with the help of selecting the area of the command and its destination. If you want to remove an item from the ribbon, select it in the right field, and then click the Remove button. If you uncheck the box for a tab in the right margin, it will not be displayed.
In general, all tabs are divided into custom and default tabs. The default tabs can be hidden. Custom tabs can also be removed.
There are buttons for New Tab, Create Group, Rename, Reset, and Import-Export in the lower right part of the window. The buttons are used, respectively, when creating a tab, group, editing the name of tapes and user groups, resetting settings, and importing/exporting them. The buttons on the right side of the arrow box allow you to change the order of the ribbon tabs.
In the figure below, the checkboxes for the Review and Developer tabs are unchecked, and the View moved to the third position from the top.
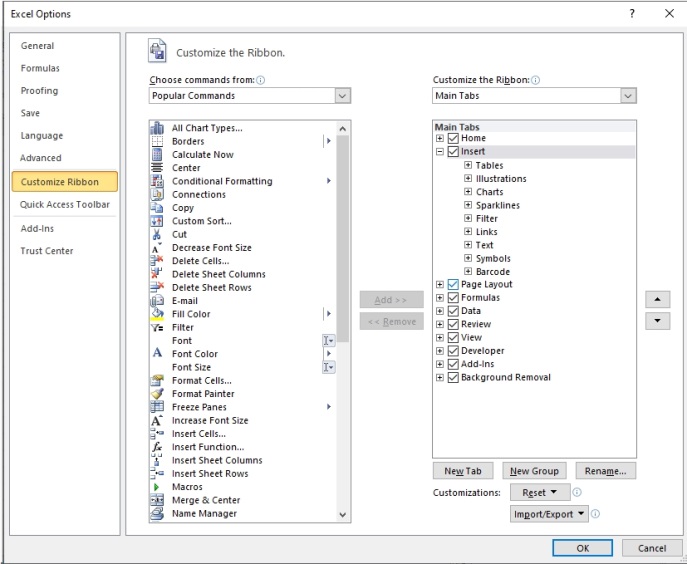
As a result of applying these settings, the document ribbon will look like in the figure below.
As an illustration, consider the process of creating a user tab with two groups of icons. To do this, in the ribbon settings window, click the button.
Create a tab: A new tab is created in this case, and a new group is automatically added to it.

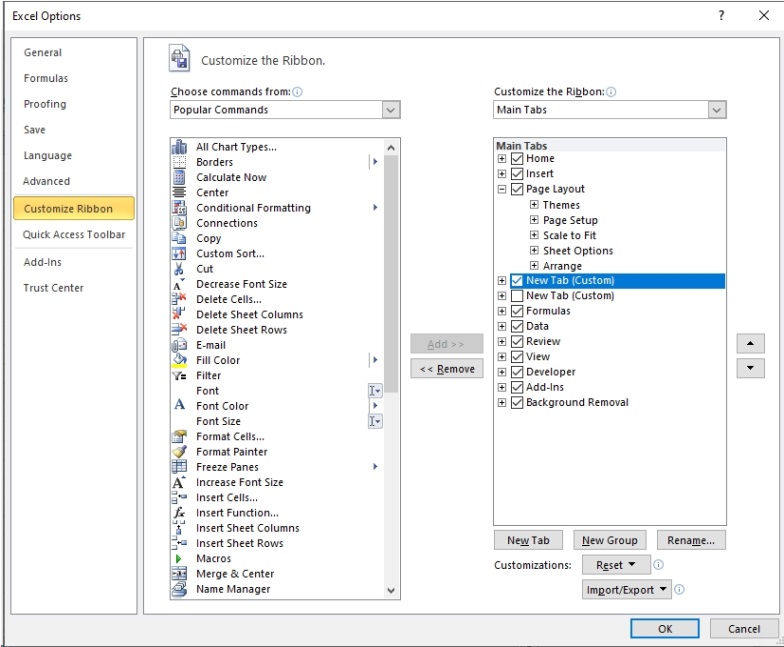
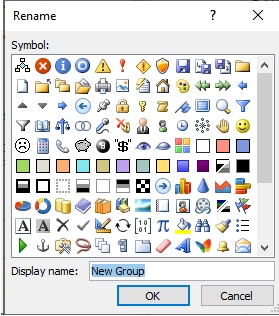
To change the name of a tab and a group, select the corresponding element and click the Rename button. As a result, the Rename window opens, in which a new name for the component is indicated instead of the default one.
When renaming groups and commands, the window for entering a new name also contains an area for selecting an icon, but the icon settings are applied only for commands.
Using the Create group button, create on the tab one more group.
The name My teams is indicated for the created tab, and the tab groups are named First group and Second group, respectively. After confirming the changes, the application ribbon changes its appearance – the My commands tab appears on it, but it is empty.

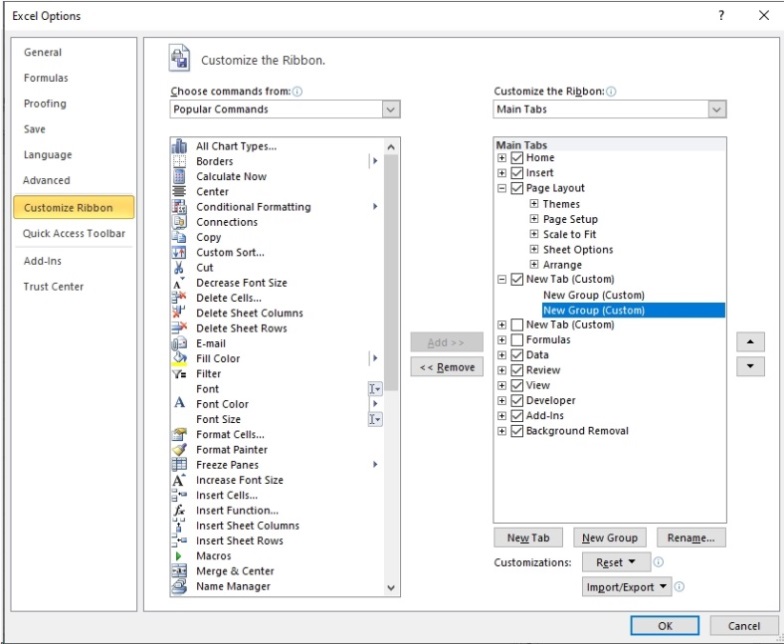

Although the groups are presented on the tab, they do not contain command icons. They need to be added there. To do this, switch back to the ribbon customization mode – you can do this as described earlier, or you can use the ribbon context menu, in which you select the Customize Ribbon command.
In the already familiar window of ribbon customization in the left list, Select commands from, select the required command and add it to the group (the one that is highlighted in the right list of Customize the ribbon). In the figure, the Create command is added to the first group.
The filling of the commands and the second group with pictograms is carried out in the same way. Two icons have been added to each group: in the first group for the Open and Save commands and in the second for the Quick Print and Print commands.
After applying the settings, the created My commands tab will look like in Fig.
![]()
To hide a tab, just uncheck the box next to its name in the ribbon settings window, and to remove a tab, select it and click the Delete button.
 Dinesh Thakur holds an B.C.A, MCDBA, MCSD certifications. Dinesh authors the hugely popular