MS Excel Cell can carry various types of data such as Numbers, Currency, Dates, etc. You can set the cell type in various ways including the following methods:
- Right Click on the cell » Format cells » Number.
- Click on the Ribbon from the ribbon.

Various Cell Formats
Below are the different cell formats.
- General: This is the default cell format for a cell.
- Number: This shows the cell as a separator number.
- Currency: Shows the cell as a currency, i.e. with a currency symbol.
- Accounting: similar to the currency used for accounting purposes.
- Date: Various date formats are available for this purpose, such as 17-09-2020, 17th-September 2020, etc.
- Percent: this shows the cell as a percent with decimal places for example 50%.
- Percentage: This shows the cell as a fraction, such as 1/4, 1/2, and so on.
- Scientific: This shows the cell as an exponential, such as 5.6E+01.
- Text: This option shows the cell as plain text.
- Exclusive: Unique cell formats, such as Zip code and Phone Number.
- Custom: This allows you to use a custom format.
We’ll be covering the following topics in this tutorial:
Setting Fonts
Any of the fonts installed for your printer can be assigned to cells in a worksheet.
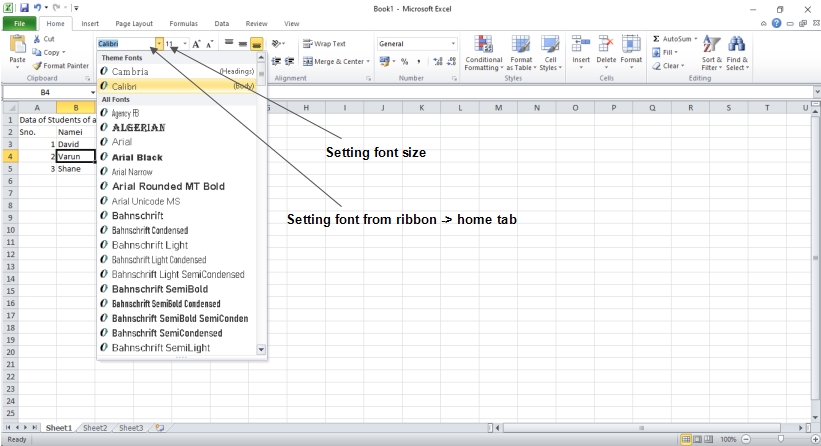
Setting Font from Home Tab
You can change the font of the selected text From Home » Font group » select the font.
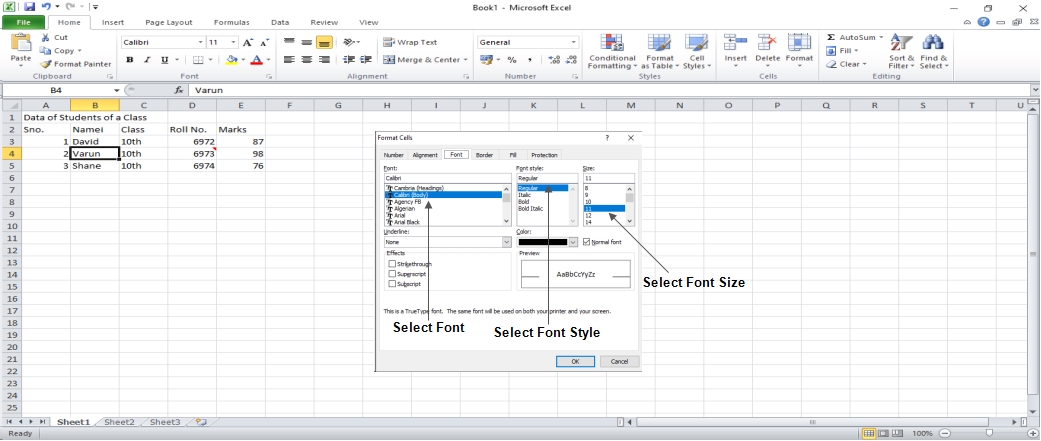
Setting Font from Format Cell Dialogue
- Right click on cell » Format Cells » Font Tab
- Press Control + 1 or Shift + Control + F
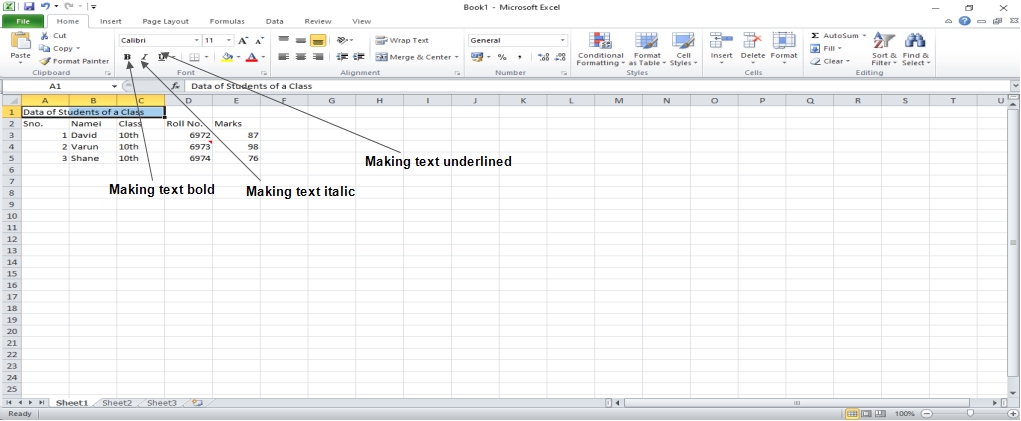
To change the look and feel of the cell, you can change the text decoration.
Text-Decoration
The Home tab of the ribbon has a number of choices, as listed below.
- Bold: It makes the text in bold by choosing Home » Font Group » Press Control + B.
- Italic: It makes the text italic by choosing Home » Font Group » Press Control + I.
- Underline: It makes the text as underlined by choosing Home » Font Group » Press Control + U.
- Double Underline: It makes the text highlighted as double underlined by choose Home » Font Group » Click arrow near U » Select Double Underline.
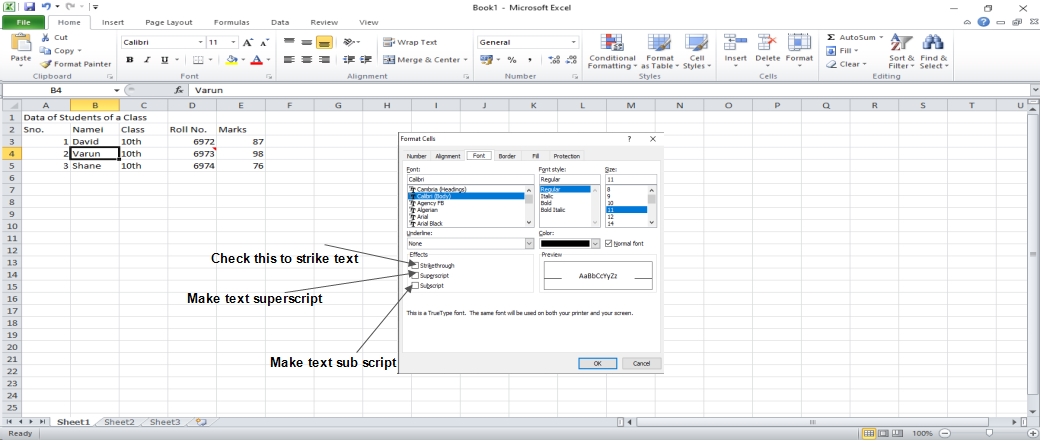
More Text-Decoration Options
As listed below, there are more options for text decoration in Formatting Cells » Font Tab » Effects cells.
- Strike-through: It vertically strikes the text in the middle.
- Super Script: It transforms the content into a super script.
- Sub Script: It transforms text into a subscript.
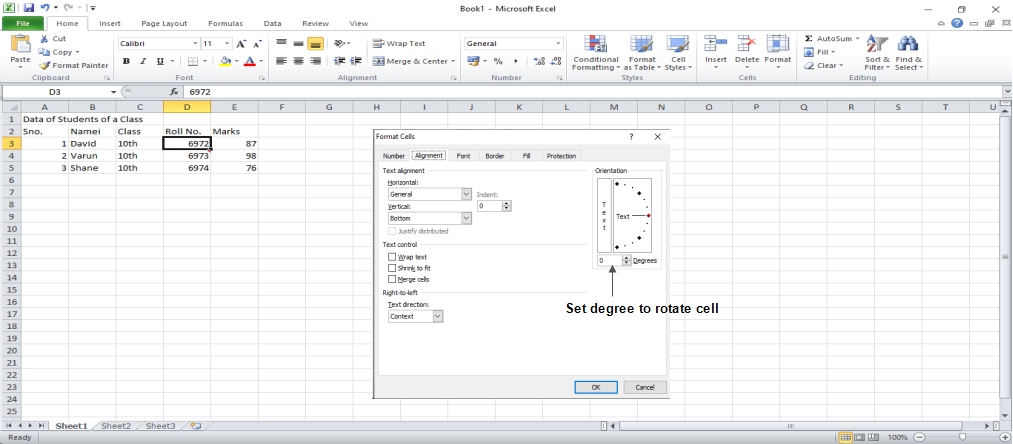
Rotate Cells
You can alter the orientation of the cell by rotating it by some degree.
Rotating Cell from Home Tab
In the Home tab, select the orientation. Angle Counter Clockwise, Angle Clockwise, and other options are available.

Rotating Cell from Formatting Cell
Select the cell with the right-click menu. Format cells » is a menu option. » Alignment Set the rotation’s degree.
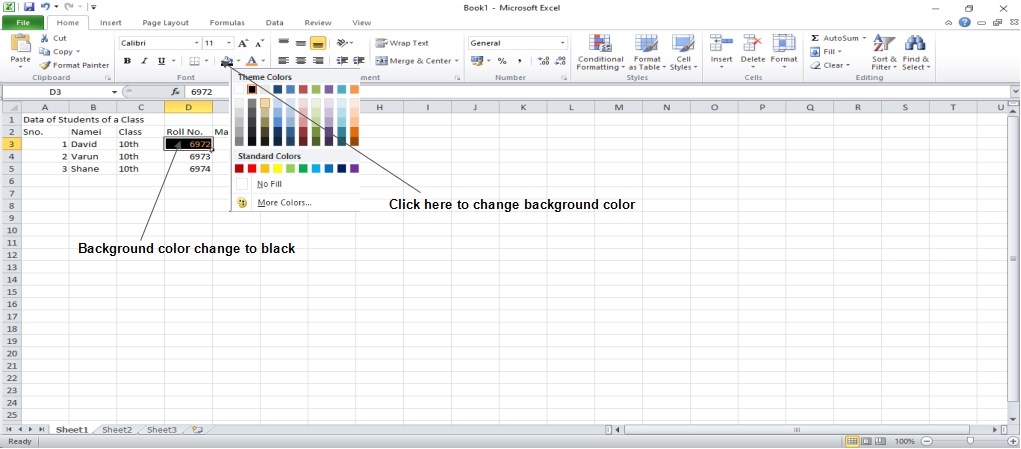
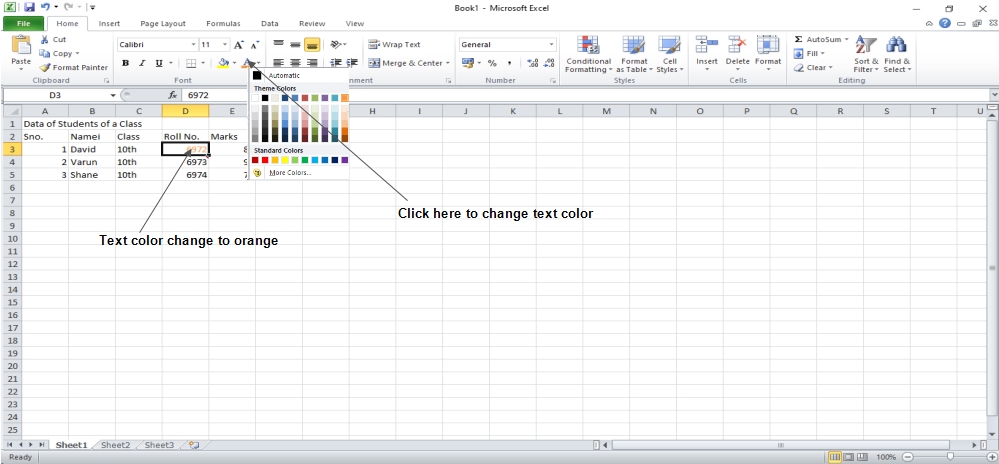
Setting Colors
You can adjust the cell’s background color and text color.
Changing Background Color
In MS Excel, the background color of the cell is set to white by default. From the Home Tab » Font Group » Background Color, you can change it to fit your needs.
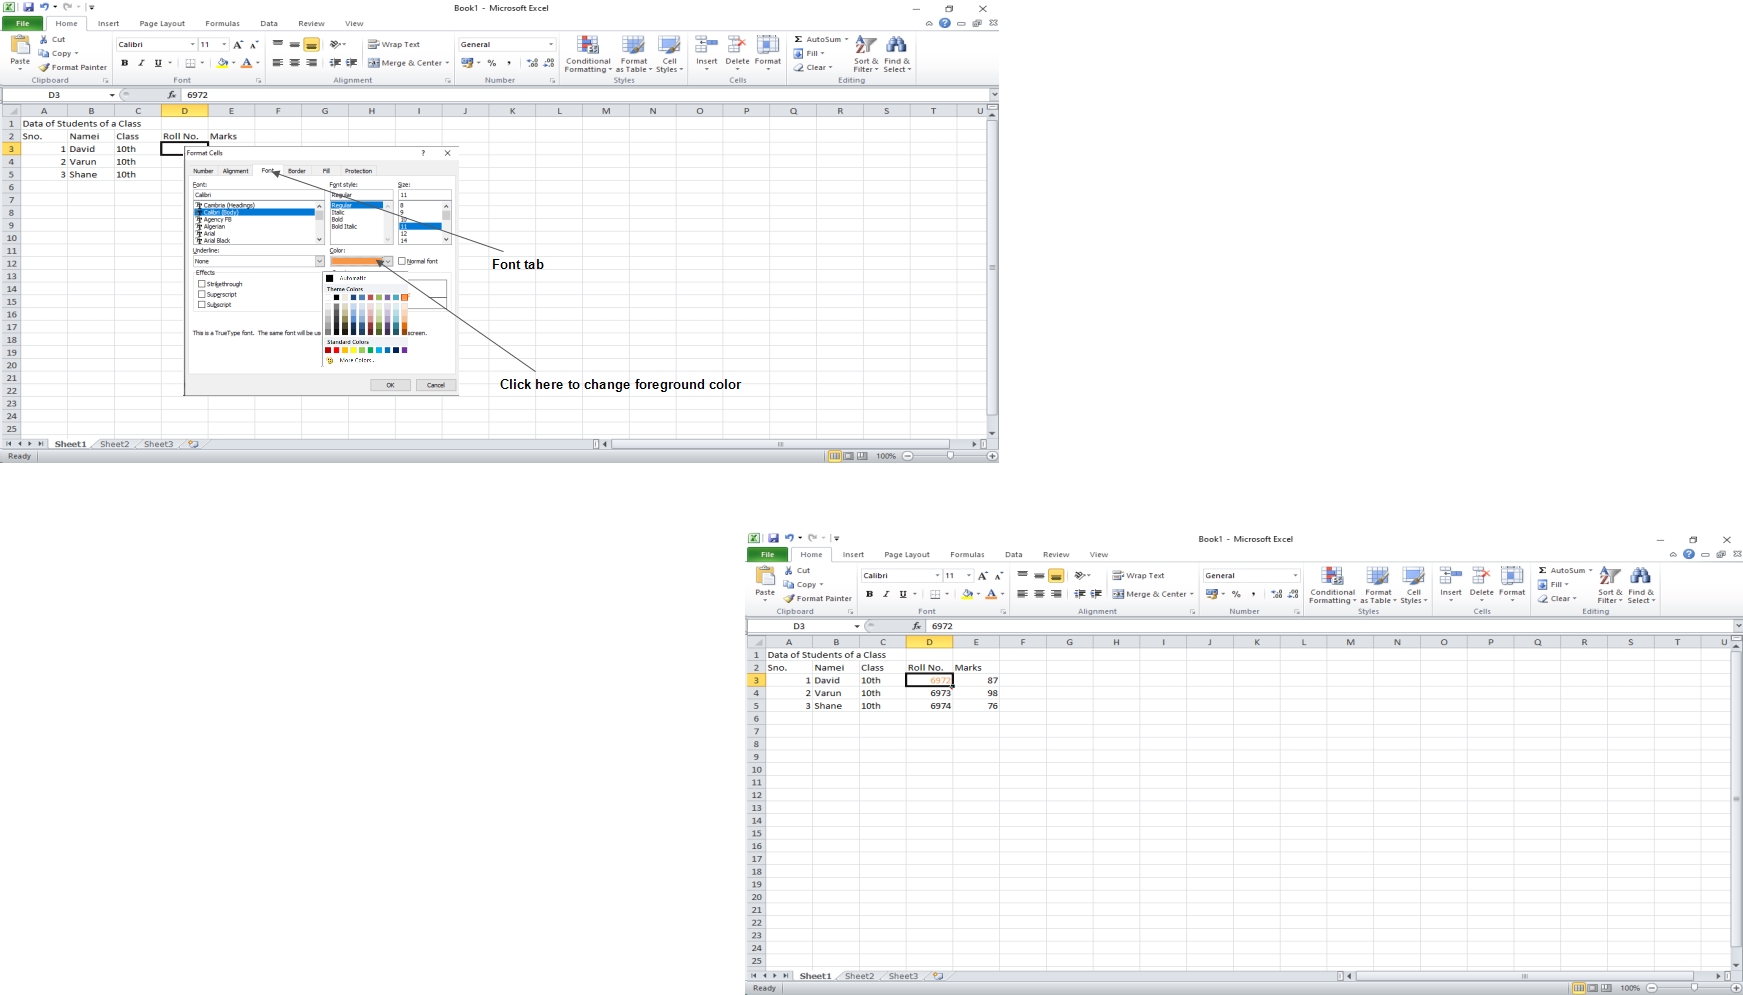
Changing Foreground Color
In MS Excel, the foreground or text color is set to black by default. From the Home Tab » Font Group » Foreground Color, you can change it to suit your needs.
Select the cell and go to Right click » Format Cells » Font Tab » Color to change the foreground color.
Text Alignment
You can adjust the cell’s alignment if you don’t like the default alignment. The numerous methods are listed below.
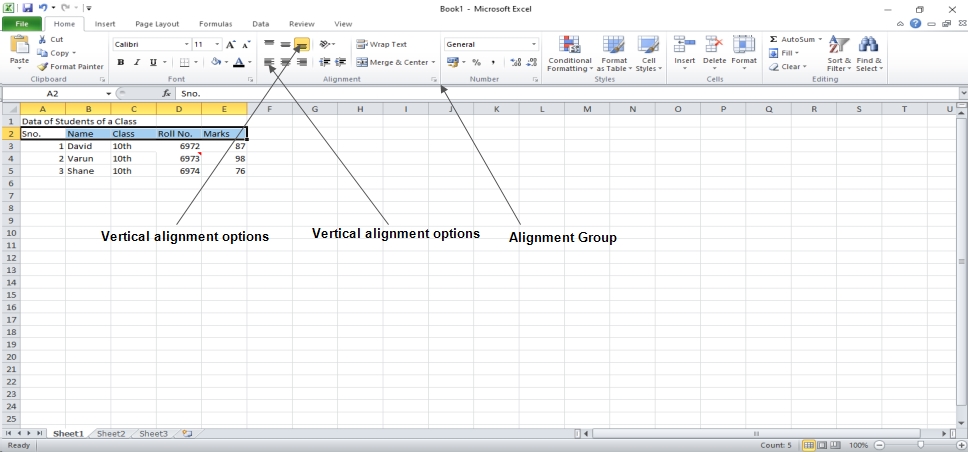
Change Alignment from Home Tab
The cell’s horizontal and vertical orientation can be changed. Excel aligns numbers to the right and text to the left by default. To alter alignment, select an option from the Alignment group in the Home tab.
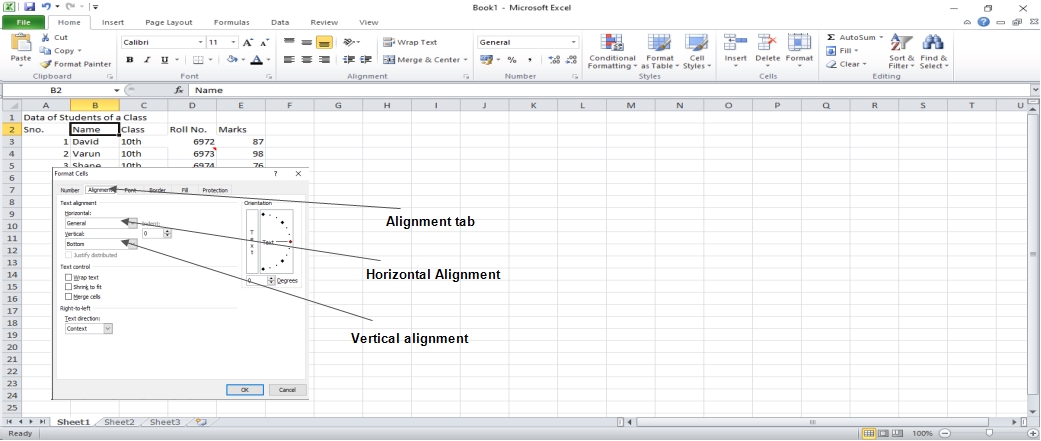
Change Alignment from Format Cells
Right Click on the cell and go to the menu “Format,” Select the Alignment Tab in the Format Cells dialog box. Choose from the Vertical and Horizontal alignment options.
Exploring Alignment Options
- Horizontal Alignment: You can choose between Left, Middle, Right, and other options for horizontal alignment.
- Left: Aligns the contents of the cell to the cell’s left side.
- Center: Places the contents of the cell in the center of the cell.
- Right: Aligns the contents of the cell to the cell’s right hand.
- Fill: This command repeats the contents of the cell until the entire width of the cell is filled.
- Justify: Justifies the text to the cell’s left and right.
Only if the cell is formatted as wrapped text and uses more than one line can you use this option.
- Vertical Alignment: You can choose between top, middle, and bottom vertical alignment.
- Top: Aligns the contents of the cell to the cell’s top
- Center: Centers the contents of the cell vertically.
- Bottom: Aligns the contents of the cell to the cell’s bottom.
- Justify: Justifies the text in the cell vertically; this choice is only available if the cell is formatted as wrapped text and contains several lines.
Merge and Wrap
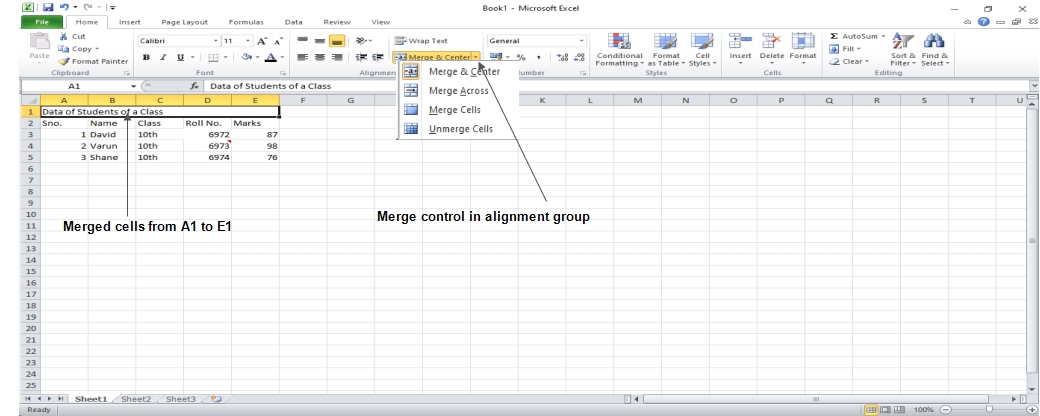
You can merge two or more cells in MS Excel. When you merge cells, the contents of the cells are not merged. Rather, you merge several cells into a single cell that takes up the same amount of space.
Cells can be merged in a variety of ways, as detailed below.
- Use the Merge & Center control on the Ribbon to make it easier. To merge cells, press the Merge & Center button after selecting the cells you want to merge.
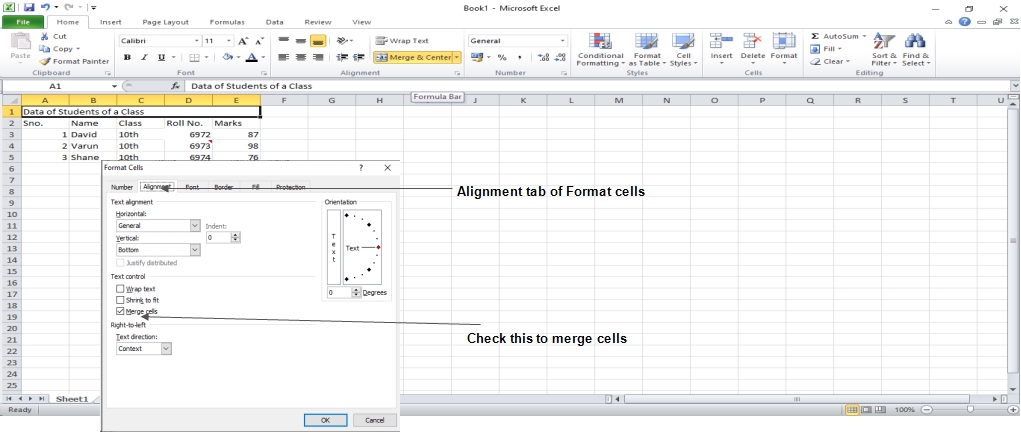
- To merge the cells, select the Alignment tab in the Format Cells dialogue box.
 Additional Options
Home » Alignment Group »The Merge & Center Control has a drop-down list with the following extra options:
- Merge Across: This command generates several merged cells — one for each row — when a multi-row set is selected.
- Merge Cells: Merge the cells that have been selected without using the Center attribute.
- Unmerge Cells: Unmerges the cells that have been selected.
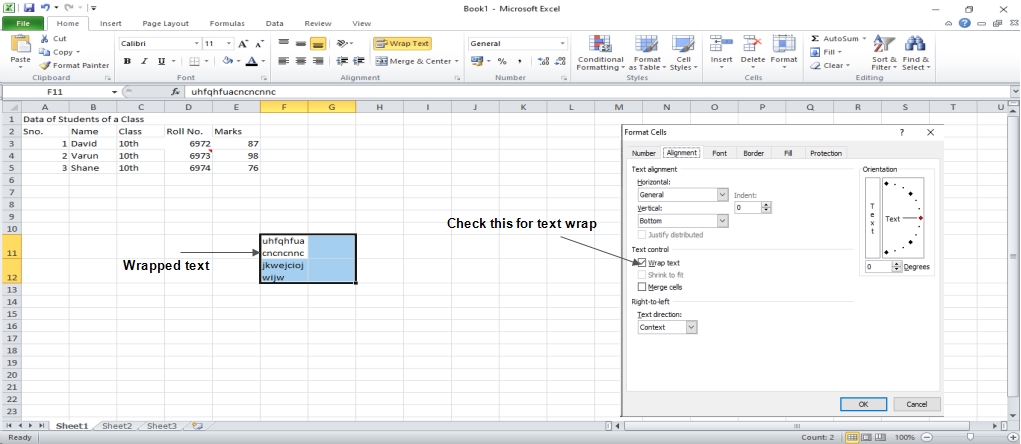
Wrap Text and Shrink to Fit
You can use the Wrap Text option or the Shrink to Fit option to accommodate text that is too wide to fit the column width but does not want to spill over into adjacent cells.
Borders & Shades
MS Excel enables you to apply borders to the cells. For applying border, select the range of cells Right Click » Format cells » Border Tab » Select the Border Style.
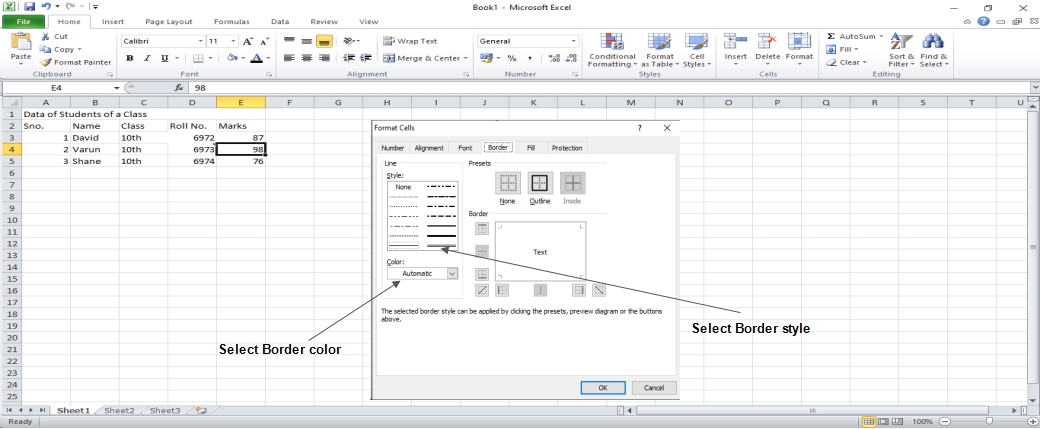
Excel allows you to add borders to a cell inside a spreadsheet. To apply border, select a range of cells. Right Click » Format Cells » Border Tab » Select the Border Style.
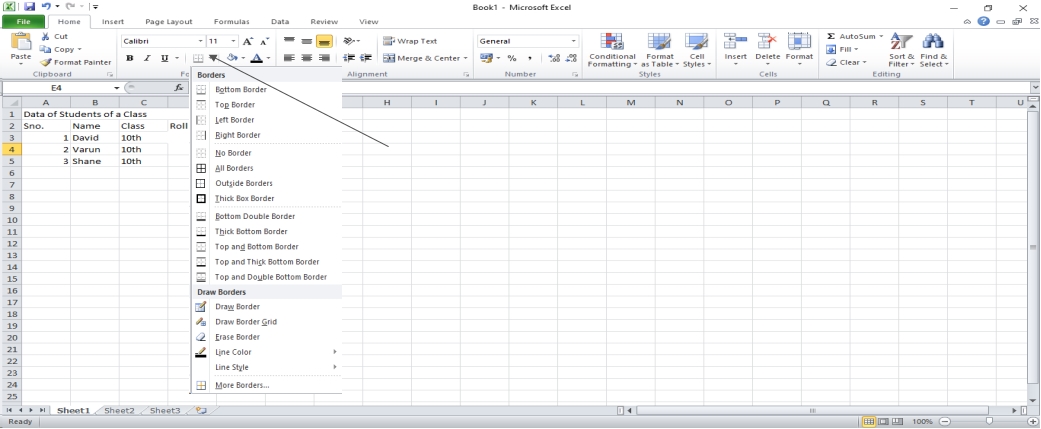
After that you can add border from the Home Tab > Font > Apply Borders.
Apply Shading
You can achieve shading across all cells from the Home Tab » Font Group » Section. Select the Color.

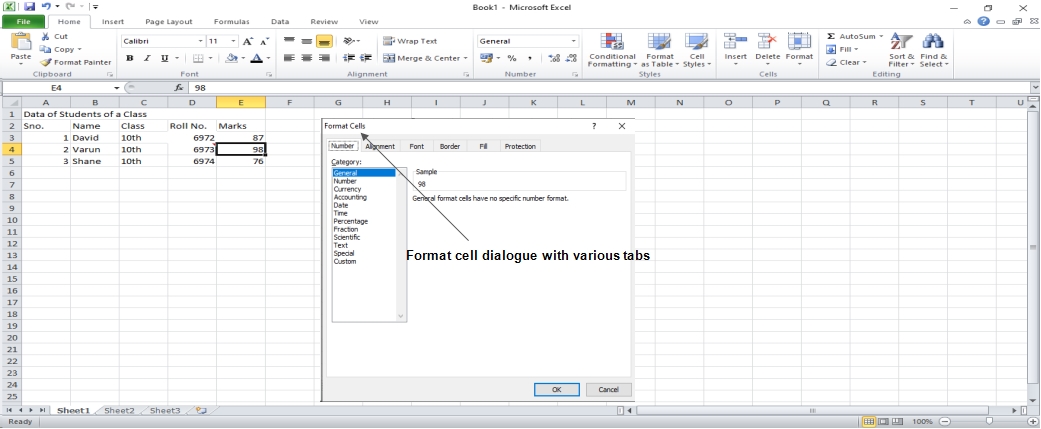
Formatting Cells
In Microsoft Excel, you can apply formatting to cells by right-clicking and selecting options » format »Open the menu. The different tabs allow various options.
 Alternative to Placing Background
- Number: You can set the format of each cell based on the value of the cells.
- Alignment: You can easily match text on this tab.
- Font: You can change the font of text on this page.
- Border: You can change the cell border by opening this tab.
- Fill: Fill the cell with this button. The theme of the lesson plan is colored borders and shades.
- Protection: You can set cell security feature from the Protection tab.
 Dinesh Thakur holds an B.C.A, MCDBA, MCSD certifications. Dinesh authors the hugely popular