MS Excel offers a variety of ways to select the data on the sheet. Please, let us see those forms.
Select with Mouse
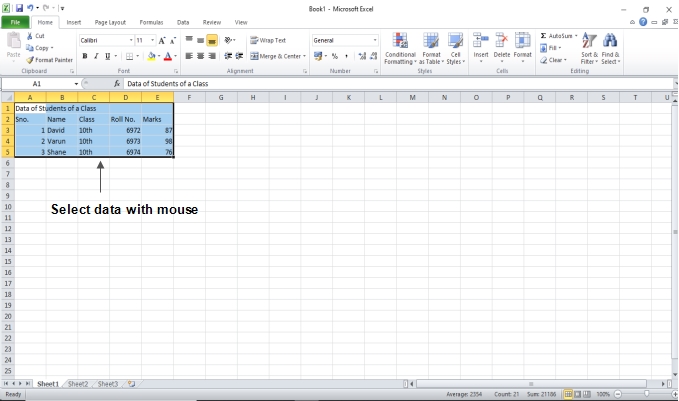
Selecting an area in a worksheet is a trivial task. Usually it is done with the mouse. A left-click is carried out over one of the four corner cells of the area intended for selection, and when the button is held down, the entire area is captured (the area is highlighted in color except for the corner cell). In fig. illustrates the process of allocating a range of cells A1: E5.
Select the data by dragging the mouse over it. As shown below, it will select those cells.
If you need to select an entire row of cells or a column, then the mouse cursor is moved to the row numbering strip or the column indexing strip, respectively (the mouse cursor takes the form of a horizontal or vertical arrow), and then the left mouse button is clicked. As a result, the entire row or column is selected. In fig the line is highlighted.
To select the entire worksheet (sometimes such a need arises), move the mouse cursor over the intersection of the row and column numbering strips in the upper left corner of the workspace. After clicking, the worksheet is highlighted.
Select with Special
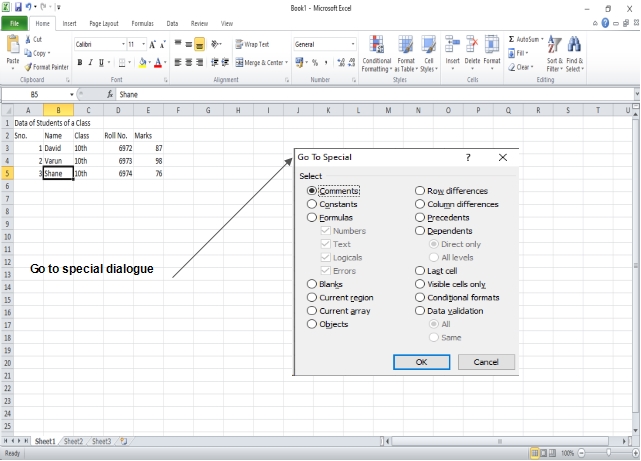
If you want to select a particular area, select a cell in that region. The dialogue box below appears when you press F5.

To see the dialogue box below, click the Special button. From the radio buttons, select the current area. To see the current area picked, click OK.
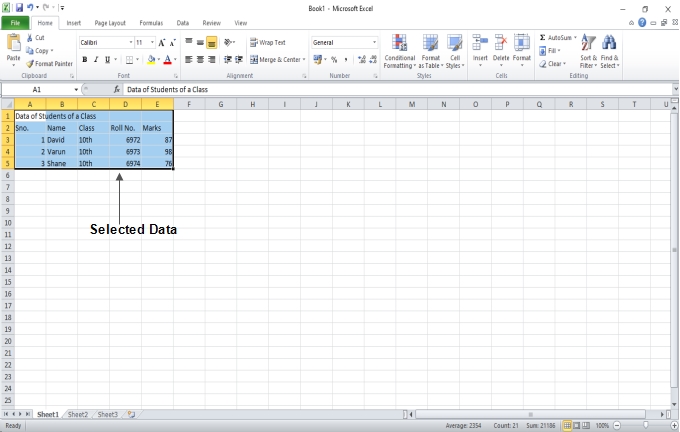
The data is selected for the current area, as you can see in the screenshot below.
We’ll be covering the following topics in this tutorial:
Insert Data
In Excel, there are 1048576 rows and 16384 columns. Excel can manipulate data as text, numbers or formulas. In Excel, a cell can only hold approximately 32,000 characters.
Inserting Data
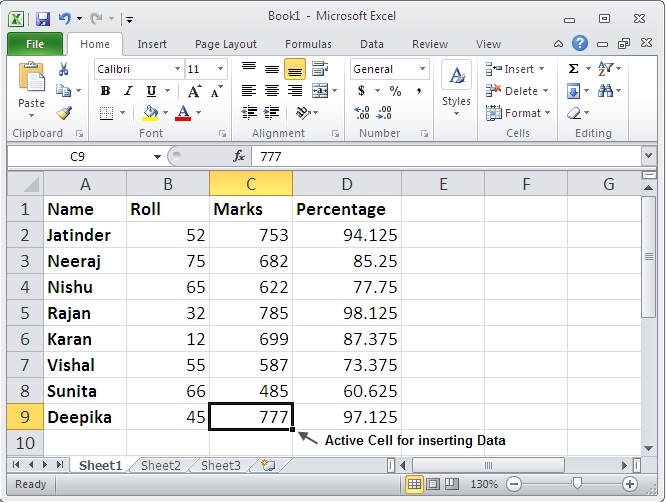
To insert data in MS Excel, simply switch on the text or number form of the cell and press Enter or Navigate keys.
 Inserting Formula
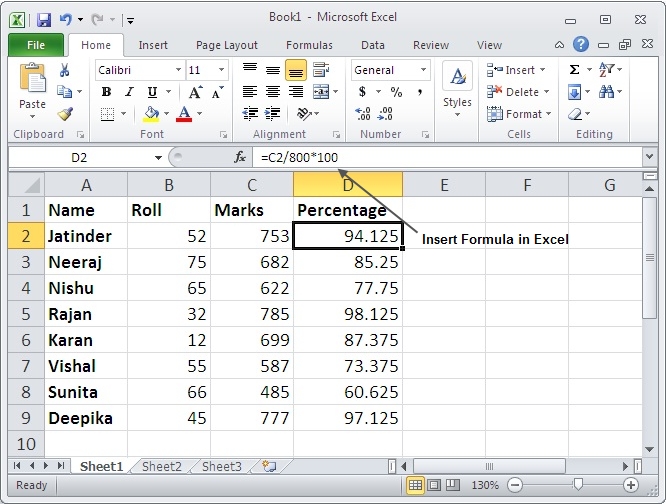
To insert the formula in MS Excel, go to the formula bar, enter the formula, and then press the enter or navigation key. To grasp this, see the screen-shot below.
 Modifying Cell Content
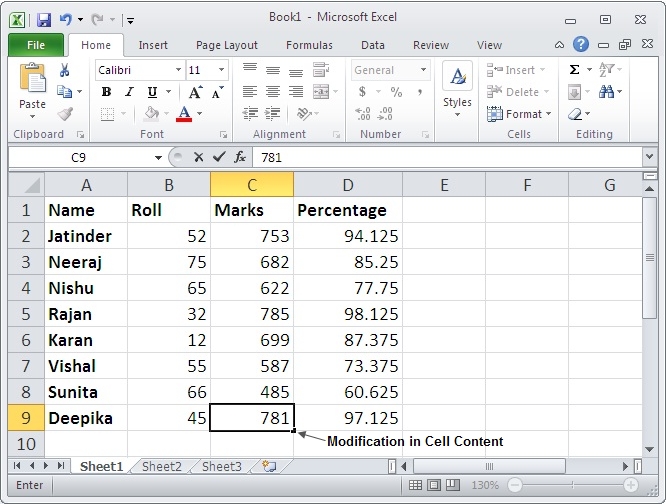
To change the contents of the cells, just activate the cell, enter a new value, and then press the enter or navigation key to see the changes. To grasp this, see the screen-shot below.
Delete Data
If you want to remove data from a cell, by typing new information in the cell; you can make your post replace the old one. The same can be done by pressing the DELETE key after selecting the cell. If we are going to do the deletion to write something new; it is the fastest way to replace the old information with new ones directly.
MS Excel offers a number of options for removing data from a sheet. Let’s take a look at those options.
Delete with Mouse
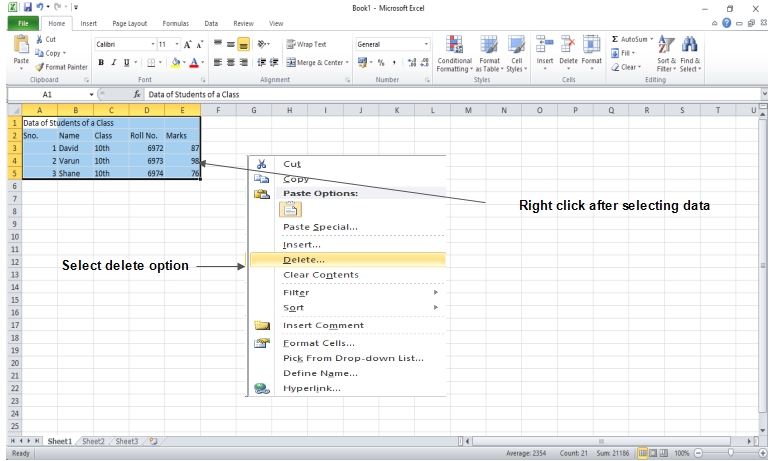
Select the data that you want to delete. Right-click on the sheet and choose delete option.
Delete with Delete Key
Select the data that you want to delete. Press the Delete button on the keyboard to delete the records.
Selective Delete for Rows
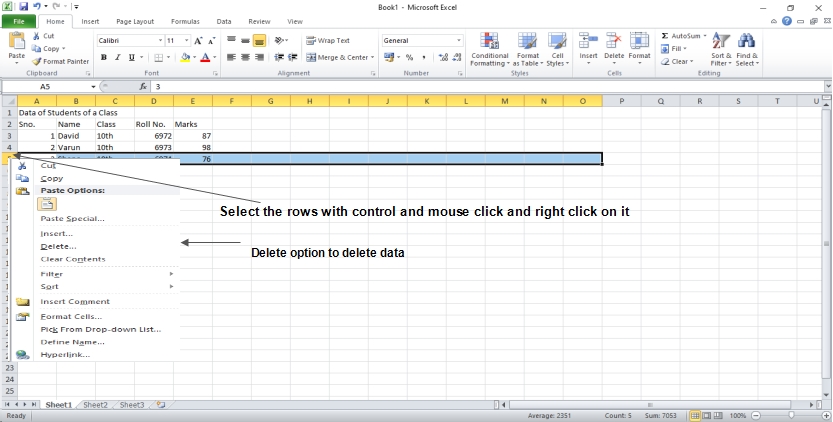
Select the rows you want to delete with Mouse Click + Control Key. Then right click to see the different choices. Choose the Delete option to delete the selected rows.
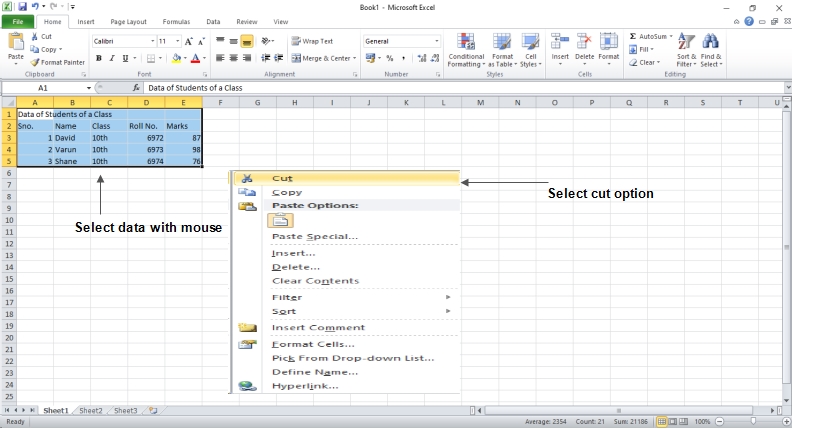
Move Data
Various methods can be used to move the contents of a cell to any cell in the worksheet. After selecting the cell whose content is to be moved, the CUT command is selected from the shortcut menu by clicking the right mouse button. Dashed lines will appear around the cell to indicate that it has been selected. After positioning the desired place on the worksheet and opening the shortcut menu with the right mouse button, the contents of the cell are moved to a new cell by using the PASTE command.
Let’s see how MS Excel can move data.
The operations that can be done on the selected cells can be done with the right mouse button.
Step 1: Choose the data that you want to move. Right Click and choose the option to cut.
 Step 2: Choose the first cell to which you’d like to transfer the data. Right click on it, and then paste the results. You can see that the data is being transferred now.

 Dinesh Thakur holds an B.C.A, MCDBA, MCSD certifications. Dinesh authors the hugely popular